Ria's Collection: 2016

Friday, October 28, 2016

A VERY BIG DAY!

Ria Mathew
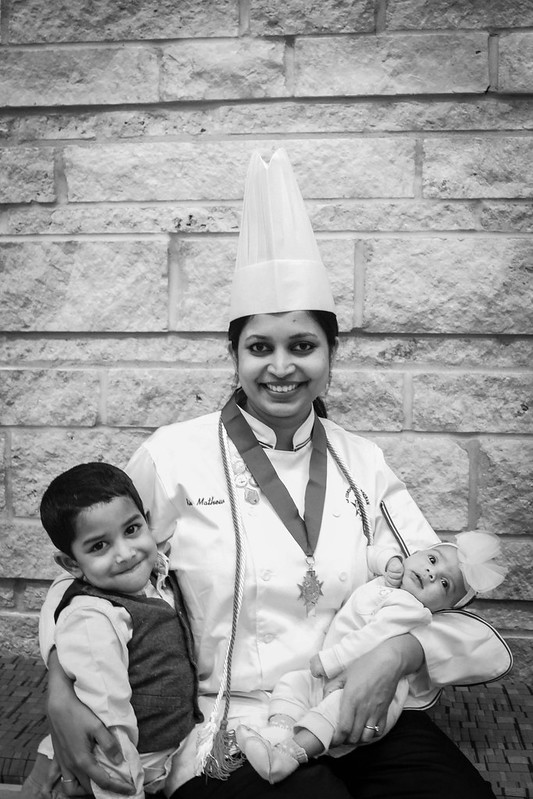
There was a time in my life where I dreamt about being a Chef, a Pastry Chef to be precise. I LOVED making & eating desserts so I dreamt about turning that into a career. Along the way, things happened and I ended up being a Textile Merchandiser. No matter how many years skipped by, that dream was still alive deep down inside me. I collected (still collecting) many recipes thinking about a future in that direction. If any of you get hold of my navy blue diary,where I started writing down my first set of recipes,you will immediately notice that it contains more sweet recipes than savoury. That diary of mine is falling apart now as it had been used well not just by me but my family as well. A cousin of mine took a photocopy of the entire book! :-)
Ria Mathew Le Cordon Bleu
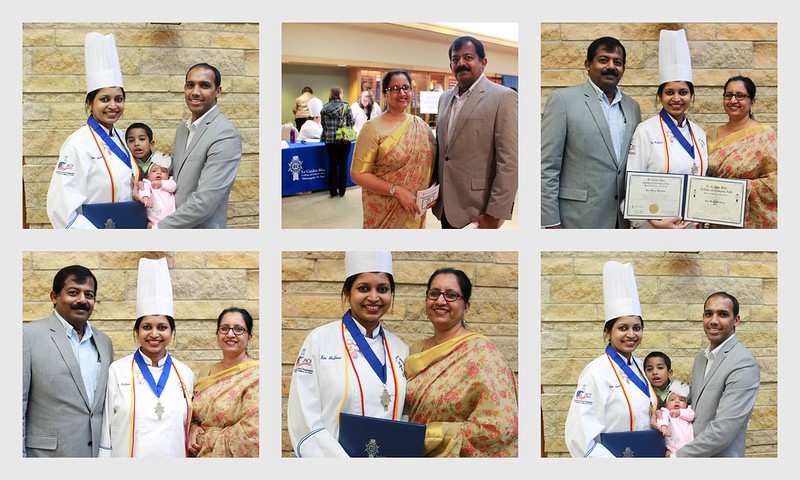
So, coming back to the point. Along the way, I realised that I should just chase my dream,make it a reality and live it or else I might just think and dream about it till the day I die. Seriously, none of this would have happened without Jobin's mental, physical and financial (of course!!) support. I was chosen as the Student Speaker for the commencement ceremony from the entire Baking & Patisserie batch,which I think was really really cool and the red and yellow cords around my neck in the photographs indicates that I have a 4.0 GPA and that I am on the President's list. I am so thrilled that Appan & Amma were here with me for my very first day & for my very last day at Le Cordon Bleu.

I am on a break right now and will be spending a lot of quality time with Ian & Zara and we will be travelling to Kannur in the coming week. We will be home for quite a bit and won't be back to Minneapolis until Spring.So, keep an eye out on this space. I will be hosting baking classes,like every other time when I am in Kannur. Details will be posted here once it has been finalised. The classes will be held in my home in Kannur (Kerala).

Thursday, October 13, 2016

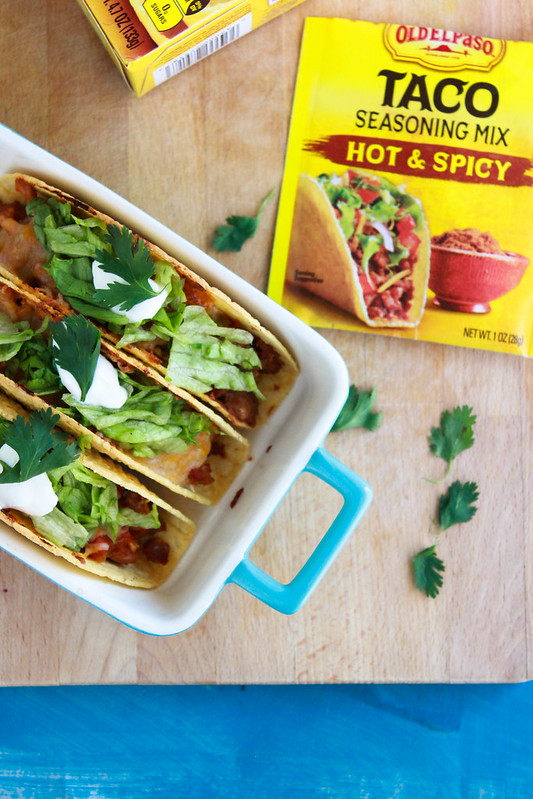
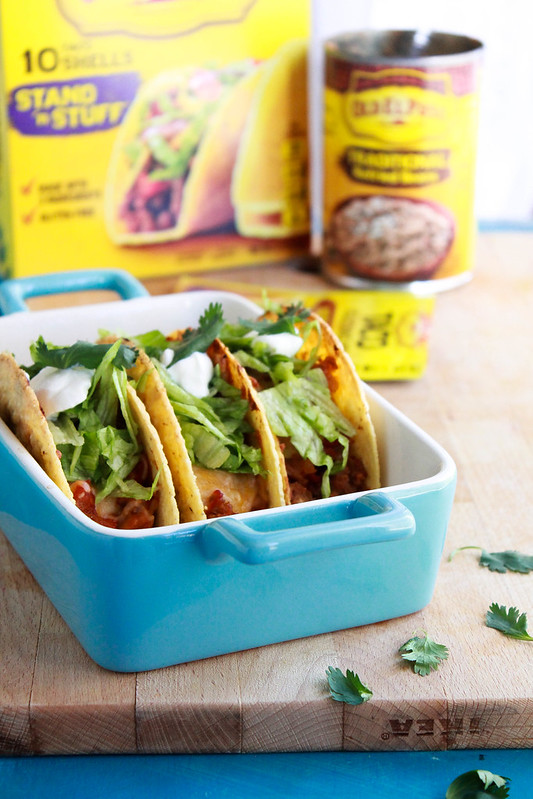
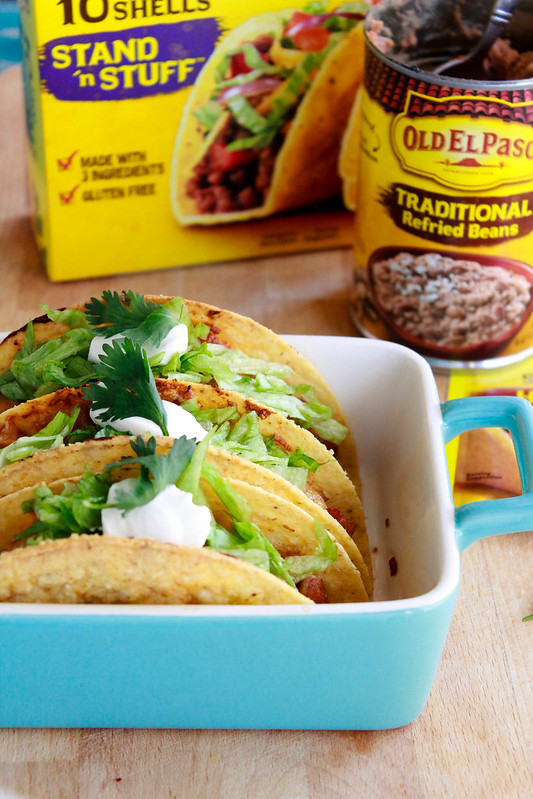
BAKED HOT & SPICY CHICKEN TACOS


Baked Hot & Spicy Chicken Tacos
The very first time I ever ate a Taco was during my Mount Carmel days in Bangalore. My department conducted a 2 day food sale every year for the final year students which was a part of the final practical examination. So when our seniors hosted the sale, one of their menu items were a vegetarian taco and that was filled with a super delicious saucy kidney bean filling which was on my mind for weeks even after the event.
Baked Hot & Spicy Chicken Tacos
My very good friend from college Vasu came to my rescue with her sister's recipe notes for homemade taco shells and filling.All those recipes contained some ingredients that I could never ever find in Kannur. So those recipes went underground and never saw daylight again!
Baked Hot & Spicy Chicken Tacos
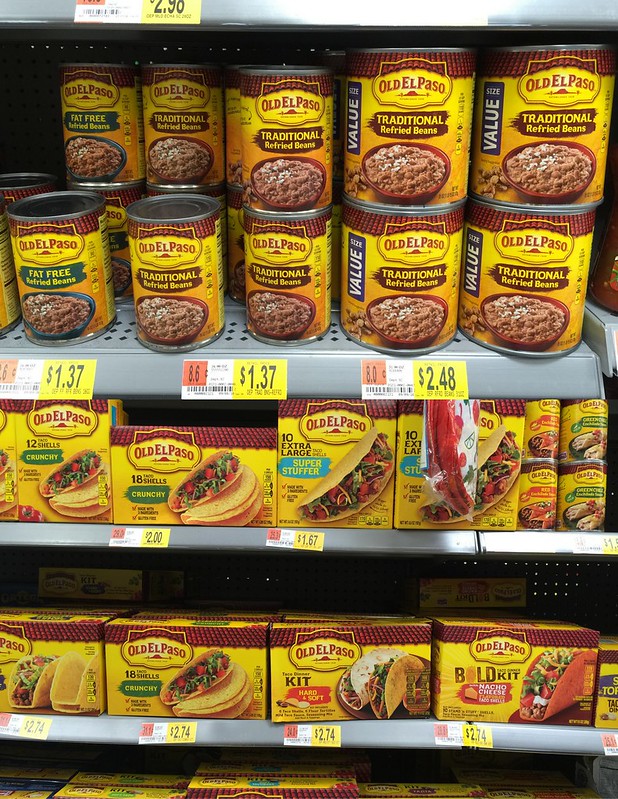
After coming to the US, my Taco craze was satified. There are so many different and easy ways that you can make or even assemble them. Readymade shells from Old El Paso are a life saver! You just have to pretty much bring all the filling ingredients together and simply assemble the Tacos. Tacos are perfect for parties, game days or even a simple dinner! I love how easy it is to have a Taco Bar at our parties,where the guests can assemble their own Tacos with the fillings of their choice.

Baked Hot & Spicy Chicken Tacos
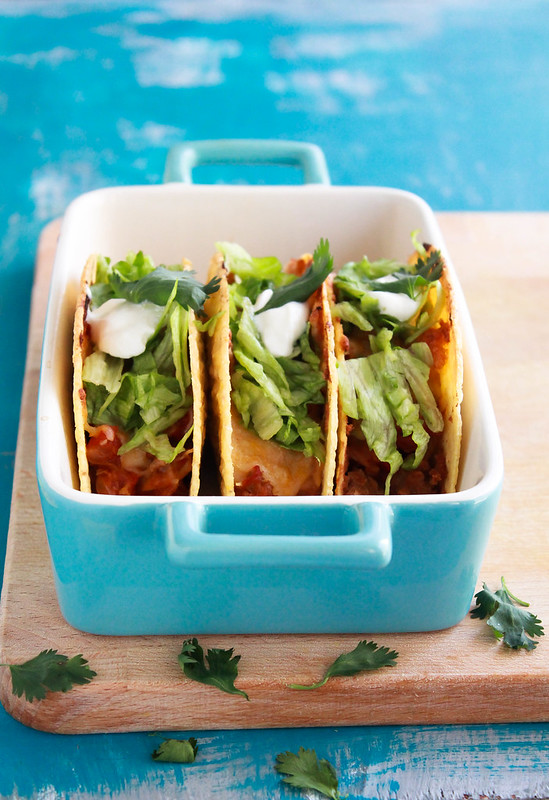
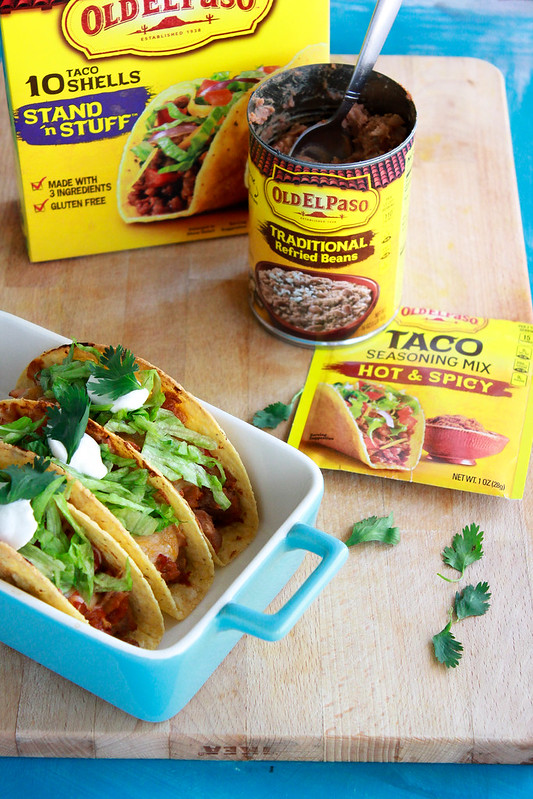
Today, I have a different take on a regular Taco...a baked version. It uses Old El Paso Refried Beans, Old El Paso Taco Shells, Old El Paso Hot & Spicy Taco seasonings along with some cooked chicken thighs, Mexican cheese and other toppings . I found this recipe on Becky's site and decided to make it right away! The ease was the main deciding factor,not to mention the flavour combinations!
Baked Hot & Spicy Chicken Tacos

BAKED HOT & SPICY CHICKEN TACOS
Baked Hot & Spicy Chicken Tacos Serves 8-10

Ingredients:
1 tablespoon olive oil
8 ounces cooked chicken, shredded
1/2 yellow onion, diced
One 16 ounce can diced fire roasted tomatoes,drained well
One 4.5 ounce canned green chilies
One 1 ounce packet Hot & Spicy Taco seasoning
Half 16 ounce can refried beans
10 Stand & Stuff Taco shells
Mexican cheese
Lettuce
Sour Cream
Cilantro

Method: In a medium saute pan, heat olive oil over medium high heat and once it is hot, add the onions and saute till transparent, 3-4 minutes. Add the diced tomatoes, green chilies, Taco seasoning & shredded chicken. Mix well and simmer for 8 minutes.

Preheat oven to 400 F. Grease a 9 X 13 inch baking pan. Place the Taco shells in it and fill them with a tablespoon each of refried beans. Top them with the chicken mixture and then with cheese. Bake for 13-15 minutes or until the cheese is melted and the shells are a bit brown around the edges. Top with your favourite toppings and serve right away!

BAKED HOT & SPICY CHICKEN TACOS
These Tacos were really flavourful and so easy to make! The filling can be made ahead of time,so it's just the last minute assembly that you need to do. Go ahead and make these for your next get together / game day / parties!  You can thank me later! :-)

Monday, October 10, 2016

HOMEMADE MEALS ON THE GO!


untitled-3742
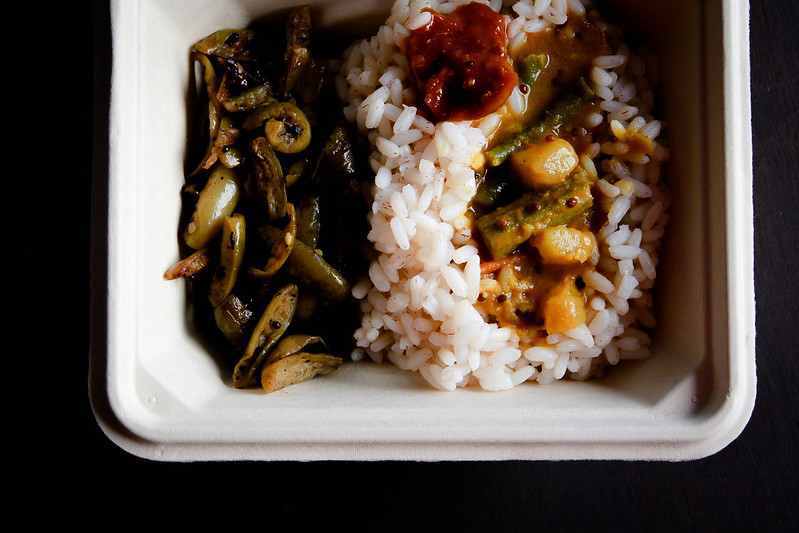
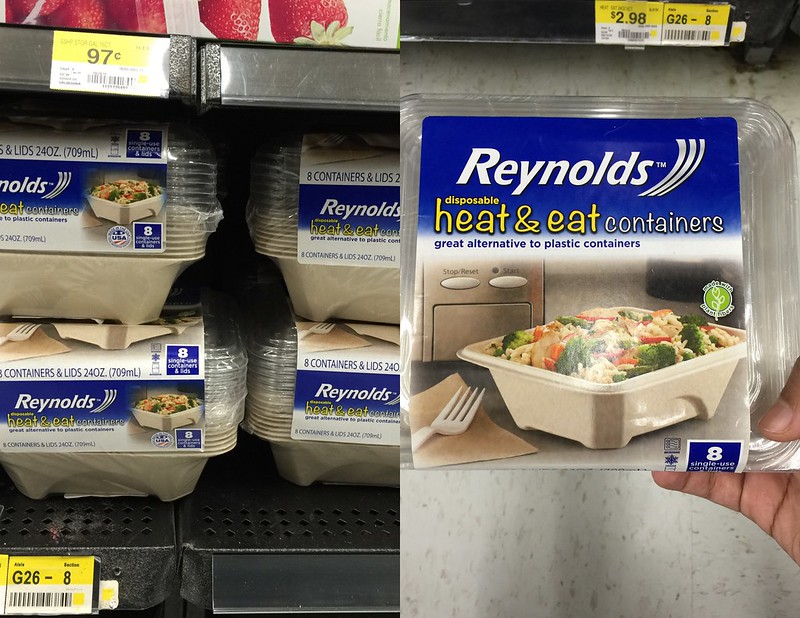
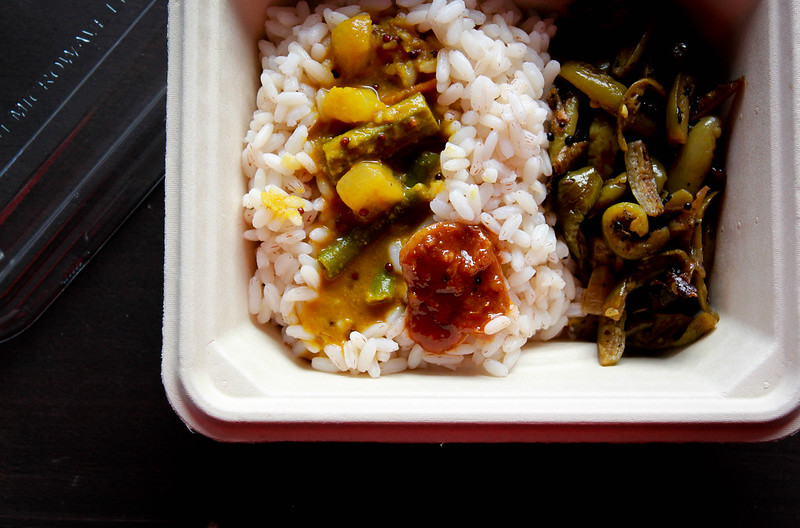
These Reynolds Disposable Heat & Eat containers have come into our lives at the right time. They work perfectly for us now since we have a teeny tiny baby girl along with her big brother at home. It makes meal planning easier with less dishes to wash. . All we need to do is just heat and eat the meal when it's time!
Untitled Export3-011
untitled-3741

I usually never send lunch boxes with a full fledged Indian meal since it's a task to heat them up and we like our Indian meals nice and hot! These containers eliminates all of those and makes life a little bit easier. These containers are a made with plant fibers,can be heated up in a microwave and are a great alternative to plastic.

You can find these awesome Reynolds Disposable Heat & Eat containers at your local Walmart store in the food storage aisle.

Tuesday, October 4, 2016

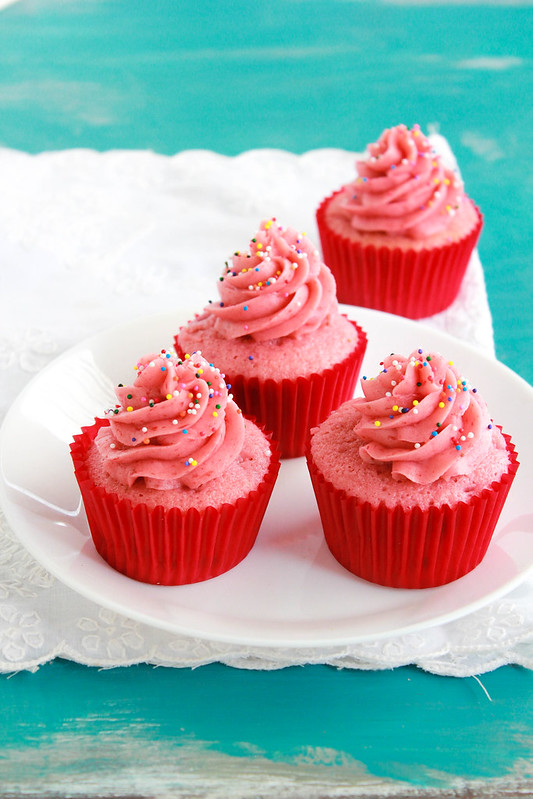
STRAWBERRY BUTTERMILK CUPCAKES with STRAWBERRY BUTTERCREAM FROSTING


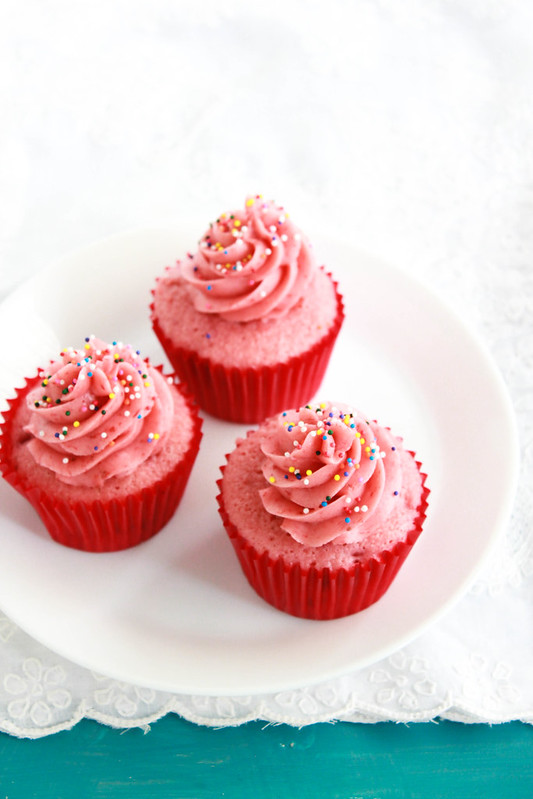
Strawberry Cupcakes with Strawberry Buttercream Frosting
I know Summer is almost a year away (sadly!) but that doesn't stop me from baking with berries as long as I can get hold of some good ripe ones. I've been eyeing these Fresh Strawberry Cupcakes from Jaclyn's blog for the longest time now and there's no other perfect time to bake them than October as it's the breast cancer awareness month.It reminds me of all the pink goodies I used to see back in the day,when my blog was little during October. Now, I honestly get zero time to blog hop which in a way is good,since all those posts would make me want to recreate them all at home and everything eventually will find it's way to my hips!

Strawberry Cupcakes with Strawberry Buttercream Frosting
These cupcakes are very moist and so full of fresh strawberry flavour,both in the cake and frosting. They are light and uses two egg whites along with a whole egg in the cupcake batter,which I think is a smart move to make some very light cupcakes. I tried them straight out of the oven,literally burning my hands as I held them...they were so good! Light and fluffy like clouds! Recipe testing with Amma is always fun as we hold our breath together while tasting what we made, to see and feel if it has turned out the way it described itself to be. These cupcakes were worth it's time and effort.

Strawberry Cupcakes with Strawberry Buttercream Frosting
Many of you must have already heard about Susan.G.Komen and her initiatives.This October, you can make a difference just by baking and sharing cupcakes.Join KitchenAid to support Susan.G.Komen. Learn more here!

STRAWBERRY BUTTERMILK CUPCAKES with STRAWBERRY BUTTERCREAM FROSTING
Strawberry Cupcakes with Strawberry Buttercream Frosting Makes 16 cupcakes

Ingredients:
Cupcakes
1 2/3 cup cake flour
3/4 teaspoon baking powder
1/4 teaspoon baking soda
1/4 teaspoon salt
1/2 cup unsalted butter, softened
3/4 cup + 2 tablespoon granulated sugar
1 large egg
2 large egg whites
1/3 cup fresh strawberry puree
1/4 cup buttermilk
1/2 teaspoon vanilla
5 drops red food colour (optional)
1/2 cup diced fresh strawberries

Buttercream
1/2 cup + 2 tablespoon strawberry puree
3/4 cup unsalted butter
a pinch of salt
2 1/2 - 2 3/4 cups powdered sugar
1/4 teaspoon vanilla
4 drops red food colour (optional)

Method:Preheat oven to 350F and prepare a muffin tin.

Cupcakes:In a small bowl, whisk together flour, baking powder, baking soda and salt. Mix together buttermilk, colour and puree in a another bowl.In a large bowl, beat butter and sugar on high speed using your KitchenAid hand mixer until creamy and pale. Add in the whole egg and mix well to combine. Add in the egg whites one at a time and beat in well. Add the flour and buttermilk mixture alternately and gently mix it in. Fold in the diced strawberries and divide the batter among the lined muffin tin (about 1/3 cup full) and bake for 18 - 20 minutes.Let the cupcakes cool in the tin for several minutes, then transfer them onto a wire rack to cool completely.

Frosting: Cook the strawberry puree in a small sauce pan over medium low heat until it reduces to 3 tablespoons, about 15 minutes. Chill it well.
Cream butter and salt until almost white. Add the strawberry puree, 1 cup of powdered sugar and vanilla. Beat well to mix. Add in the remaining sugar and beat well.If your buttercream is stiff, adjust the consistency with heavy cream. Frost the cupcakes as desired.
Ian has his favourite flavour picked out for a cake,which by the way is Chocolate. He asks for the same old chocolate cake and chocolate brownies,so I rarely make any other flavour these days . If it's a Marble Cake,it's okay with him but other than that, if I were to give him a choice, he would always go with his most favourite flavour. So when I baked these, I made a separate batch of chocolate cupcakes for him. Even then, when he saw these pink cupcakes, he grabbed one and then he ate another one before bed. Today, as soon as he was back home from his Montessori, he casually walked past by the cake box and picked out one for himself.

I think that can only mean one thing, these turned out pretty good!

Thursday, September 22, 2016

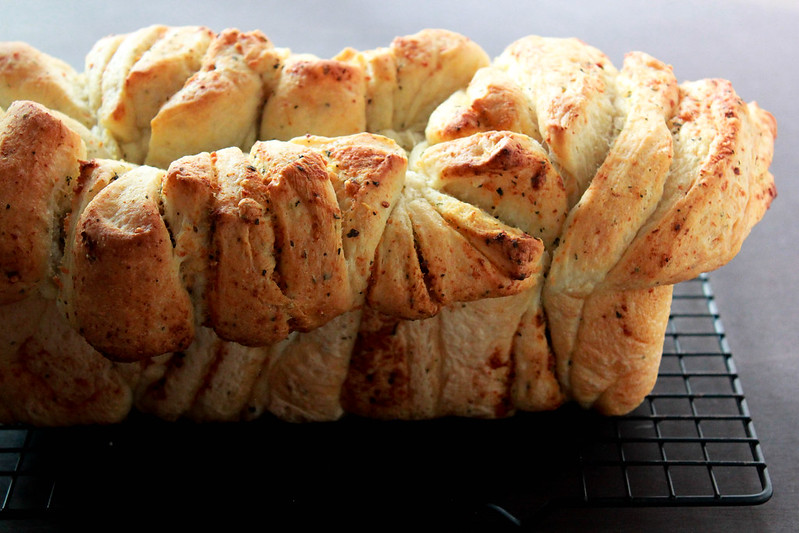
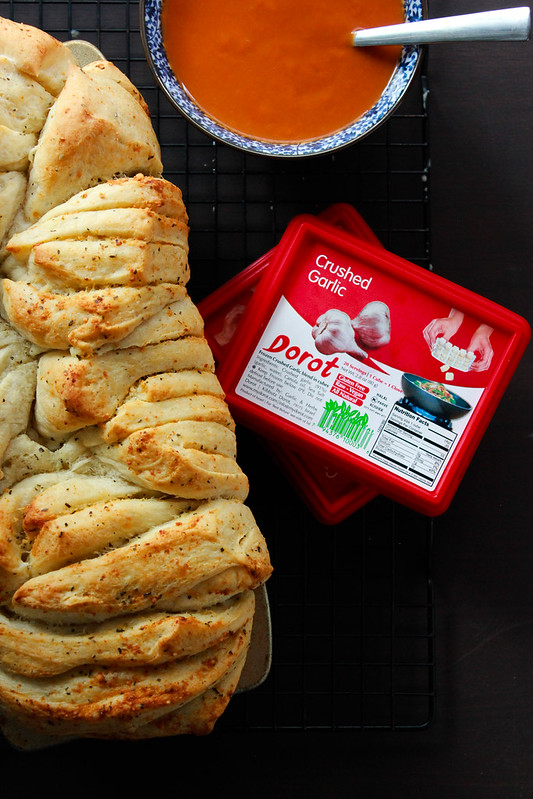
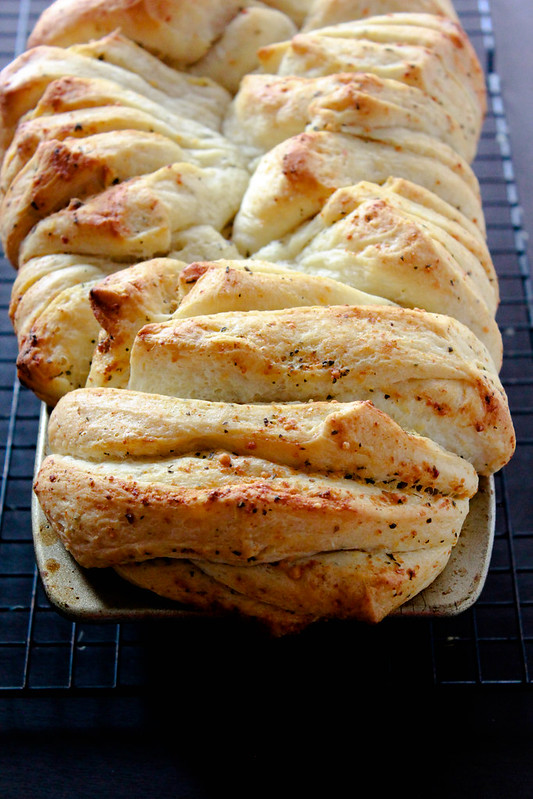
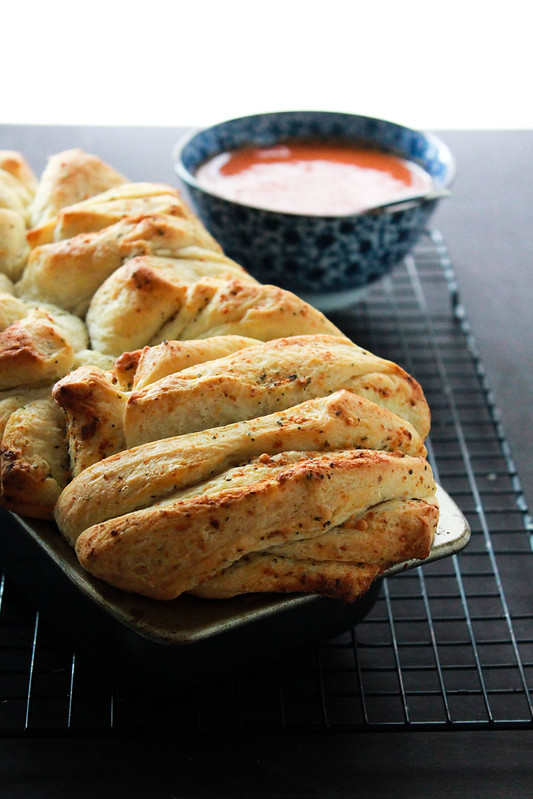
GARLIC & BASIL PULL APART BREAD

This post is sponsored by Dorot but the content and opinions expressed here are my own.
GARLIC & BASIL PULL APART BREAD
It hasn't been that busy here as I thought it would be when a baby arrives. It could be because it's my second time around. Things have been really smooth and the siblings are bonding very well! Even though Amma insists on me taking some time off from the kitchen, it's something I find very hard to do. So whenever I can, I sneak into the kitchen and try my hand at something new since Amma has all our day to day meals covered.

GARLIC & BASIL PULL APART BREADGARLIC & BASIL PULL APART BREAD
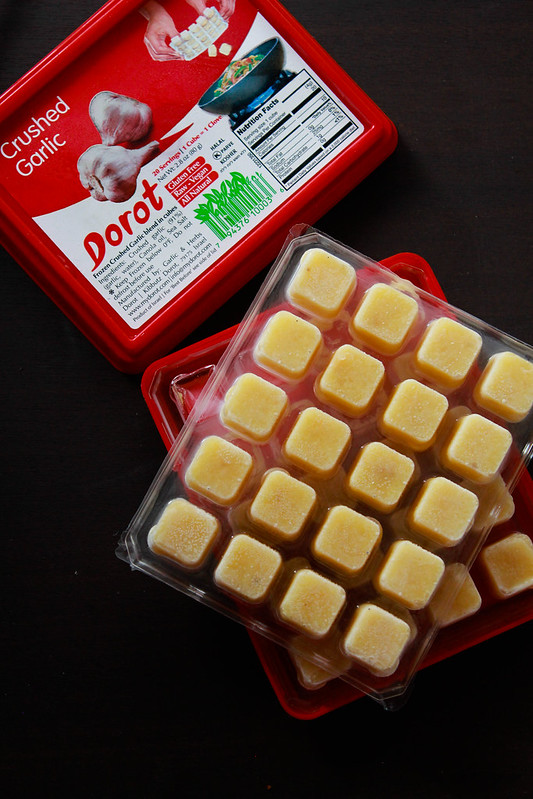
Have you ever hoped that you could find some awesome herbs in frozen paste form that you can just pop it out of the case,straight into whatever you are making? I never really cared for the ginger garlic pastes that we get to buy at our local Indian stores because they don't smell or taste anything like it. Whereas Dorot products are really really good. So flavourful and super easy to use!
GARLIC & BASIL PULL APART BREAD

They have Crushed Garlic, Chopped Basil, Chopped Parsley,Glazed Onions, Chopped Dill,Chopped Cilantro, Chopped Chili, Crushed Ginger in their product line. As a garlic lover, I was attracted to their Crushed Garlic.Each cube holds one clove of garlic. Just pop it out and use it as you wish. You can find their products at any Trader Joes (one of my most favourite places to shop!) & Whole Foods. The product was easy to find and you can find them at the frozen section of Trader Joes or Whole Foods. Dorot has been kind enough to offer you guys a discount on your purchase. Click here to avail the offer!
GARLIC & BASIL PULL APART BREAD
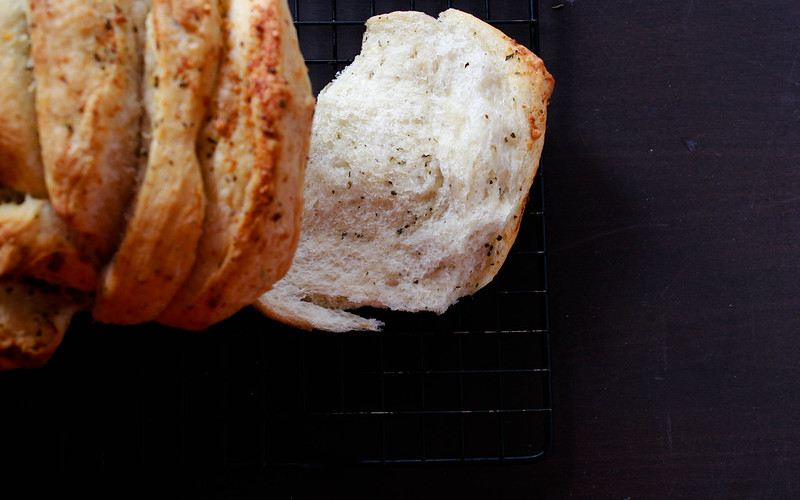
Amma loves a good garlic bread! So when I spotted this recipe on Rachel's blog, I instantly bookmarked it to try it that night. It turned out really fluffy, soft and tasty! We enjoyed it with a warm bowl of Roasted Red Pepper & Tomato Soup. It was an amazing meal!
GARLIC & BASIL PULL APART BREAD
Makes one 10 inch loaf
GARLIC & BASIL PULL APART BREAD
Ingredients:
3 1/2 cups bread flour
1 tablespoon granulated sugar
2 1/4 teaspoon instant yeast
1 1/2 teaspoon dried basil, divided
1 1/4 teaspoon salt
2 + 6 cloves garlic, ground to a fine paste,divided
2 tablespoons olive oil
1 cup + 2 tablespoons very warm water
1/4 cup milk
4 tablespoons unsalted butter, melted & divided
6 tablespoons grated Parmesan cheese

Method: In the bowl of your stand mixer, mix together flour, sugar, yeast, 1/2 teaspoon dried basil,2 cloves of garlic & salt. With the machine running on low speed, add in the oil, water & milk. Mix on low - medium speed until the dough comes together and leaves the sides of the bowl, about 4 minutes. Leave it to double in size,covered,in an oiled bowl.
Once doubled in size, punch down the dough and roll it out on a lightly floured surface to a 12 x 20 inch rectangle.
Smear 3 tablespoons of melted butter, remaining 6 cloves of garlic paste,1 teaspoon dried basil and sprinkle the cheese over it. Cut the dough into 6 rectangles and stack them up. Cut the stack into 6 squares and place them in a lightly greased 10 inch loaf tin.Cover the bread dough and let it rise for 30 minutes.
Preheat the oven to 350 F.Once the dough has risen, drizzle the remaining 1 tablespoon of melted butter over it and bake the bread for 30-35 minutes. Enjoy while warm !

You can find a $1 off discount coupon to use towards any of the Dorot garlic and herb products,here!

Friday, September 16, 2016

MEET BABY ZARA!

Baby Zara!
Meet our new love, Baby Zara born on 16 September 2016.
Ian is in love with his baby sister!

Wednesday, September 7, 2016

CORN FEAST!

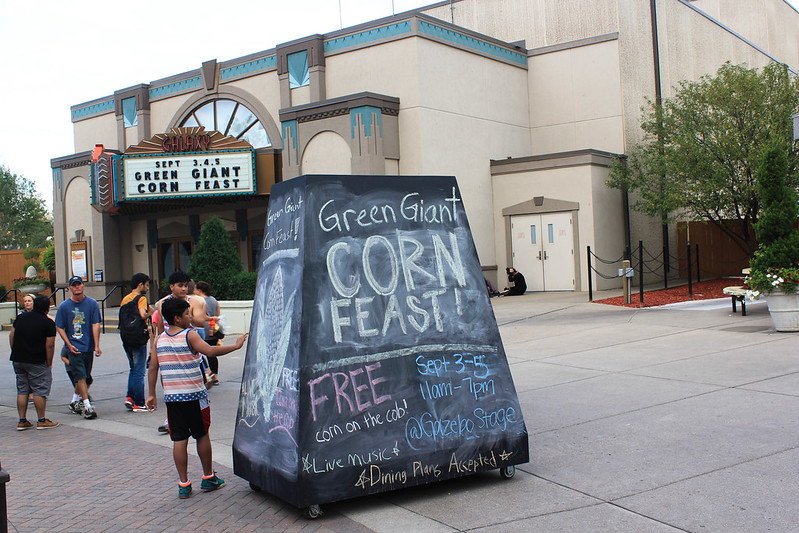
Valleyfair
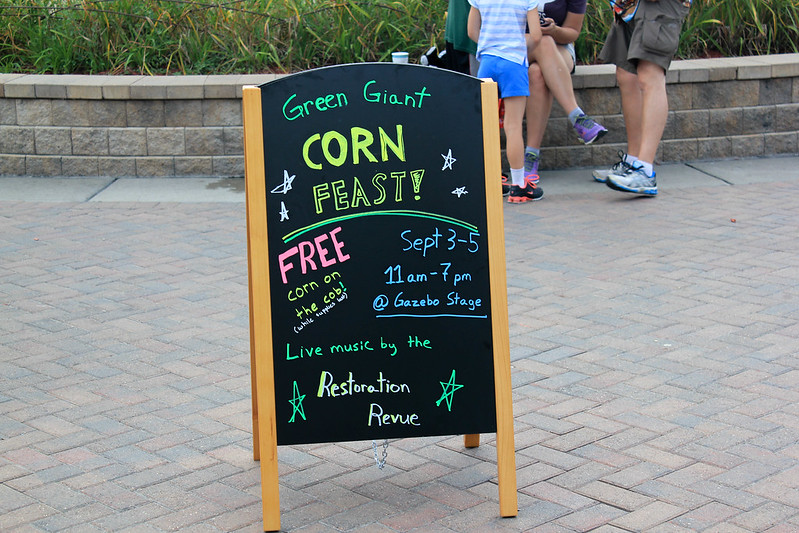
Long weekends usually call for lots of food and drinks! This past Labor Day was no different. We went to the Valleyfair once again and took part in the 40th Annual Green Giant Corn Feast happening there.We love corn and didn't think twice about standing in the line to eat the freshly cooked buttery corn sprinkled with lots of lemon pepper! The stalls were giving out 30,000 pounds of fresh corn to the park visitors and the lines were growing by the minute!
Valleyfair
Ian loves going to such fairs where there is fun and food involved. The weather was perfect, cloudy but not hot. So we sat down by the stage with the piping hot buttery corn and listened to the live music performed by local band Restoration Revue. After that,we took Ian for all the rides the little ones could ride on! He was so excited all throughout and couldn't decide which ride he should go on next! Appan & Amma are visiting and they found the caricature stall quite exciting and got a colour caricature done. It was really a lovely day,well spent with the people we love!
Valleyfair
There will be a lot really fun events happening at the Valleyfair this fall,perfect for families & foodies alike, so keep your eyes peeled open for it! You can get more details regarding them here!

This post is sponsored by Cedar Fair Entertainment Company and all opinions are my own.


Wednesday, August 24, 2016

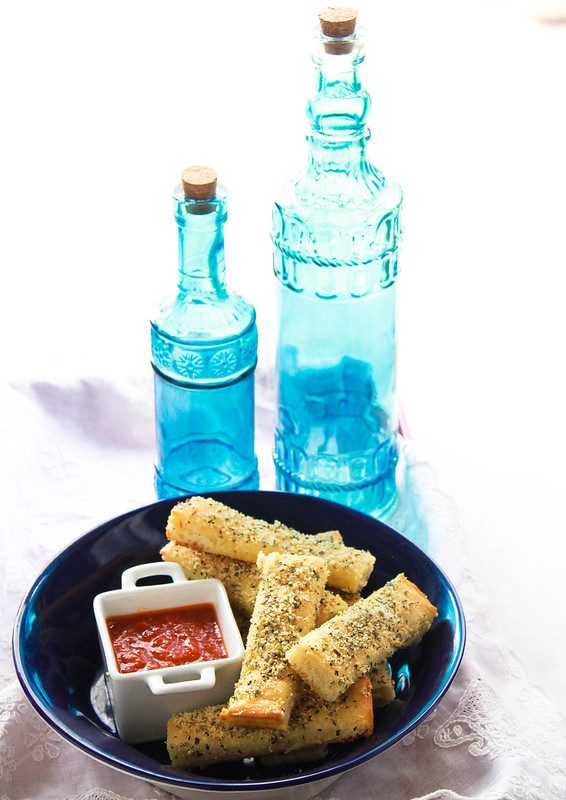
PIZZA HUT STYLE BREADSTICKS RECIPE & A GIVEAWAY!

How to make breadsticks better than Pizza Hut with flavours fresh from Italy!
Pizza Hut Style Breadsticks
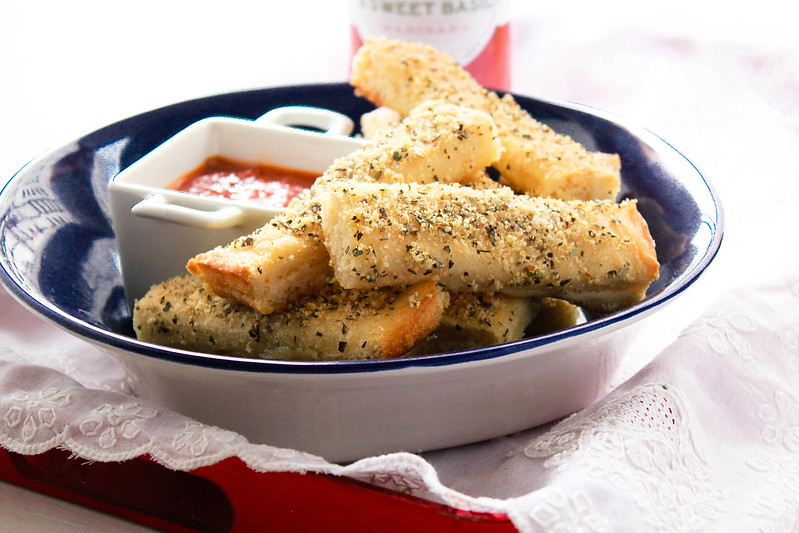
These breadsticks are really to die for! They are so chewy, so addictive, so flavourful, so filled with everything you asked for and so full of carbs! Don't get me wrong when I said it is filled with carbs. I am all for it and on most days I am on a carb heavy diet. I mean, how can I ever say no to rice and bread. They are the staple food in our home. Ian asks for bread everyday and will be happy if I gave him that for all three meals!

Pizza Hut Style Breadsticks
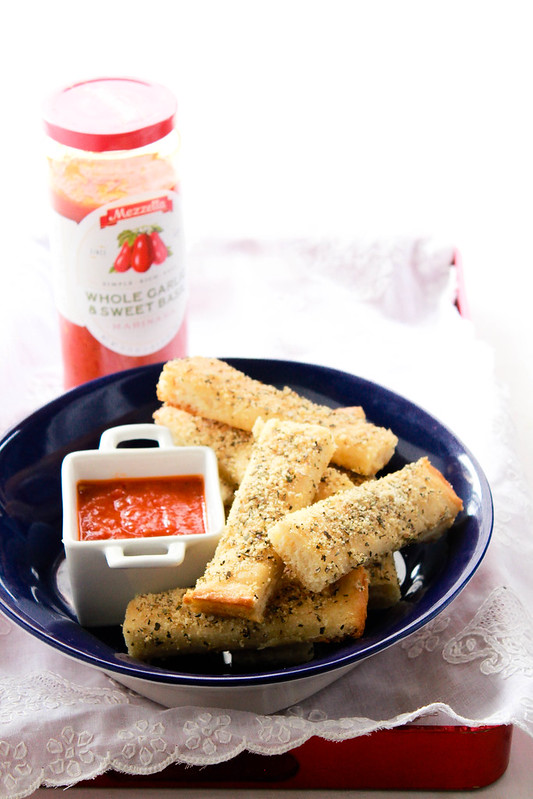
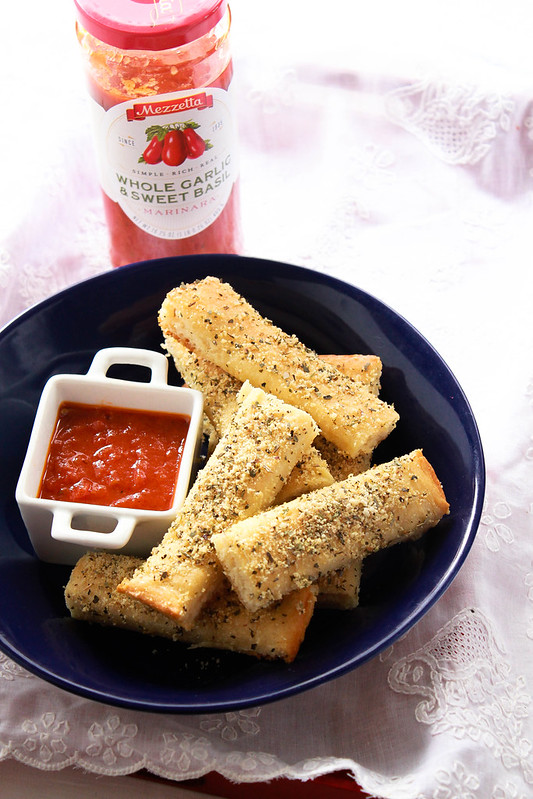
He is all for Pizza, like most kids are. Once a week, I bake him a pizza at home with his choice of toppings,which almost always ends up being Pepperoni! No surprises there! So yesterday, when I made these bread sticks, I told him it's like a deconstructed pizza and that he needed to dip the bread sticks in the delicious Whole Garlic & Sweet Basil Marinara from Mezzetta. He wasn't very excited about that idea at first but once he took a bite of it, he was really hooked onto it. He literally licked the plate clean! Thank you Michelle for this delicious recipe!
Pizza Hut Style Breadsticks
Mezzetta makes really good marinara sauces in multiple flavours. We are big fans of anything with garlic in it,so we picked up the Whole Garlic & Sweet Basil Marinara sauce to dip these wonderful bread sticks in. It's 100 % natural marinara sauce made with San Marzano tomatoes with no added colours or sugar. I am already eyeing their other flavours like Caramelized Onion & Butter Marinara!
PIZZA HUT STYLE BREADSTICKS
Pizza Hut Style Breadsticks Makes 20 pieces

Ingredients:
For the breadsticks
1/4 cup non fat dry milk
1 tablespoon sugar
2 1/4 teaspoons rapid rise yeast
1/2 teaspoon salt
1 1/3 cup warm water
2 tablespoons olive oil
4 cups bread flour

For the seasoning:
2 tablespoons grated Parmesan cheese
1 tablespoon onion powder
1 tablespoon dried oregano
1 3/4 teaspoon garlic powder
1 1/2 teaspoon dried basil
1/2 teaspoon salt

12 tablespoons butter, melted

Method:
Breadsticks: Place the dry milk powder, sugar, salt and yeast in the bowl of your standmixer attached with a dough hook.Add the warm water and mix well. Let it sit aside for 10 minutes until foamy. Add the oil and mix well. Add the flour 1 cup at a time,kneading on low speed. Once all of the flour is added, increase the speed to a medium high and knead for 5 minutes.

Meanwhile, take two 9X13 inch pans and pour 4 tablespoons of melted butter into each of them. Divide the kneaded dough into two equal parts and roll them out into two 9X13 inch rectangles and place them in the tins. Cover and let it proof until doubled in size, approximately 90 minutes.

Seasoning: Mix all the ingredients together in a small bowl and set aside until needed.

Preheat the oven to 475 F.Once the dough has risen, score each pan of dough into 10 breadsticks. Brush the tops with 1 tablespoon each of melted butter and bake for 12-15 minutes or until the are brown at the edges. Take them out and sprinkle generously with the seasoning. Let it cool in the pan for 15 minutes, then slide it out onto a cutting board. Slice the breadsticks with a pizza cutter or knife and serve them warm with your favourite marinara sauce.

These were really good! The seasoning is spot on and will make you crave for more! Try it sometime and be surprised as to how easy it is to recreate restaurant food at home!

Mezzetta is holding a HUGE giveaway for you! The Grand Prize consists of a trip for a Winner and one (1) Guest to attend culinary experiences (including cooking class and farm tour) in the San Marzano region of Italy and explore other cities of Italy. The Grand Prize trip consists of the round trip coach air transportation between the major commercial airport nearest to winner's residence and Rome, Italy and the culinary experience and tour of Italy.

To enter,click here!

I am also very excited about our upcoming trip to the Valleyfair for the Green Giant Corn Feast!

Wednesday, July 27, 2016

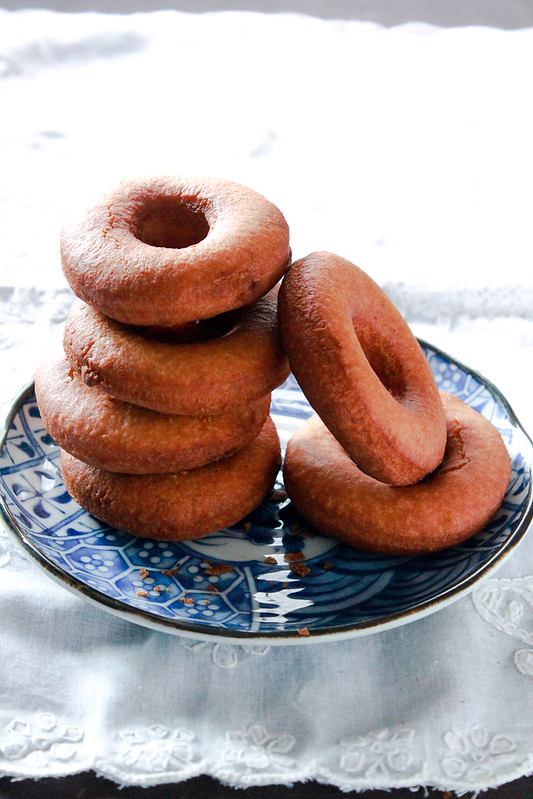
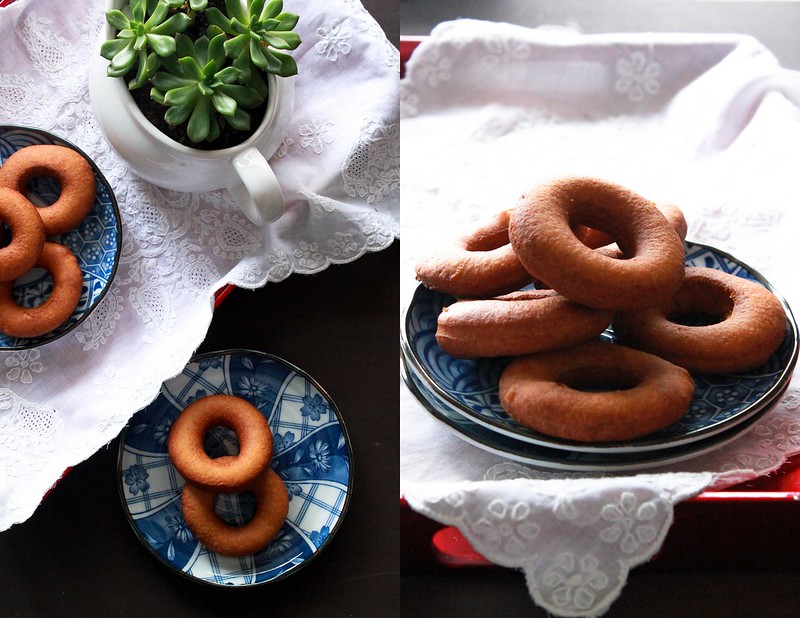
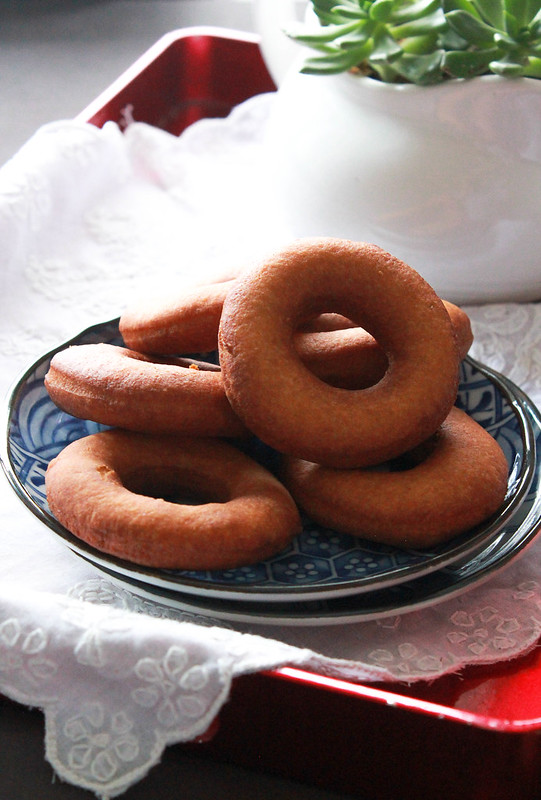
OLD FASHIONED KERALA DOUGHNUTS

Old Fashioned Kerala Doughnuts
Honestly, I don't know how many of you can relate to these doughnuts.These doughnuts played a huge role in my childhood days. Thankachi aunty, my Mamma's sister-in law would make these and send it across to us whenever Mamma visited her. Later, Amma got the recipe from Thankachi aunty and would make it for me once in a while. I don't remember Amma making it much after Ritchie was born. I was 8 1/2 years old when my brother was born,so I pretty much remember everything that happened then. It was my first hands-on experience with babies. Gosh, I do have a lot to tell you all!
Old Fashioned Kerala Doughnuts
So, till Ritchie was born, Mamma's grandkids were all girls. Anju chechy, Tinu, Neethu and I. We would spend our vacations together in Mamma's terrace,grinding up her bougainvillea flowers and then diluting it with water,pretending it to be wine! Mamma was totally against anyone plucking flowers from her plants. That's because her Headmistress,a foreign lady, in her school Balikamadom (Tiruvalla) was very strict about it . She (The Headmistress) would pull out two strands of hair from the head of anyone who dared pluck the flowers from her garden. Then when her birthday came, she would let everyone pluck the flowers to their heart's content. That was the story Mamma would tell us,even though she never pulled out her granddaughter's hair. So finally,when Ritchie was born,she got her first Grandson!Anyway, that has nothing to do with these doughnuts, well almost.
Old Fashioned Kerala Doughnuts
So when Anju chechy got married and was living in Bangalore, we visited her once and Neethu made these and brought it for her sister. Everyone made fun of her saying it's the Home Science effect,because of the subject she took for her undergrad! I was so thrilled to see my favourite thing and still remember eating them early in the morning as soon as we got to Anju chechy's apartment. I don't know if Neethu remembers it but I do!
Old Fashioned Kerala Doughnuts
So, if you are thinking these are the typical melt-in your mouth doughnuts,you are wrong. These are more of the 'Vettu Cake' kind, soft yet a bit like a cookie. I must say that these are super addictive. I wanted to take the pictures of the doughnut holes but I popped them one by one into my mouth while frying the rest. And do you know why I made these today? It was raining here! It was so dark outside and it was thundering and raining at the same time. Even if there is no dinner at home, we always have some kind of a thing to snack on and usually,it is deep fried if it rained like how it did today!

OLD FASHIONED KERALA DOUGHNUTS
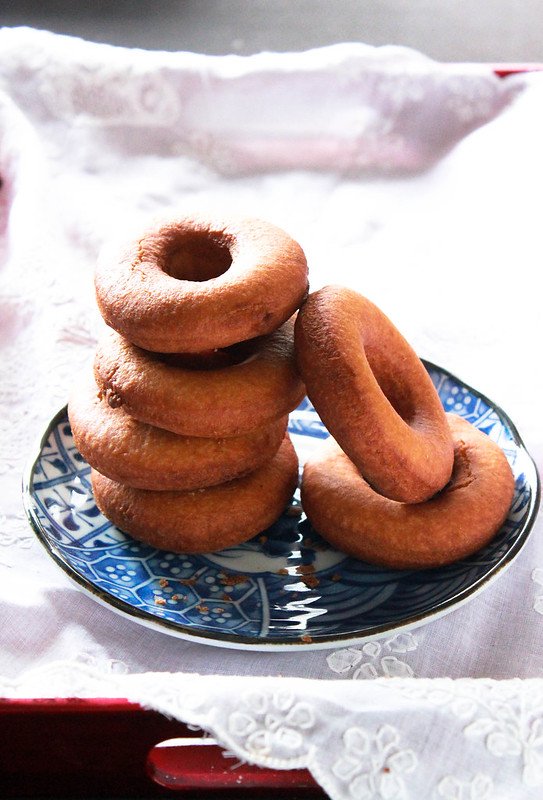
Old Fashioned Kerala Doughnuts Makes 26-28 pieces

Ingredients:
3 cups all purpose flour
1 teaspoon baking powder
1/4 teaspoon salt
1 cup powdered sugar
3 tablespoons ghee
3 eggs, separated
Oil for deep frying

Method:
In a bowl, mix together ghee and powdered sugar. Add the egg yolks and mix well. Add the flour,baking powder, salt,lightly beaten egg whites to it and mix to for a soft dough. Set it aside covered with a cloth for 10 mins.
Roll the dough out into 1/4 inch thickness on a floured surface and cut them out like doughnuts. Deep fry in hot oil over medium heat* until golden brown.Drain on paper towels and store in an airtight container. They have an amazing shelf life!

*Don't heat up the oil too much, the doughnuts will brown very fast since there's sugar in the dough.
Well, now this is not Thankachi aunty's recipe.I didn't want to wake Amma up in the middle of the night asking for the recipe. Instead, I checked my favourite source for recipes of these kind, Swapna chechy's blog because I was 100% sure she would have it and she did! Her recipes are foolproof and delicious!
 

Tuesday, July 26, 2016

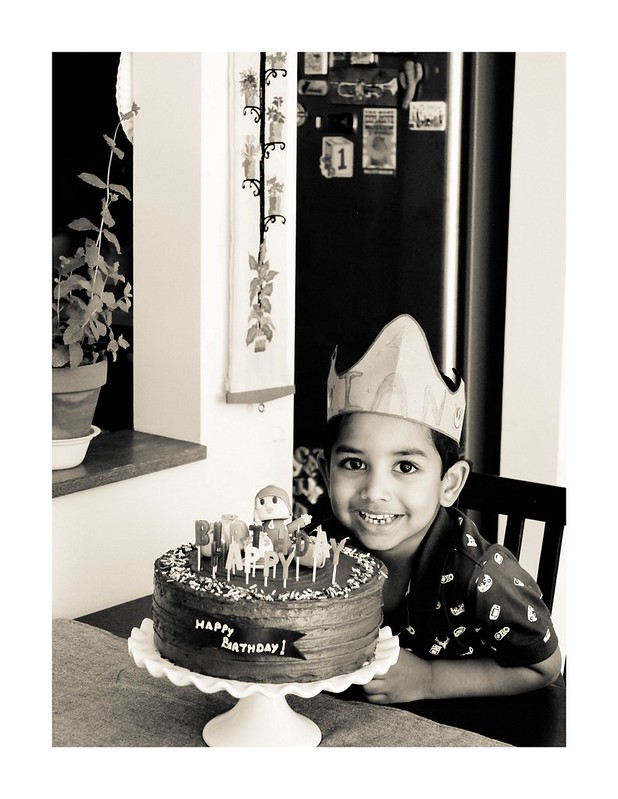
HAPPIEST FOURTH BIRTHDAY, IAN!

Happy Birthday, Ian!
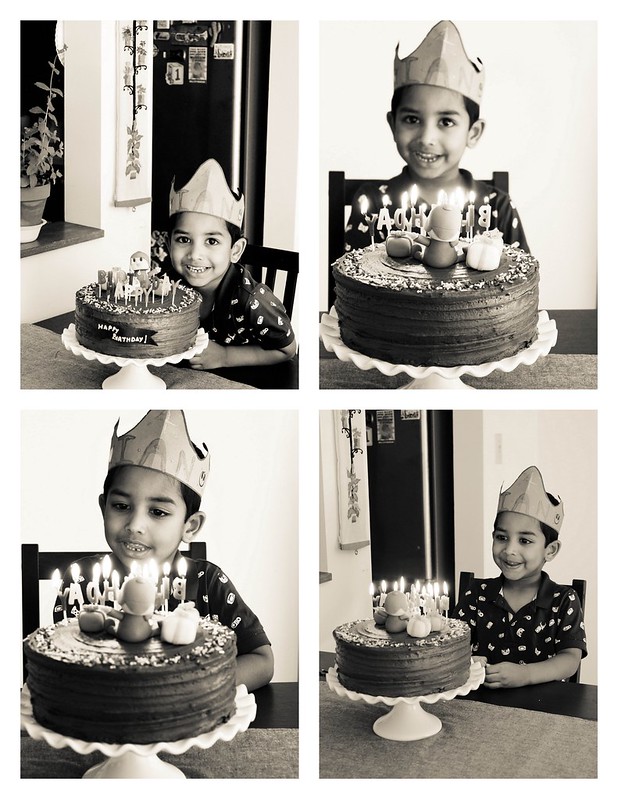
That little boy of ours is FOUR now! Where did the time go? I think I ask that question to myself a lot these days. He has grown so much in the last one year. He also helps me a lot with things at home. His specialty is clearing up the mess and folding his own laundry! From the time he could walk, I made sure that he cleaned up after his own mess,every single day.He has been happily doing his share of things around the house without being asked to these days. The best thing is, he tells me that he is very good at cleaning up stuff!
Happy Birthday, Ian!
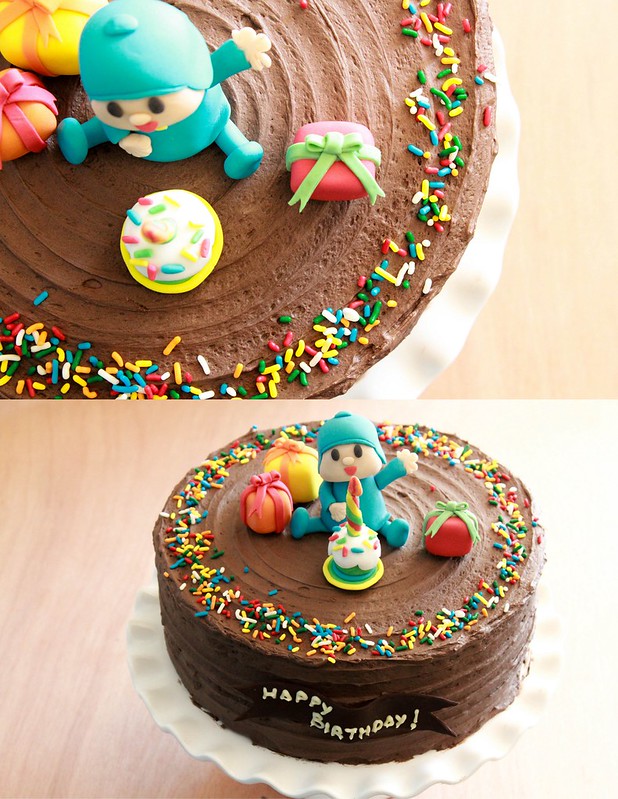
He has recently started folding his clothes and puts them away in a nice little pile. His Malayalam is pretty awesome for his age and we are strict about speaking in Malayalam at home. His favourite cartoons still remain the same so I decided to surprise him with a Pocoyo on top of his birthday cake.I made that for my last term in school and saved it for his birthday. His favourite cake is still my Chocolate Cake.
Happy Birthday, Ian!

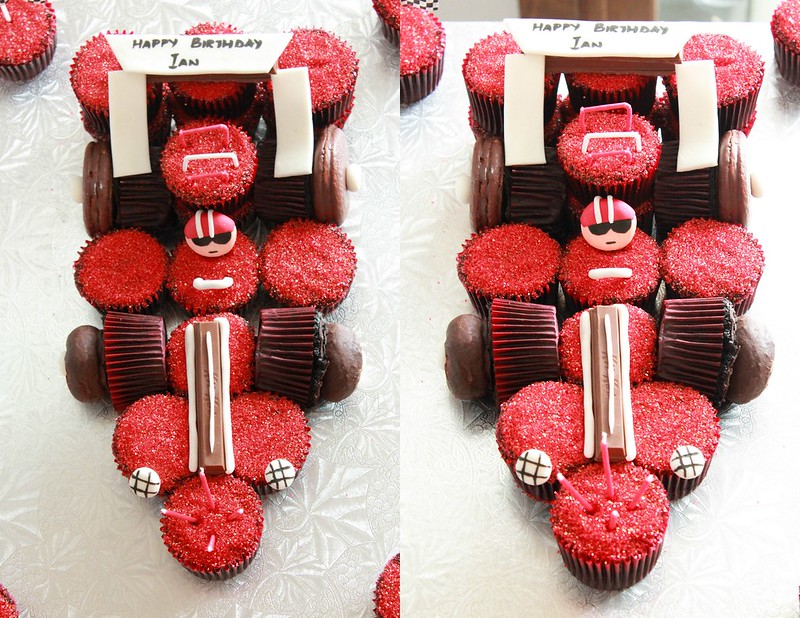
When I asked him sometime back in February what cake he wanted for his birthday, he immediately told me that he wanted a red racing car. So, for the birthday, I made him a Butter Cake with Malted Chocolate Buttercream Frosting and for the birthday party next day, a Red Racing Car Cake ( courtesy Pinterest) with his favourite Chocolate Cupcakes. He was really excited about those and had a great time with friends both at his Montessori and at home.
Happy Birthday, Ian!
Birthday Party Menu ( Dinner)

Pork Ularthiyathu
Cherry Cheese Pineapple
Maharaja
Curried Chicken Dip with Tortilla Chips

Chicken Biriyani
Fish Moilee
Homemade White Bread
Raita
He couldn't wait for me to finish taking pictures of him as he wanted us to light the candles and sing for him! Look at that face, isn't that worth more than a million bucks? Be still my heart.
 

Monday, July 11, 2016

HOMEMADE HOT FUDGE SAUCE

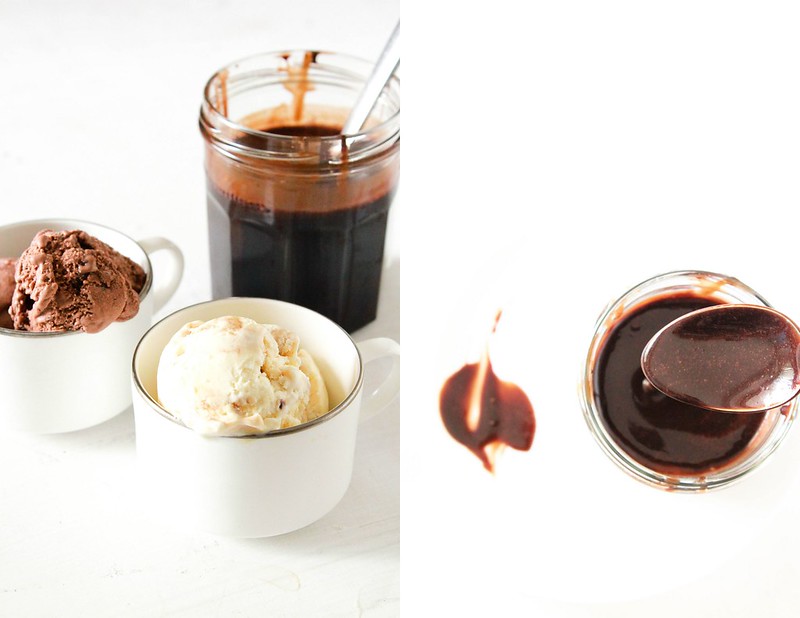
Hot Fudge Sauce
It's been really really hot outside today. So naturally,it's a day when I feel like eating something really cold, like an ice cream. These days, Ian gives me a list of things he would like to eat once he back from his Montessori. Chocolate ice cream, Fish Fry & Homemade Pizza tops the list. That reminds me, I need to thaw the fish for our Fish Fry, Yogurt & Rice dinner tonight!

Hot Fudge Sauce
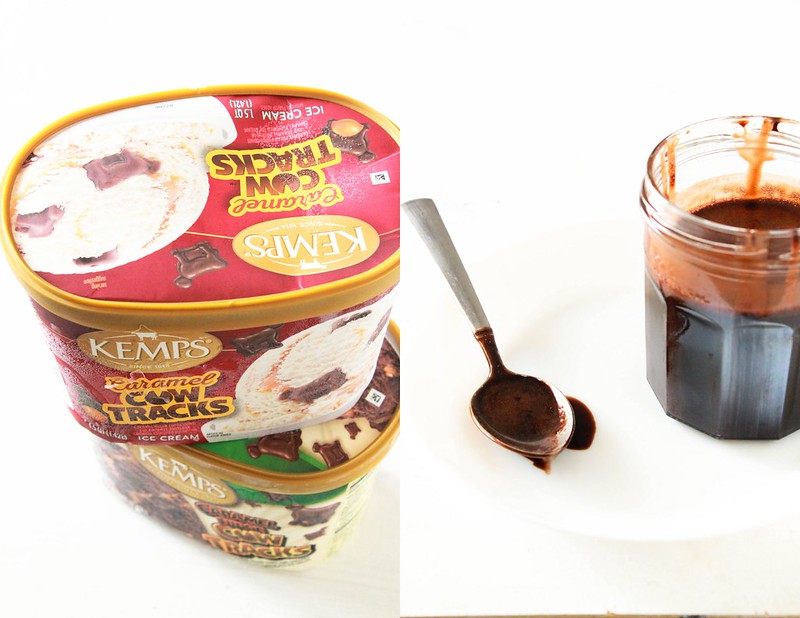
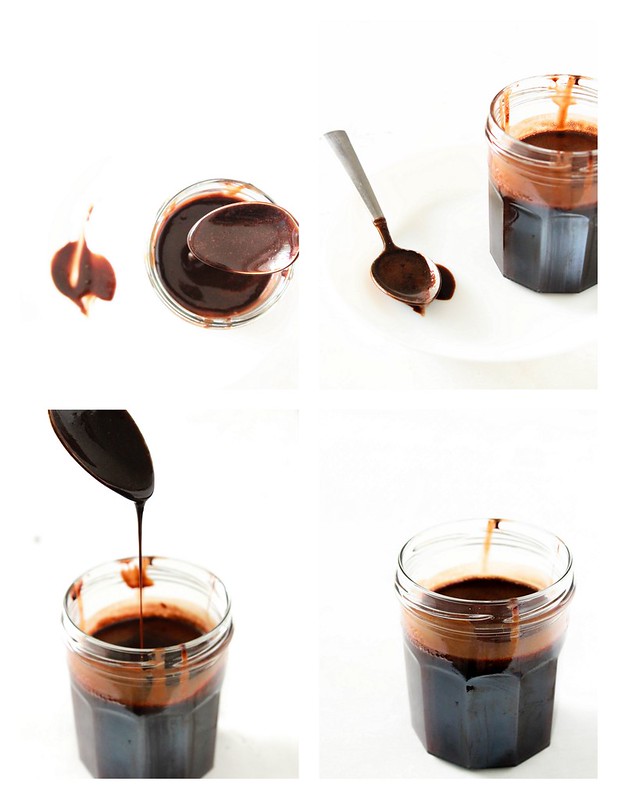
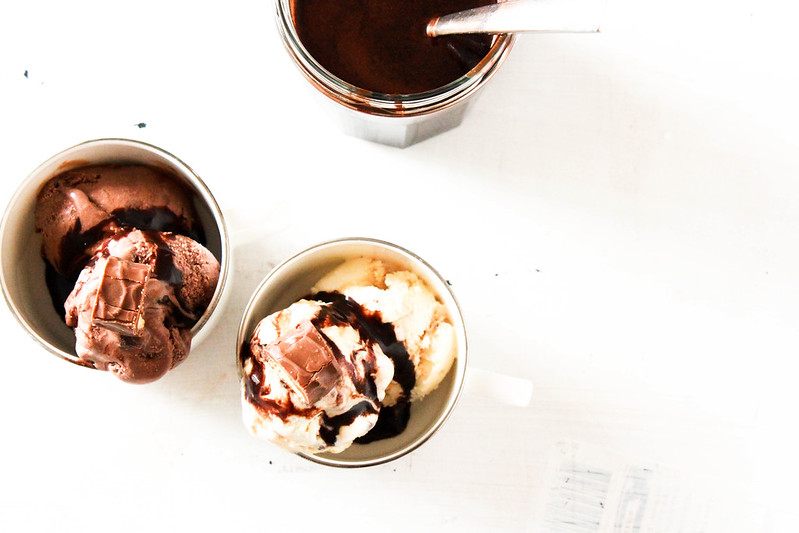
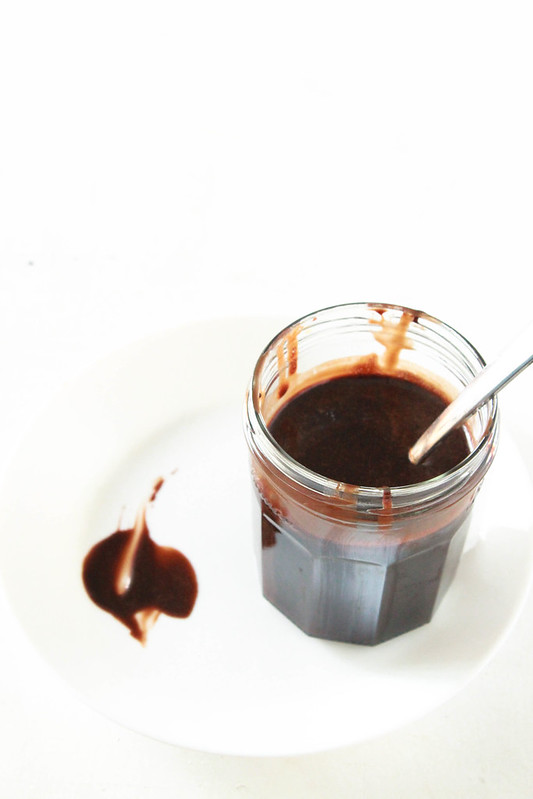
I made some Hot Fudge Sauce yesterday to pour over our ice cream and Ian has fallen for it completely. This has been my go to homemade chocolate sauce recipe for years now. It's a fool proof recipe and can be made in no time at all and lasts for a good time in the fridge. When Kemp's asked me if we would like to try some ice cream from their 40 different flavours, I jumped in at that opportunity.  I mean, it is so hot outside now and who wouldn't like to enjoy some ice cream drizzled with homemade chocolate sauce? That too, when it's a brand that I've enjoyed over the years!
Hot Fudge Sauce
I decided to try the Caramel Cow Track and Caramel Fudge Cow Tracks because I am all about caramel right now and I was really sure Ian would enjoy the Caramel Fudge Cow Tracks and I wasn't wrong! He calls it the chocolate ice cream and when I drizzled the Hot Fudge Sauce over it, it made the whole thing extra decadent!
Hot Fudge Sauce
This recipe is from Kamran,a good source for awesome recipes! I just cannot wait to use up this sauce and create homemade sundae's for my little family! Summer is the best season even if it's scorching hot outside right now.

HOMEMADE HOT FUDGE SAUCE
Hot Fudge Sauce Makes about 1 cup

Ingredients:
100 grams good quality dark chocolate,chopped small
2 tablespoons cocoa powder
1/3 cup golden syrup /light corn syrup
1/3 cup heavy whipping cream
1/3 cup powdered sugar
1/2 teaspoon vanilla
pinch of salt

Method: Melt the chocolate and cocoa powder together over a double boiler or using a microwave oven. Stir well. Add the golden syrup followed by heavy cream and powdered sugar. Add the vanilla and salt and mix well. Bottle it up and use as needed!

Related Posts Plugin for WordPress, Blogger...