Ria's Collection: July 2014

Wednesday, July 30, 2014

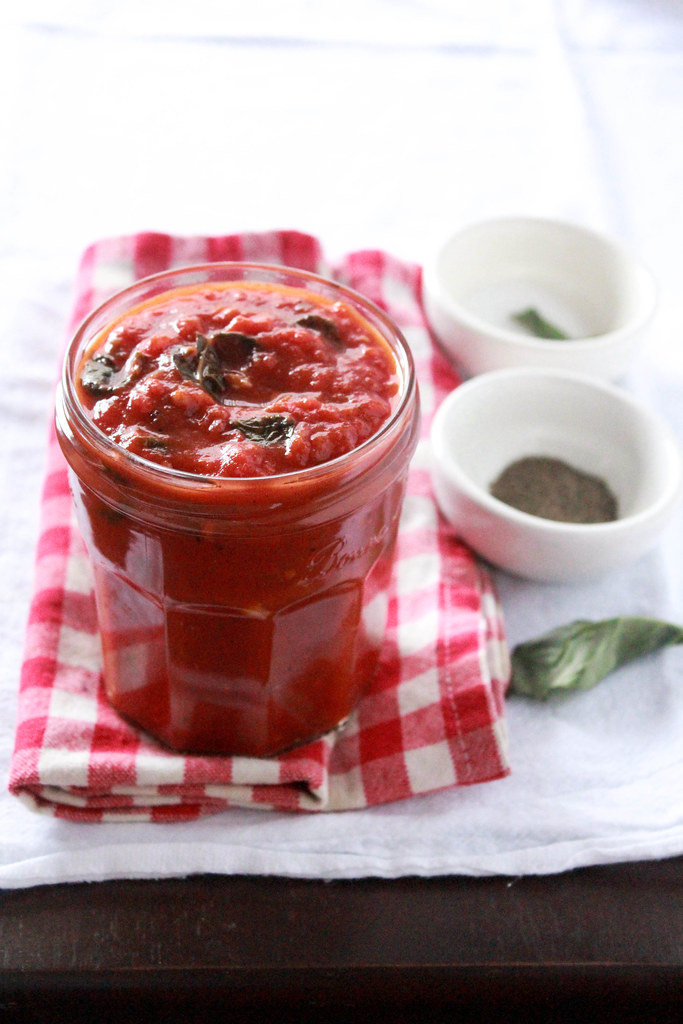
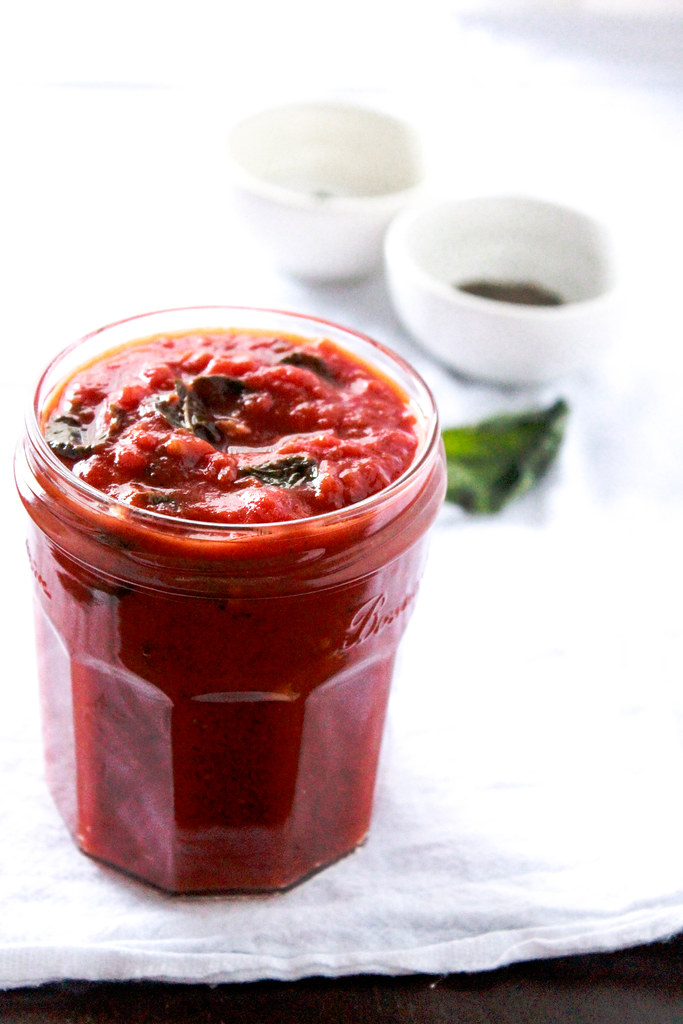
20 - MINUTE HOMEMADE MARINARA SAUCE

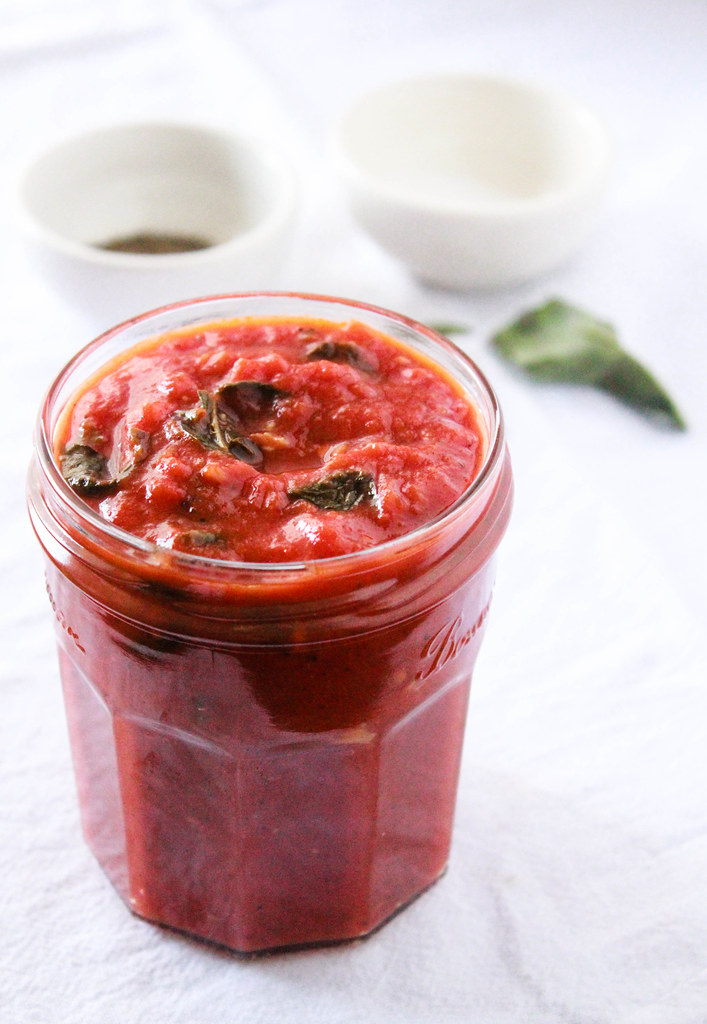
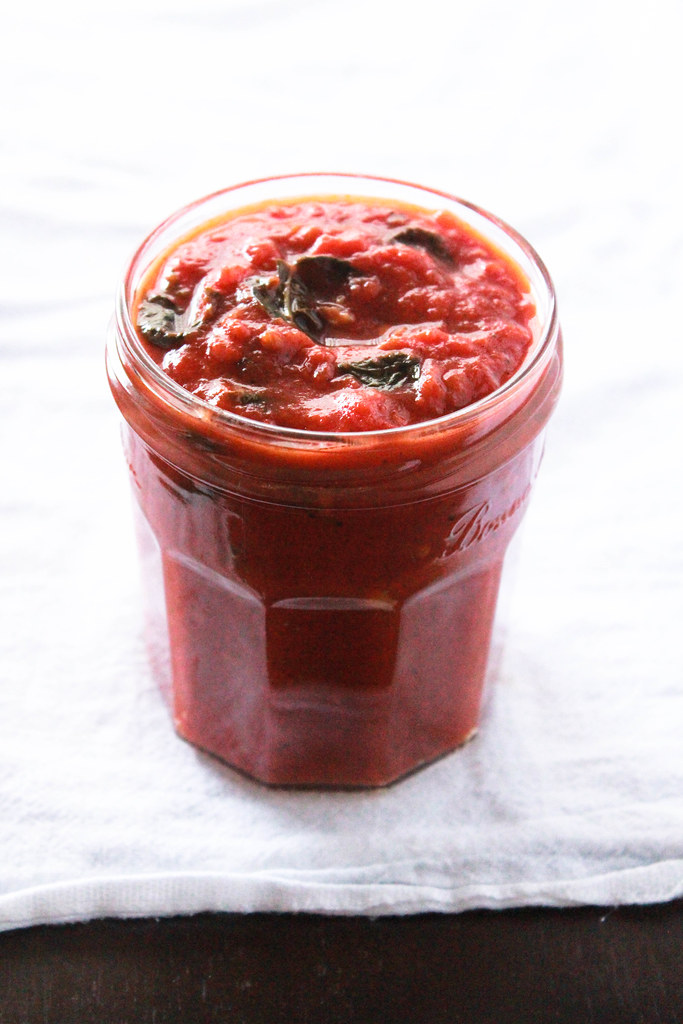
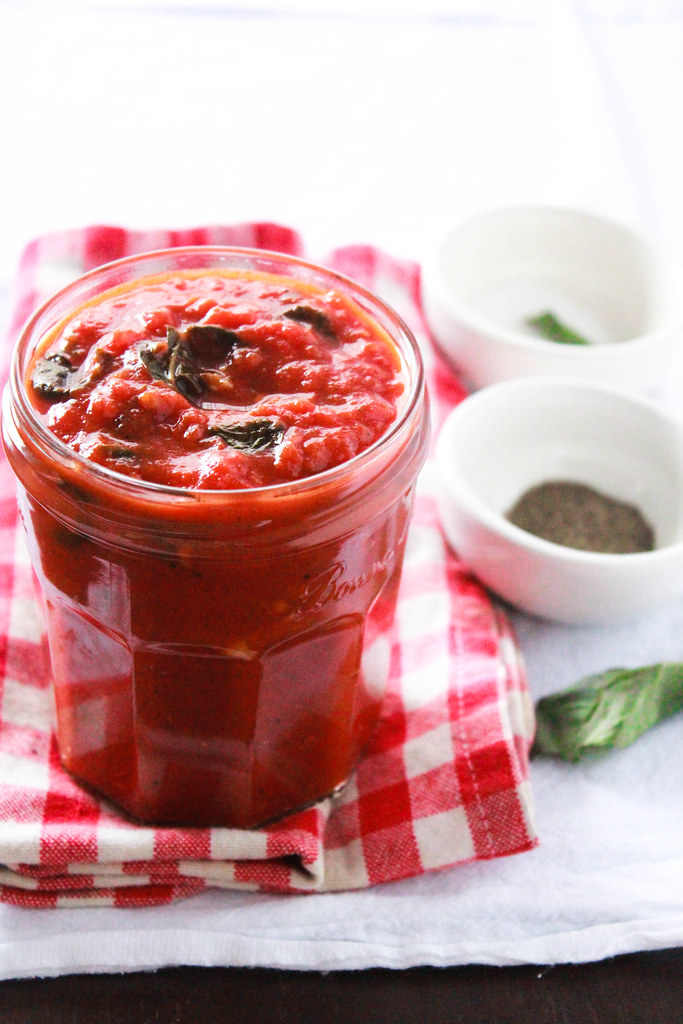
20 MINUTE MARINARA SAUCE
I try to cook food from scratch as much as I can. But, having said that, I do take shortcut methods when I am pressed for time or when I cannot keep my hands off of trying a recipe which calls for shortcut ingredients.We have decided to go local as much as we can so we buy a lot of ingredients for our daily cooking from the local Co-op. Off late, I am reading a few cookbooks written by fellow food bloggers. I follow them on their social media too,to get inspired with their meal planning for their families.It's an inspiration of sorts for the lifestyle they follow and not exactly the recipes.
20 MINUTE MARINARA SAUCE
When I read a cook book, I enjoy reading the headnotes more than the recipe itself. A cookbook without headnotes doesn't go well with me.It gives a personal touch to each recipe. Like, how they came up with that idea and how it evolved into a recipe gives you an insight of their day to day life. I am a person who imagines a lot when it comes to food. I can spend hours and hours on it. Infact, I've spent almost 3 weeks trying to develop a recipe based on an appetizer we ate at the wedding in Chicago.I read similar recipes online but, nothing came close to what we ate there.But, since I decided I would not give up on it, I did some calculations in my head and made a batch of that amazing dip and it tasted awesome. Infact,it was so much better than the one we had in Chicago, if I say so myself.It was served at Ian's 2nd Birthday Party as Thai Curry Chicken Wontons. 
20 MINUTE MARINARA SAUCE
We used to buy Marinara sauce all these years but after reading and following Jennifer, I made a mental note to try out her recipe next time I needed some sauce for my pizza and pasta. Ian loves pizza.Be it Pepperoni,Sausage,Cheese...anything as long as it's a pizza.He now knows that it comes in a thin cardboard box too! So, recently we had a package delivery and it came in a sleek carboard box. He was sleeping when Jobin brought it in. We didn't throw the box because we know that he loves to play with it. When Ian woke up, he saw the box and exclaimed,'Pizzi!'. He was very sure there was Pizza in it and when he realised there was none, he started asking me for it!
20 MINUTE MARINARA SAUCE
Yesterday, after putting him to sleep, I set out to caramelizing some yellow onions with thyme,olive oil, butter and white wine. The house smelled incredible and I knew that would wake him up because from the time he was a baby, any food that smelled good woke him up. No, I am not kidding! He would also tell me what exactly he is eating everytime I gave him something to eat! I know I am raising a Little Foodie and I am very happy about it.So, he did wake up and then immediately asked me to give him Pizzi! I wouldn't blame him. It did smell like an Italian resturant with all those onions caramelizing along with fresh thyme!
20 MINUTE MARINARA SAUCE
So, I decided to make a Pizza just for him with the sauce I've been itching to make.All things came together very well and I baked a thin crust pizza for him and the dough was made according to Jennifer's recipe too,from Homemade with Love. It was a very good one.Even though I made it *just* for him, it ended up being our dinner :) I wizh we had a slice of that Simple Strawberry Pie that I made a few weeks ago, using Jennifer's recipe for dessert. It was so good! Do try to make some before the sweet Strawberries go out of season. It hardly takes any time to bake!

20-MINUTE MARINARA SAUCE
Makes about 1 quart (900 grams)

Ingredients:
1 tablespoon extra virgin olive oil
2 garlic cloves
1 (28 ounce /784 grams) can whole peeled San Marzano tomatoes*
Handful of fresh basil leaves, torn into pieces
Sea salt and freshly ground black pepper

Method: Heat oil in a fairly large pot over medium heat. Add the whole garlic cloves and cook until they are fragrant and golden, 2-3 minutes. In another bowl, break up the tomatoes with your hands and add them to the garlic,along with the tomato juice from the tin.You can puree the tomatoes if you like a smooth sauce or just break it up roughly,if you want a sauce with some texture,like I did.Season with salt and pepper and add the torn basil leaves. Stir it and let it cook on medium-low for 15 minutes.If not using immediately, let the sauce cool completely before storing it in the refrigerator. It will stay fresh for upto 3 days. They will stay good, frozen, for up to 2 months.

*IF you want to use fresh tomatoes, blanch -peel -deseed them before using. The taste will vary a bit because they don't taste exactly the same as the tinned ones. There's no harm in trying,though! A pinch of sugar may be needed to balance the tartness of the fresh tomatoes. This is just my suggestion.
I was really happy with the results. If you find it a bit tart, I would suggest that you add a pinch of sugar to balance it out. This sauce worked very well with Ian. I saw him peel off the cheese layer to lick the sauce.One of the first words he learnt to say clearly was sauce. He loves ketchup and must have thought this Marinara sauce was it's cousin. They are in a way, right?

Monday, July 28, 2014

A HOMEMADE BIRTHDAY PARTY -2

Ian's 2nd Birthday Party
Iam very sure what I want when it comes to Ian. That is only till he starts to demand what he wants though! No matter how crazy the whole party planning turns out to be, I want that to have my touch in every single thing. It could be because Amma made every thing for our birthday parties. We never catered food for it. I remember, as a child, I would wait to go for birthday parties but once I get there and see caterers standing there in uniforms...I would lose my appetite.
Ian's 2nd Birthday Party
I am talking about what I liked and disliked while growing up and all your views could be different. For our birthday parties, every person whom we invited would turn up and the first thing they would mention was the food. Since they knew Amma would be making everything, they thought it would be better to come! Food has always been an important part in my life.
Ian's 2nd Birthday Party
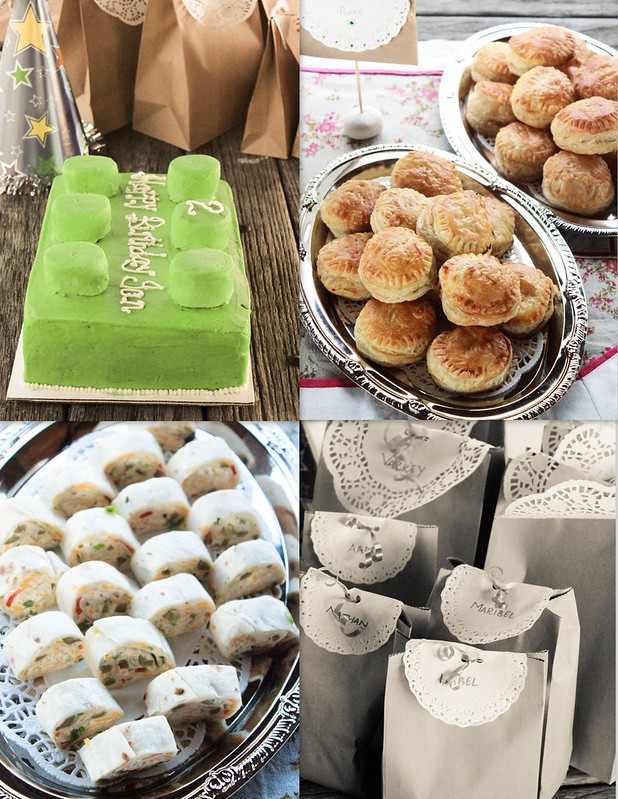
Ian is too little to decide what cakes he wanted for his big day. So,I decided that I would like to make something that reflected what he likes at this age.So,it was a car cake for the birthday and a green lego cake for the party. He loves his building blocks and the first colour he learnt to say was Green. So that's how the green lego cake was born. He loves the Chocolate Cake I make for him almost every week. So that was the flavour choice for the party cake, obviously.
Ian's 2nd Birthday Party
I don't believe in having theme parties for a boy so little plus, this is the only time i would get to do so. Once he grows, I think he would have made uphis mind on what he wants! It might be a superhero of some kind. We did a picnic style birthday party this year,just like last year. Jobin and I have very similar tastes in almost everything,so decisions are made very easily. We love open spaces and especially because he is a Summer baby, a park was the most ideal place for the party. It was at the same location as last year but a different shelter. The birthday party ended with a 20 minute fireworks (10,000 lbs!) as a part of the one-week long celebrations by the City.It was a beautiful one!
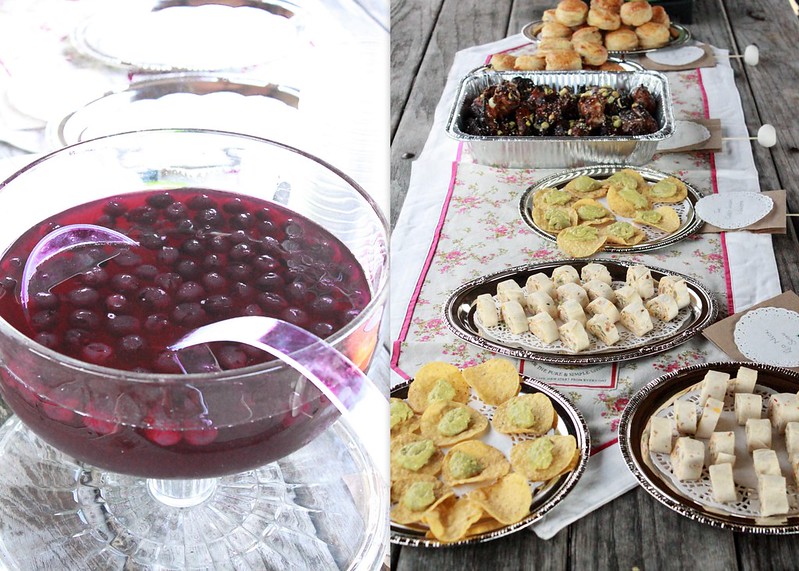
Menu for Ian's 2nd Birthday Party

Purple Surprise
Mango Soda

French Onion Pastry Puffs
Thai Curry Chicken Wontons
Red Neck Sushi
Sticky Wings

Spicy Chipotle Chicken
Cuban Style Black Beans
Lime - Cilantro Rice
Fiesta Corn
Jalapeno Cheddar Cornbread
Tostadas
Tortillas
Fix -ins : Tomato, Onions, Lime, Sour Cream, Scallions

I would like to extend my thanks to all those who sent in wishes for his big day and a bigger thanks to all who started sent those in advance! I really, really appreciate it!
 

Tuesday, July 22, 2014

HAPPIEST SECOND BIRTHDAY,IAN!

Ian's 2nd Birthday Cake
Our little boy turned TWO today! The past year was a very busy one for him. He learnt a lot of new things, made new friends, traveled across the globe,enjoyed getting drenched at the beach,learnt new tricks and even started to talk! He loves to sing and sings really well. We are planning to send him for singing lessons soon. He also loves to read his story books to me and one thing I've noticed is that, he enjoys reading as much as I do. I am indefinitely going to supply him with more books!The photograph you see above was taken this morning, as soon as he woke up. We hang streamers in our living room as a part of our celebration.Of course, he took it down one by one!
Ian's 2nd Birthday Cake
I was sad and happy yesterday because it was his last day as a one year old but at the same time, it's his big day tomorrow! I know that he doesn't even realise all that, but,as a mother I was just remembering all those moments of joy from the time he was born. He has been a very good boy ever since he was born. He never gave me a sleepless night,loves to eat and is totally a fuss free lovable kid! We are really blessed to have him and we thank God for that!Over the past two years, I've realised that I'm much more patient and selfless than I though I was.Being a Mother has changed me for good.
Ian's 2nd Birthday Cake
Like how I mentioned earlier, he loves to read. He has a tiny book of numbers and he likes a particular page in it because of a car. Like most boys,he loves his trucks, cars,bikes, jeep etc., He even places it in a particular order, very impressive actually and doesn't approve of that being disturbed.So, to celebrate this Little Man,I decided to bake him a cake today. A cake which resembles the car he loves from his book.I saw a cake on BHG and decided to go ahead with the idea.It's a plain Butter Cake with Buttercream frosting. I usually stay away from fondant decorations for our personal celebrations The birthday party is not until Saturday and I've planned for another cake for that day. The menu and photographs will follow! Just like his First Birthday party, I will be making every single thing! No catering in our household !

Thanks to all my dear readers who've been sending Birthday Wishes for Ian! Thank you so much, from the bottom of my heart! You are the best!

Monday, July 21, 2014

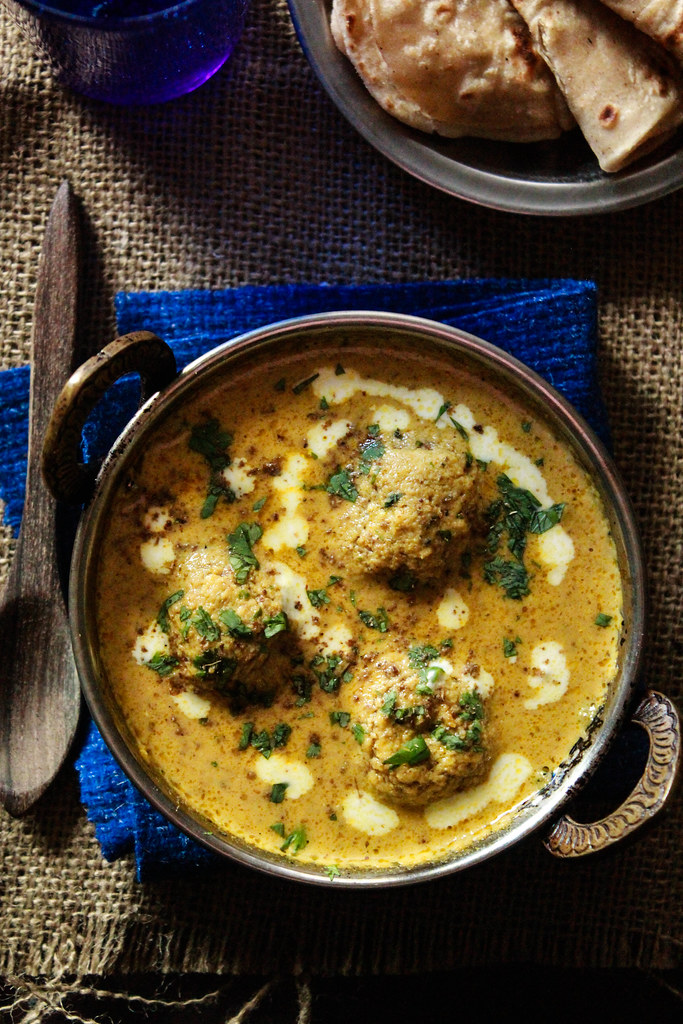
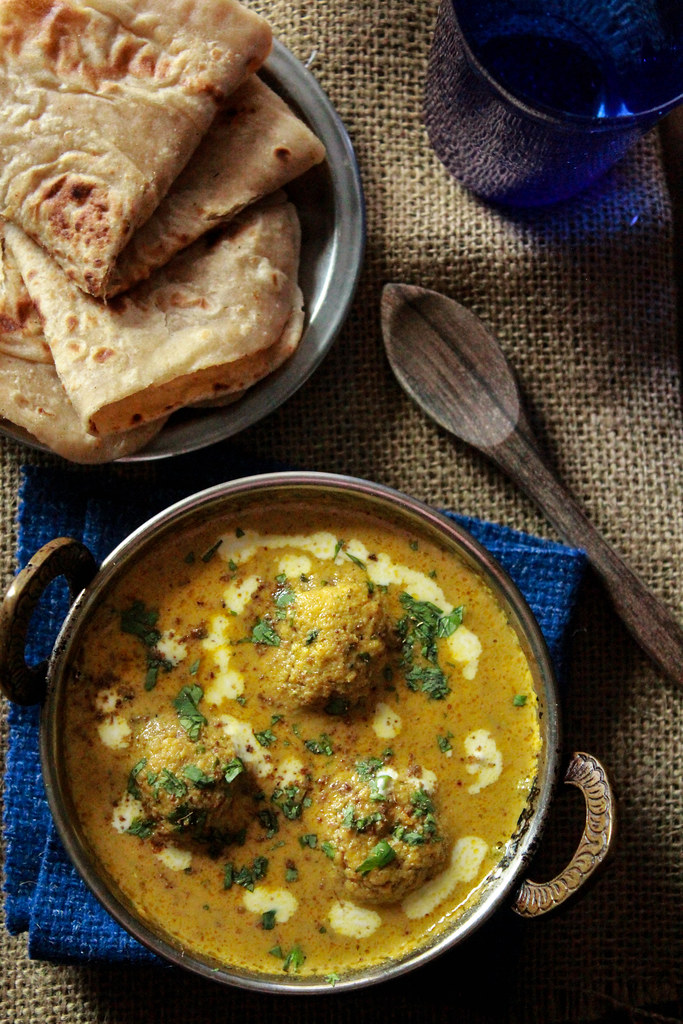
MALAI KOFTA

You will not find many recipes using Paneer in this food blog of mine. It's because I am very picky about it. I'd eat it in an Indian-ised Cheesecake,Chili Paneer from a restaurant in Bangalore( I do not remember it's name now!), Malai Kofta from Sukh Sagar, Bangalore& Amma's Cheese Fingers.Malai Kofta was not a dish we made at home. It was never a dish we ordered when we went out together as a family. We are hard core non vegetarians and eating out only means eating meat,poultry & seafood!
MALAI KOFTA
But. There is always an exception when you live in a hostel which serves a not-so-good packed lunch along with breakfast.It gets cold by the time you get to the college and gets very very cold by lunch time. So, Jitha and I would eat out at the college canteen or at the close by restaurant called Sukh Sagar.They served only vegetarian food which was totally delicious by the way. We simply loved eating there.
MALAI KOFTA
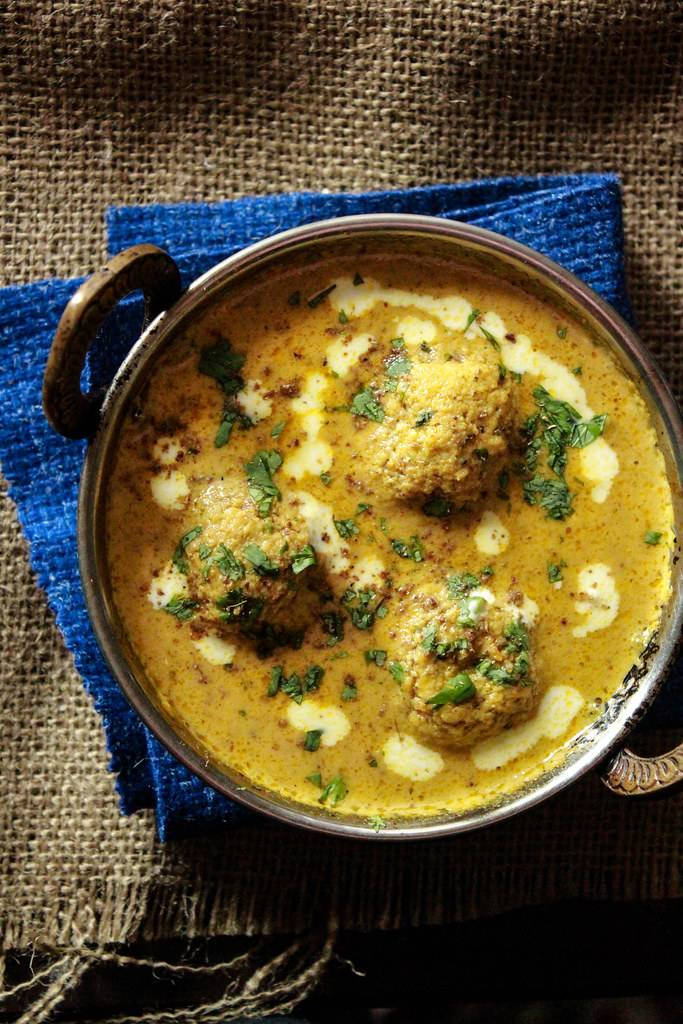
Malai Koftas were the highlight of all the food we ordered out there.Each plate had one huge kofta with lots of gravy. The kofta was like a tennis ball. Huge! But,it was so soft and so good! I've never eaten one after that. Recently, I was going through my recipe collection and found a recipe for it which I had noted down a very long time ago from one of Smita Chechy's cookbooks. I think it is Sanjeev Kapoor's recipe.
MALAI KOFTA
I always run out of ideas for our dinner curries,to go along with Chapathis.I had a block of leftover Paneer after making Amma's Cheese fingers,sitting in the freezer which, I knew would go for a toss if I didn't use it immediately.That's how I landed up making this curry.Here's how I made it.
MALAI KOFTA MALAI KOFTA
Serves 6

Ingredients:
Koftas:
250 grams paneer
125 grams potato,boiled,peeled & mashed
2 tablespoons cornstarch
Salt & Pepper to taste

Masala 1
2 onions,sliced
2 teaspoons cumin seeds
1/2 teaspoon peppercorns
2 small green cardamom
1 inch piece cinnamon stick
3 dried red chilies
4 cloves garlic
3 tablespoons coriander seeds
1 tablespoons fennel seeds
2 black cardamom
3 cloves
1 tablespoon poppy seeds
2 green chilies
2 inch piece ginger,cut up
3 tomatoes,chopped
3 tablespoon chopped cilantro
4 tablespoon oil

Masala 2
3 tablespoons cashews
3 tablespoons grated coconut

Other ingredients:
2 tablespoons oil
1/2 teaspoon turmeric powder
1/4 cup yogurt
4 tablespoon malai / fresh cream
2 tablespoon ghee
1 teaspoon sugar
Salt to taste
1/2 teaspoon garam masala

Method:
Koftas: Mix all the ingredients together and form a smooth dough. Divide into 12,shape them and deep fry in hot oil until browned.Drain and set aside.
Masala 1 : Heat oil  on medium high heat and saute all the ingredients through ginger,for 4-5 mins.Add the chopped tomatoes and cilantro and cook for another 2 minutes. Take it off the heat and let it cool completely. Once cool, grind to a smooth paste.
Masala 2: Grind together coconut and cashewnut to a fine paste using a little bit of water.

Heat the ghee in a large pan and once hot, add the ground masala (Masala 1)to it. Saute for 3-4 minutes. Then add the turmeric powder,yogurt & sugar. Cook for another 1 minute.Add the ground masala (Masala 2), 2 tablespoons malai,salt & some water and simmer covered, for a few minutes. Open the lid,add the koftas and remove from fire. Pour remaining malai on top & sprinkle with 1/2 teaspoon garam masala and serve immediately.
That aroma when you are sauteeing Masala 1 is incredible! It smells like you are cooking something non-vegetarian! :) This curry will thicken as it cools, so adjust the water accordingly. The sauce can be made ahead,re-heated and then add the koftas in the end, if you want to make this curry ahead of time.We shared this curry with some friends and they felt that it tasted really good and different!

Wednesday, July 16, 2014

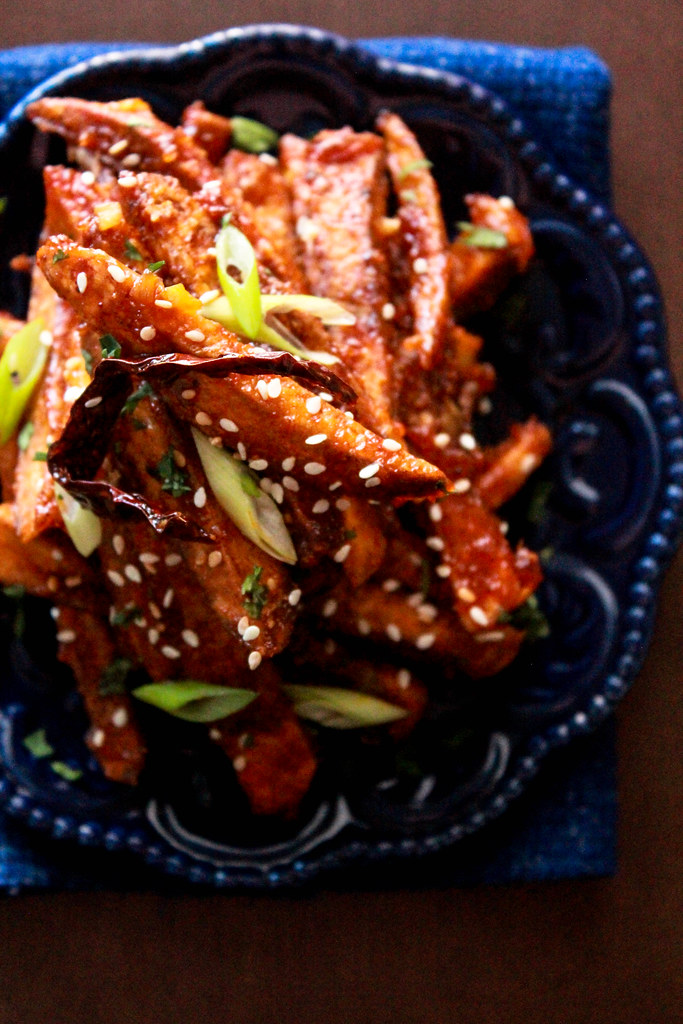
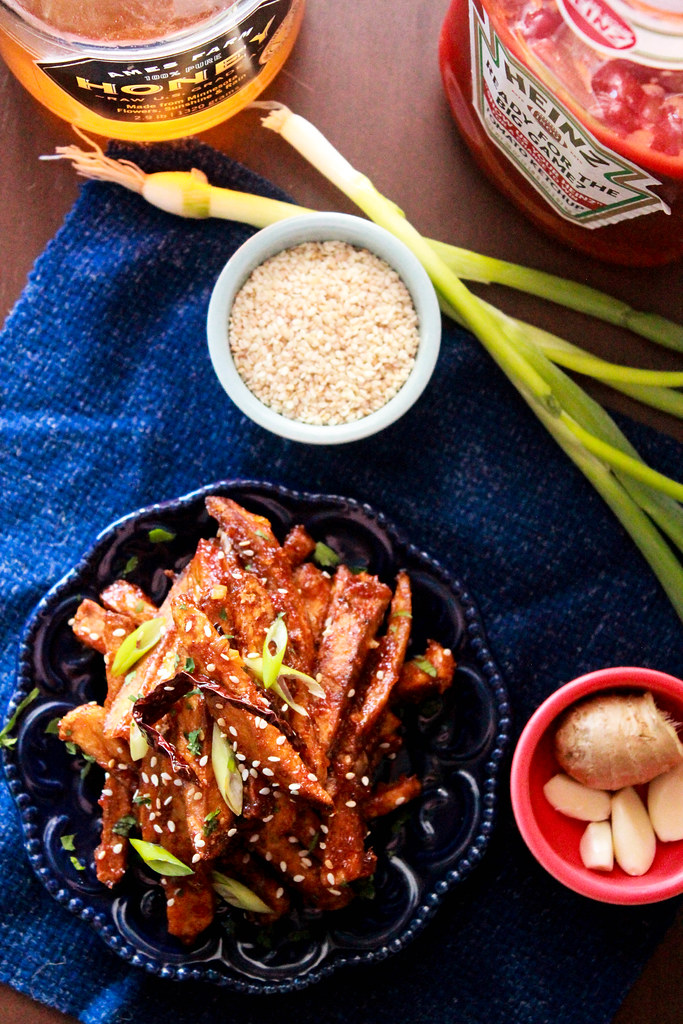
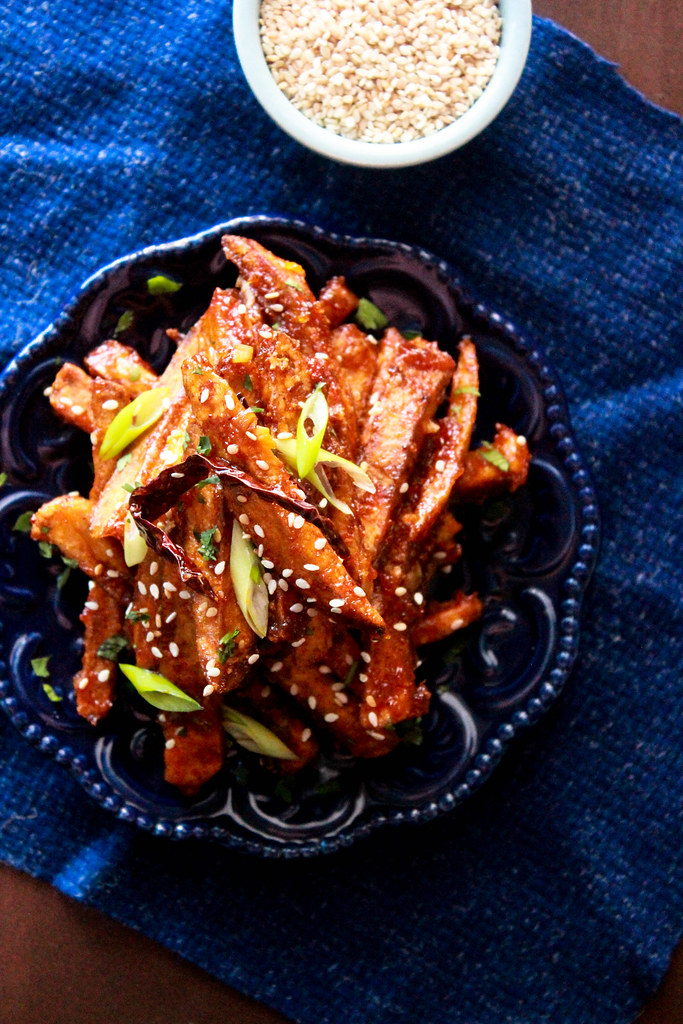
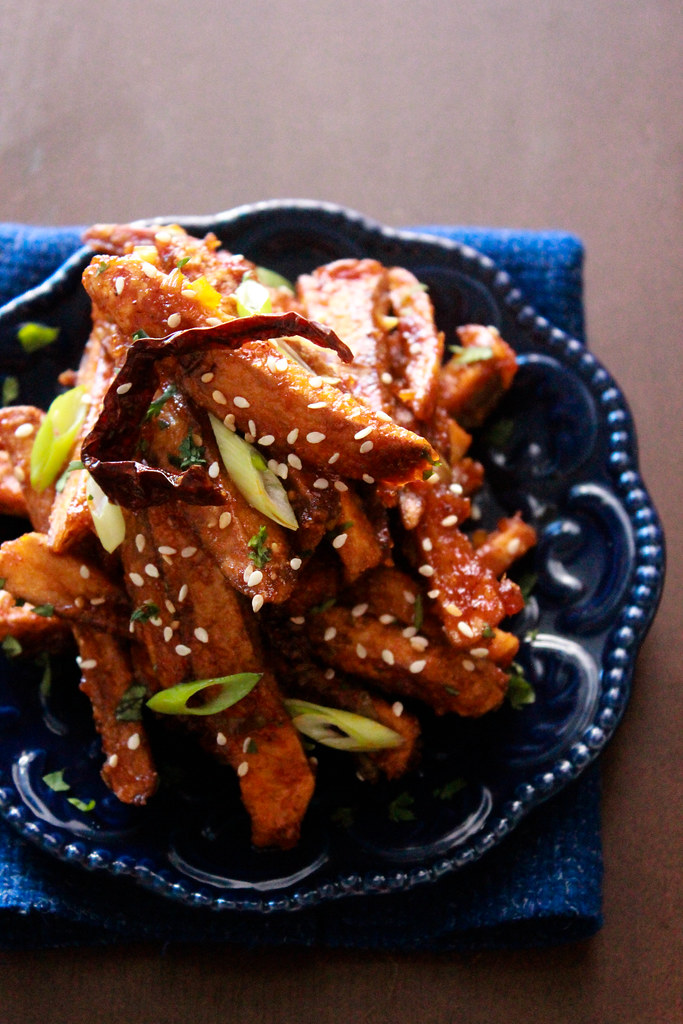
HONEY CHILI POTATOES

I am back with another recipe using honey! This time it's paired along with a favourite ingredient of mine, Potatoes! I can eat anything made with potatoes,any time of the day! It's such a versatile ingredient and is an instant favourite with most people. I tasted this dish 11 years ago at Mainland China,Bangalore. One of my closest friends,Vasu, is a vegetarian and she had ordered this as her appetizer. The entire plate vanished in no time and it was just the two of us!
HONEY CHILI POTATO
A few months later, I spotted this recipe in a book Mamma gave me.I noted it down in my navy blue diary. You should see the condition of that diary now. It's falling apart but at the same time, it's filled with delicious recipes too! So, I have kept it safe. Have you ever come across people who steal other's hand written cookbooks? I have and it's not a good experience at all! The number of years and effort you put into writing that book is just too precious! So,wherever I am now, all my books are kept safe! If someone wants a recipe and asks for it, I will be more than happy to share it with them.It's better to be safe than sorry!
HONEY CHILI POTATO
The original recipe calls for blanching sliced potatoes and then frying it. Instead,you can use frozen fries and skip a step. I am giving you the recipe from the book but feel free to substitute it. It will yield the same result. There's some joy in skipping steps in a recipe,isn't it? Especially if they give the same results!
This is a delicious appetizer and tastes best when eaten immediately. Fried potatoes retain some crunch when served alone but, when they are tossed in a slightly sticky sauce, they get soft faster.So,if you are planning to take this appetizer with you,to someplace, it will taste just the same but they will be a bit soft.
HONEY CHILI POTATO
There are a few things that you need to be careful about while making this recipe. We are adding the sauces directly to the oil,which means,it can get burnt very very easily . Once burnt, no amount of modifying can rescue it. It will taste bad.So, reduce the heat to low before you add the sauces. It's applicable for all recipes containing sauces &  powders. This recipe calls for chili paste and since I didn't have it on hand, I substituted it with red chili powder / cayenne. Feel free to increase or decrease the amount to suit to your tastes. Try to have the fried potatoes ready on hand before you make the sauce, so that way you can toss it immediately. The sauce will thicken a bit as it sits and might not coat the potatoes as much as it would,when hot.
HONEY CHILI POTATOES
HONEY CHILI POTATO Serves 2-3

Ingredients:
250 grams potato (or frozen fries)
50 grams cornstarch
Salt & pepper
Oil for deep frying
2 tablespoon oil
3 dried red chilies
2 tablespoon tomato ketchup
1 tablespoon green onions
1 tablespoon ginger garlic paste
1 1/2 teaspoon cayenne
1 teaspoon honey
1 teaspoon ground black pepper
Salt to taste

Method:
IF you are using store bought frozen fries,fry as mentioned behind the packet and toss them in the sauce.
IF you are making the fries at home,wash,peel & cut the potatoes into fingers. Blanch them in boiling water for 2 minutes and let it drain completely. Once cool, toss it with cornflour,salt and pepper.Shake off the excess flour & deep fry in hot oil (350F) until golden brown in colour.

For the sauce: Heat oil in a large saute pan and add the ginger garlic paste. After 30 seconds, add the dry red chilies and mix well. Decrease the heat and add the remaining ingredients and stir it well.Add the fried potatoes and toss well to coat. Serve right away garnished with green onions, cilantro and white sesame seeds.

Ian loved it! Just like his Appa & Amma,he loves potatoes in any form. He took his share and sat on our rocking chair to eat them peacefully. Every now and then he would ask us to get him water because it is a bit hot for him.These days he calls Jobin,'Jobi'. So it was very funny to see him call out to 'Jobi',for water!  I hope you try this sometime,it really is a quick one to pull together and tastes fabulous!Next time, I will use the readymade fries. We usually don't stock fries in our freezer. So, it's going to need some planning next time on!
 

Tuesday, July 15, 2014

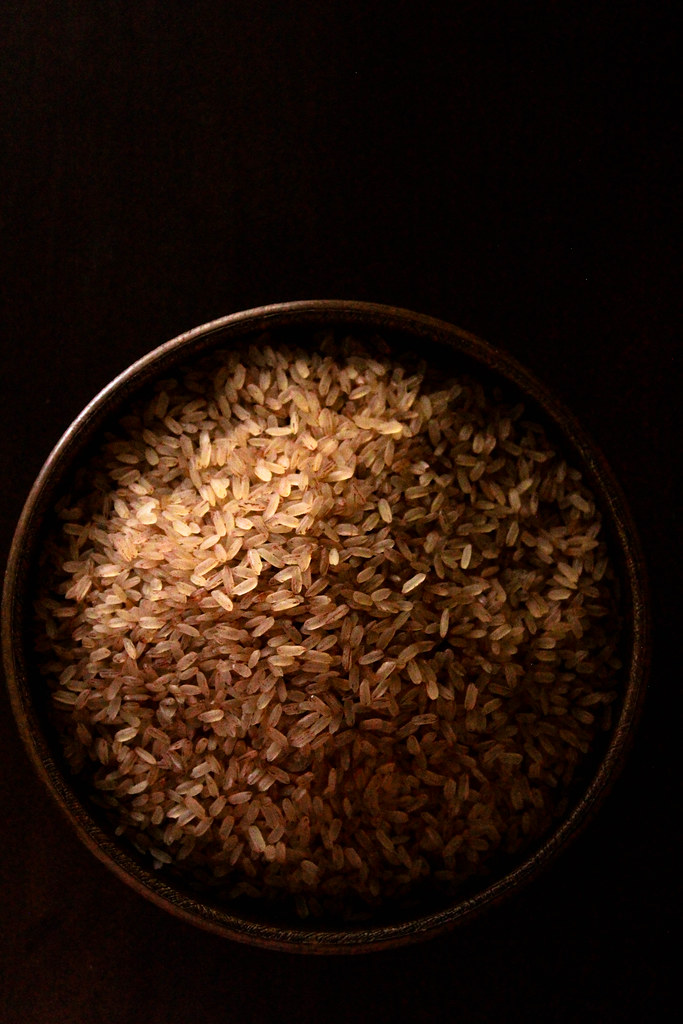
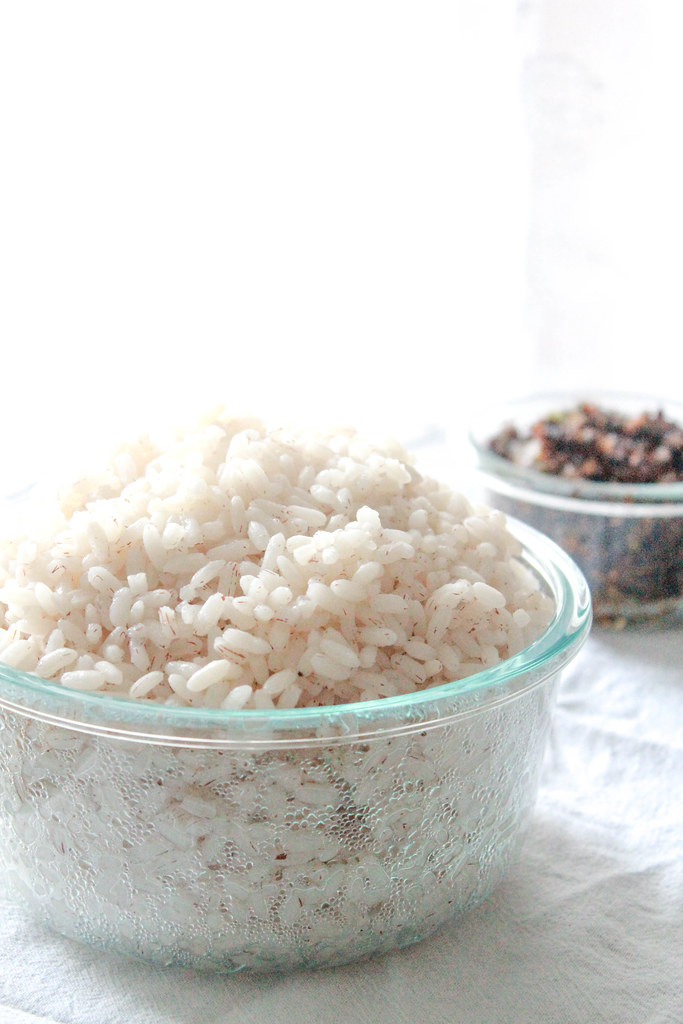
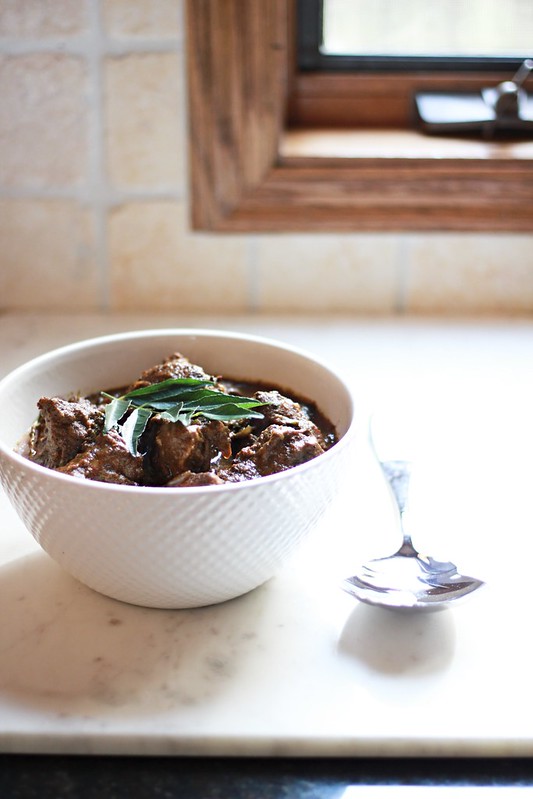
HOW TO COOK KERALA MATTA RICE

KERALA MATTA RICE
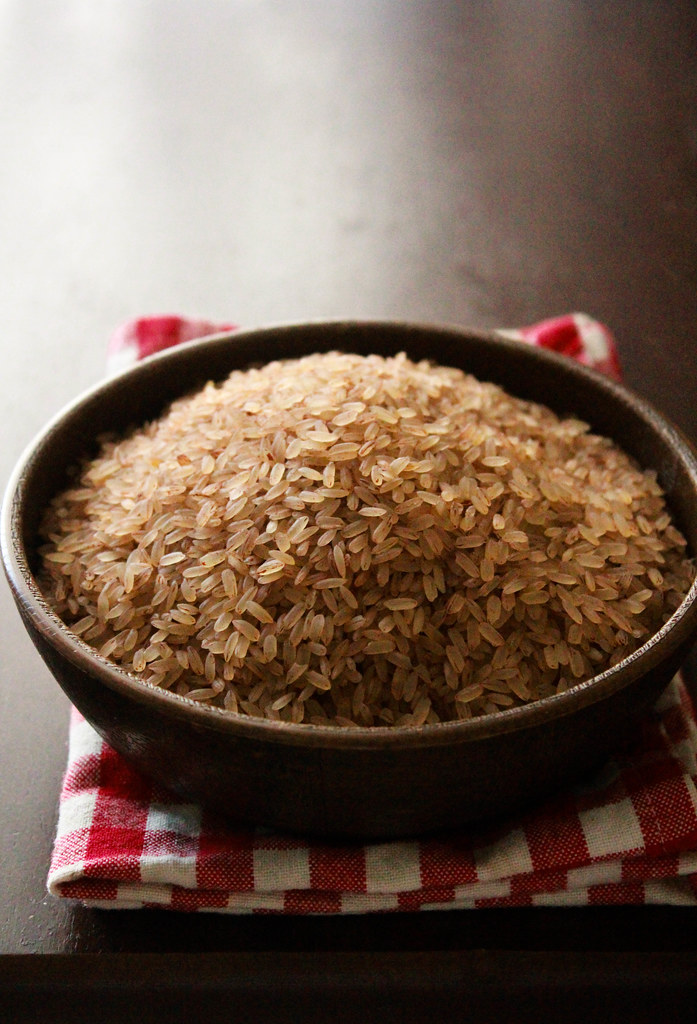
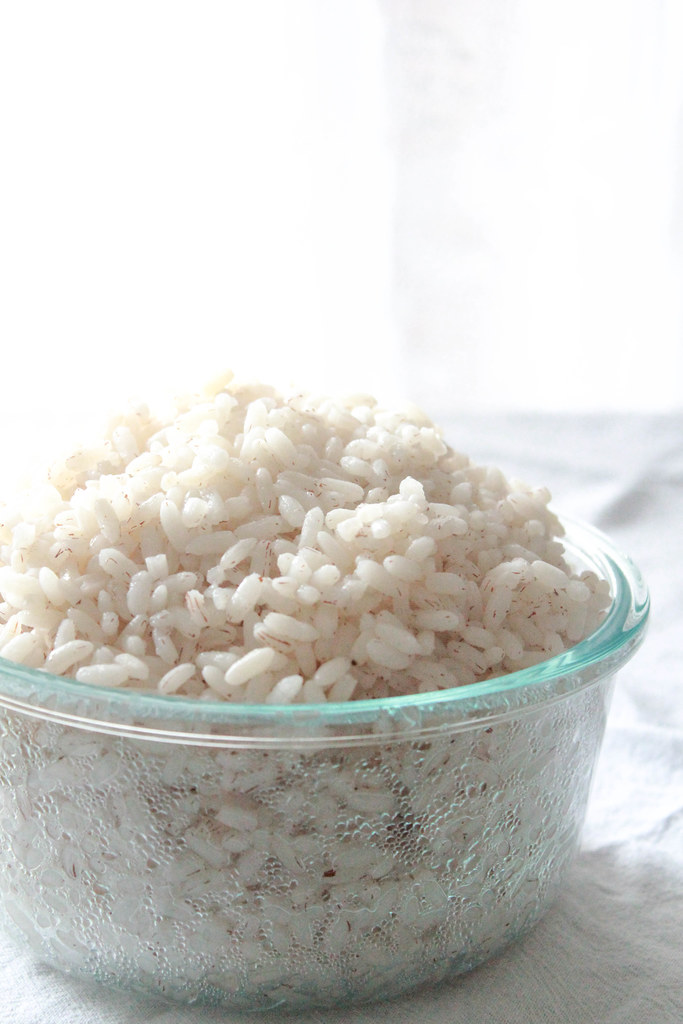
I am sure some of you might have smirked at the idea of writing about how to make the perfect rice. If anyone thinks that cooking some rice is a rocket science,they are so mistaken! Infact,even a child can make it. Here, I am talking about the easiest way to make the Kerala Matta rice. The chubby rice.The fatter the rice grain, the starchier it is. The starchier the rice, the more liquid it needs to cook. It also takes a longer time than its skinnier counterparts.
KERALA MATTA RICE
Many people, including myself must have found out a way which works out best for them. I always went ahead with the pressure cooker method. Infact,that's the quickest way for matta.But,how many whistles do you give it? How much water do you use? What's your proportion of water to rice?
Kerala Matta rice is also known as Palakkadan Matta, Rosematta,Chomanna Ari, Parboiled Red Rice etc.,
KERALA MATTA RICE
KERALA MATTA RICE

I never gave much thought to it until Peramma told me how to go about it. It rocked my world! It's the most easiest way to cook the matta rice without your kitchen filling up with starchy spray everywhere! No more messy countertops/cooker lids / stoves. If you have already figured a way to cook yours without the above mentioned side effects,good for you! It took me a while, you see.
KERALA MATTA RICE
Last weekend,we had this rice talk with our friends and they felt the need to rinse out the cooked rice, add more water and give it another boil, which made it a lengthy process to cook matta.That's when I told them about the method I follow. I really feel that this is the best way to go about it provided, you have a large cooker.If not, try a smaller proportion. Here's how my Peramma told me to do:
THE BEST WAY TO COOK MATTA RICE

Ingredients:
1.5 cups Palakkadan Matta rice
12 cups water

Equipment : Pressure Cooker

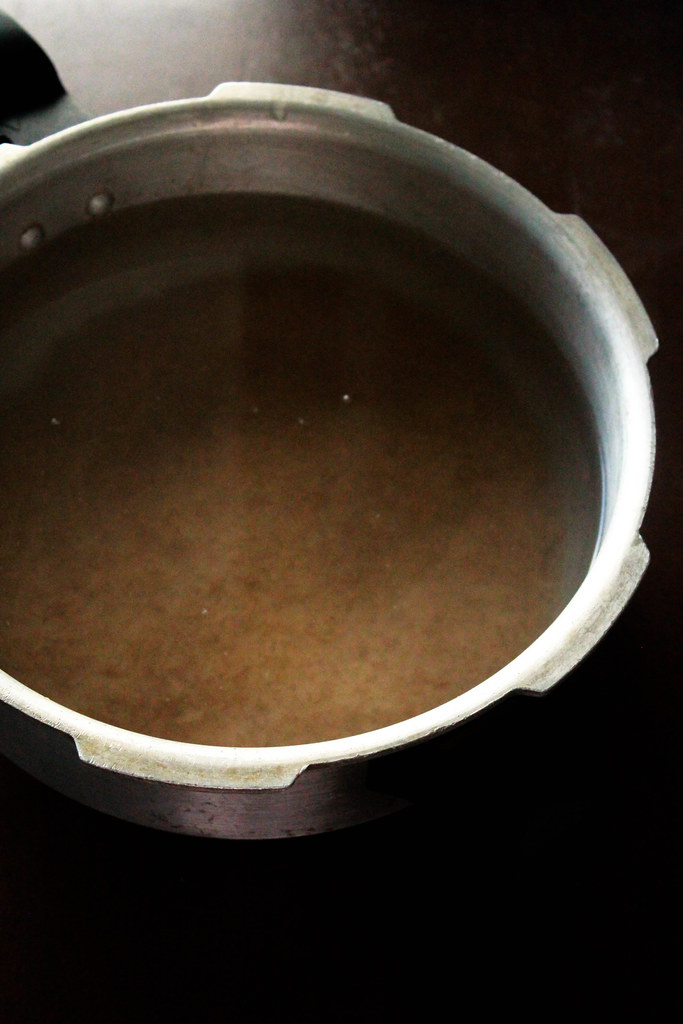
Method: Take the measured rice in the pressure cooker and wash it,rubbing the grains,until the water turns clear,about 4-5 times. Add the 12 cups of water and keep the cooker on the stove. Turn on the heat to low,cover the cooker and wait for the steam. It will take anywhere between 5-6 minutes. Place the weight and cook the rice on low heat for 1 whistle. Turn off the heat and let pressure go down on it's own. Open and use as needed.

Updated on 16 July 2014 : This is not an absorption method for cooking the rice. There will be plenty of water after cooking,which can be drained off if needed.If you consume the starchy water as Kanji, you are of course, consuming the starch! :-)
 

Monday, July 14, 2014

MELT & MIX HONEY CAKE

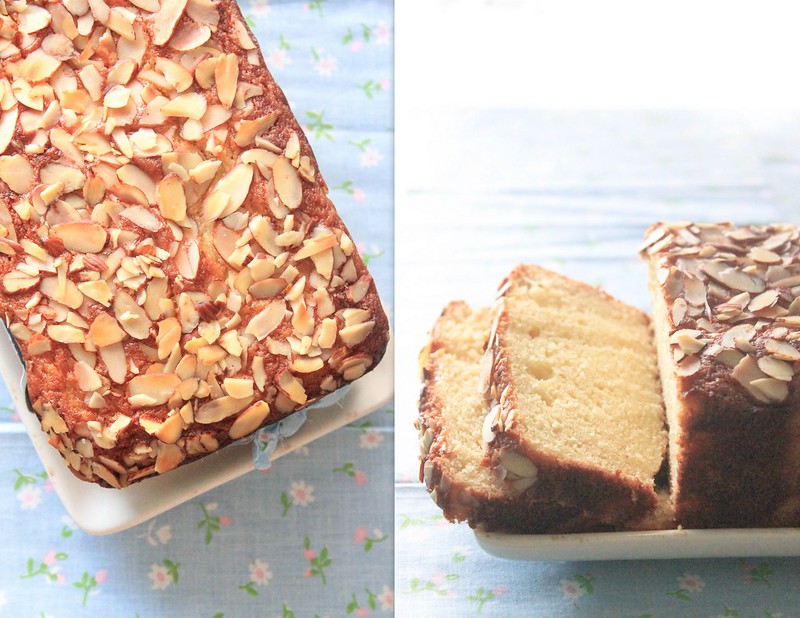
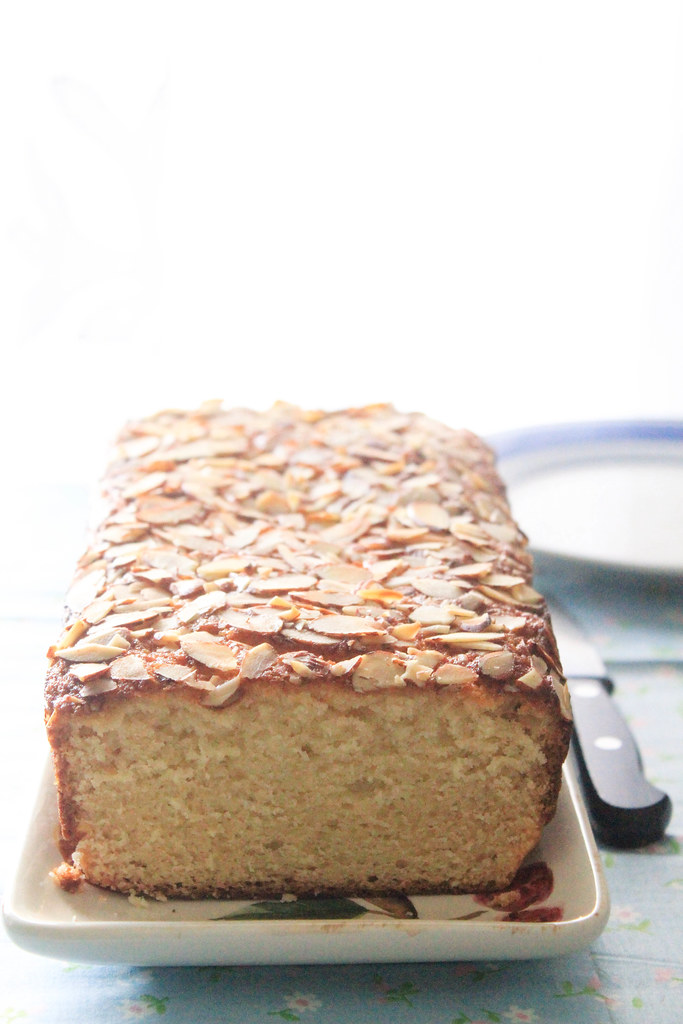
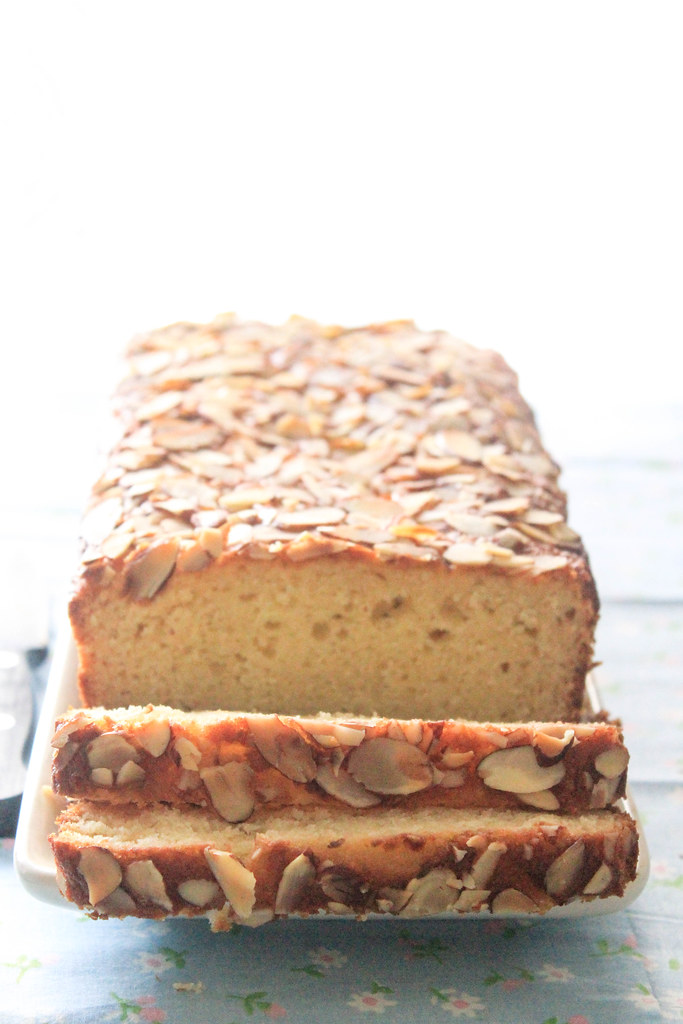
This cake has been on my to-bake list for atleast 2 years now. I really don't know what took me so long though.All the ingredients are my pantry staple.I am sure, it's your pantry staple too. Sometimes,certain good things have to wait. I am so glad that wait is over because this cake is a very good one. Moist,buttery, melt-in-the-mouth soft and slices beautifully! Isn't that how a good cake is meant to be?
HONEY & ALMOND LOAF CAKE
I love adding honey to my food,indirectly. You would have seen that in my WHITE HOUSE HONEY & OATMEAL MUFFINS, HONEY ROASTED ALMONDS & BBQ PORK SPARE RIBS.This cake recipe is from Donna Hay. I chance upon this one while I was browsing through the numerous recipes she has on her beautiful website. If you haven't visited her's , please do. It's a magical place to be.The original recipe doesn't call for almonds to be scattered on top but I thought that would make our cake look prettier. You can omit that step,for sure!
HONEY & ALMOND LOAF CAKE
Jobin is the reason why we have honey at home. He drinks a concoction of lime juice, honey and warm water every morning before his run.Even though he's been telling me to try it, I just cannot. The taste of raw honey makes me gag.I am not joking.But, it's a totally different thing, if it's added indirectly to my food. I adore it. I love whatever I've tasted so far that's been cooked with honey.One of my favourite dips these days is Honey Mustard. Two things that I dislike in the raw form,when combined, becomes my most favourite thing to dip my food into.I don't think I can get more weird that this!
HONEY & ALMOND LOAF CAKE
So, the other day I was watching Food Network and Ian was watching it with me.We were watching a cupcake show and immediately the little boy started asking me for cake. It was a very clear request which was slowly changing into a demand. And I had zero cake in the house. I somehow convinced him I would make one that day and pacified him by giving him an ORANGE -RAISIN BUTTERMILK SCONE. Later, when he was taking a nap, I made this cake. I was so glad that I did it because he woke up asking for it. I have always noticed that if he goes to sleep asking for food, even if I fed him a minute ago, he would wake up asking for the same thing, be it 10 hours later. I do have a boy who loves to eat,for sure!

MELT & MIX HONEY CAKE
Makes one 8 inch loaf
Serves 10-12

Ingredients:
1 3/4 cups (260 g) self raising flour
3/4 cup (165g) caster sugar
1/2 cup (125ml) honey
155 g unsalted butter,melted
3 large eggs,slightly beaten
3/4 cup (180g) sour cream / thick yogurt
1 cup sliced almonds

Method: Preheat the oven to 350 F/180C.
Place the flour and sugar in a bowl. In a separate bowl, combine butter, eggs, honey & sour cream,until well combined.Add the flour mixture and mix until just combined. Pour into a prepared loaf tin,top with sliced almonds and bake for 45-50 minutes or until done. Let it cool in the tin for 10 minutes, then, unmould it and let it cool completely.

All I can say is that, this is a delicious cake.Usually butter cakes need the regular beating and folding of the ingredients,whereas, this one doesn't require that method and it still produces a marvelous cake.This cake can be baked in a jiffy since you are melting the butter and not waiting for it come to room temperature before using it! See, isn't this a winner, all the way? We really liked this cake and this should keep Ian happy for a few days.

Thursday, July 10, 2014

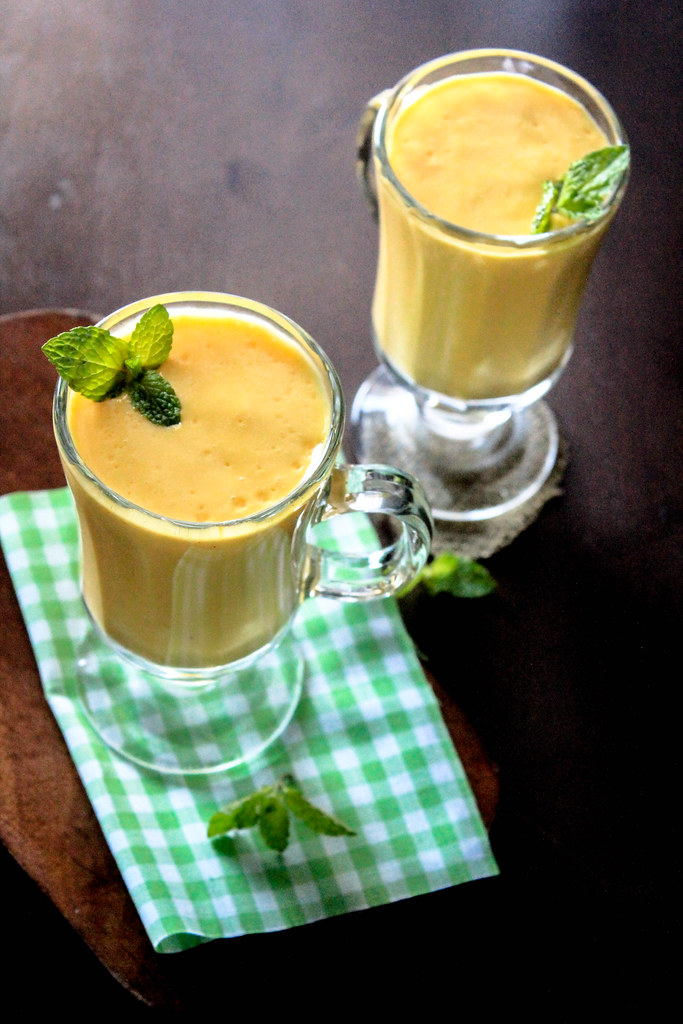
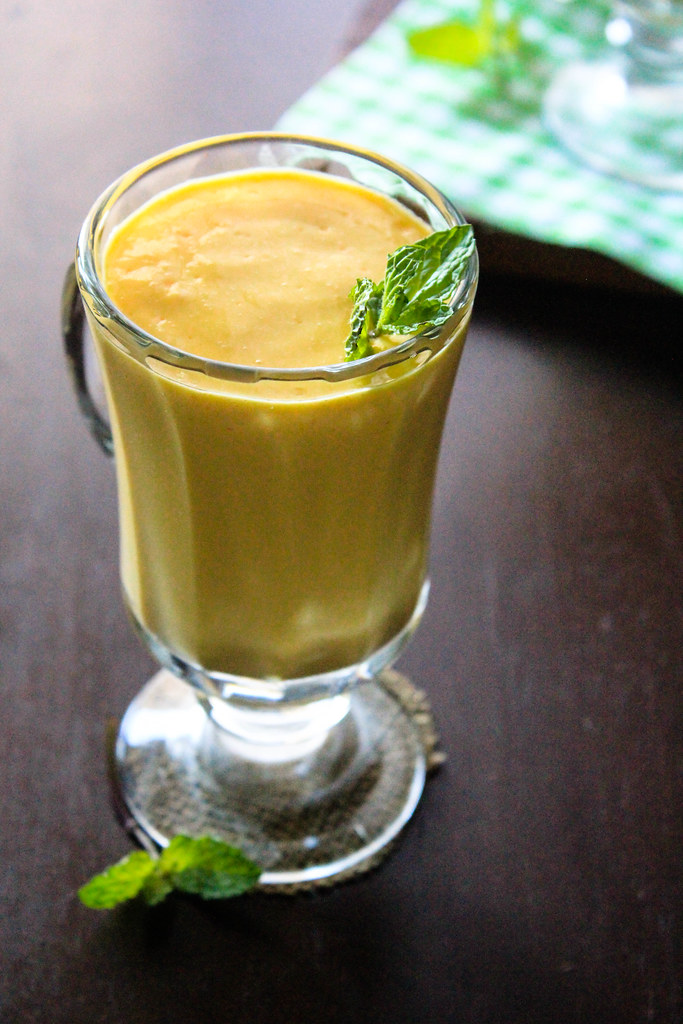
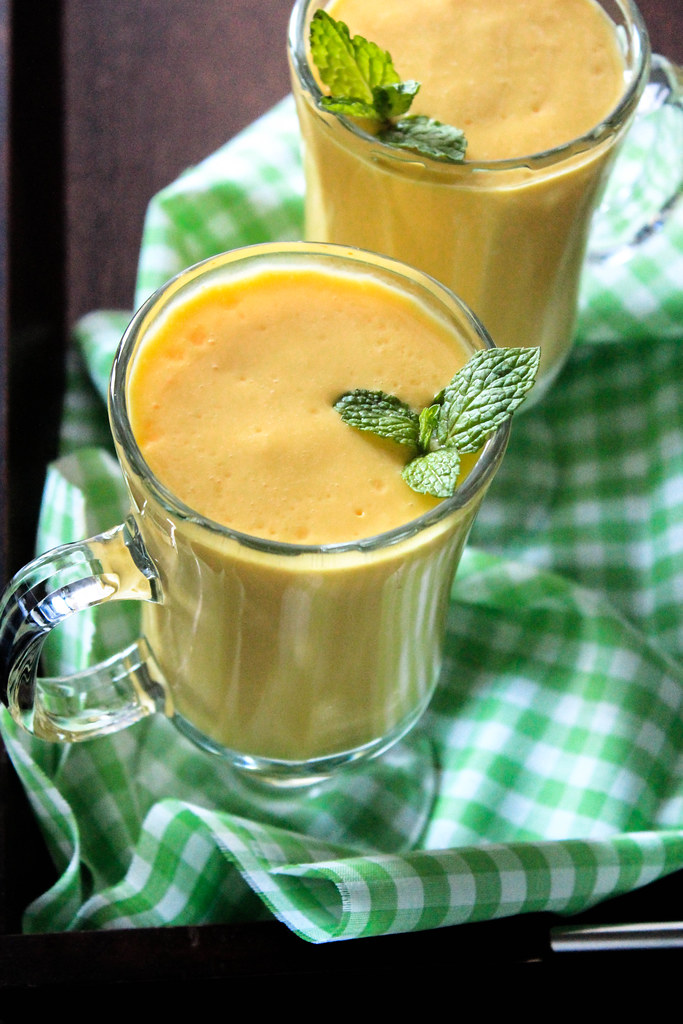
DELICIOUS MANGO LASSI

Minnesota likes to be cool,cold and coldest for the most part of the year.After living here for almost 5 years, I have now begun to understand the hype of Summer around this part of the globe. Everyone just waits for it to be warm.And that doesn't last for more than a few weeks here.By then it's Fall already!Then the days fly by till January and after that, nothing moves or changes for the next few months. That's the season I am not looking forward to!
MANGO LASSI
For me, Summer should make you feel warm and not hot and sweaty. I don't like hot days. I always tell Jobin, that, there's a smell in the air which reminds me of Summer always. I think it's the humidity and the heat from the roads which produces that smell. It also means, I get to smell the wafting aromas of everything that's cooking on our neighbourhood grills. It's such an awesome smell of seared meat and roasted veggies. Yum! That's the summer I like.
MANGO LASSI
This is that time of the year when you get to go to the Farmers Market and enjoy the beautiful produce & flowers that's grown locally.It really is a beautiful sight! This is the time when Lemonade stands pop up here and there, with variety of flavours. I love a good Lemonade. But, I also love a good,very cold Lassi. Amma is the biggest fan of Lassi in our house. She just simply adores that cold concoction of thick yogurt and sugar.
MANGO LASSI
We don't get a decent Lassi anywhere in Kerala, from our personal experiences. It's always a sour thing. A good lassi is not sour. It's just the plain goodness of freshly set yogurt and not the ones that's been lying around in the fridge for days! We always look forward to our trips to Karnataka & Tamil Nadu and then gulp down our share of Sweet Lassi. It was not until we moved to Minnesota that I got a chance to taste a Mango Lassi.
MANGO LASSI
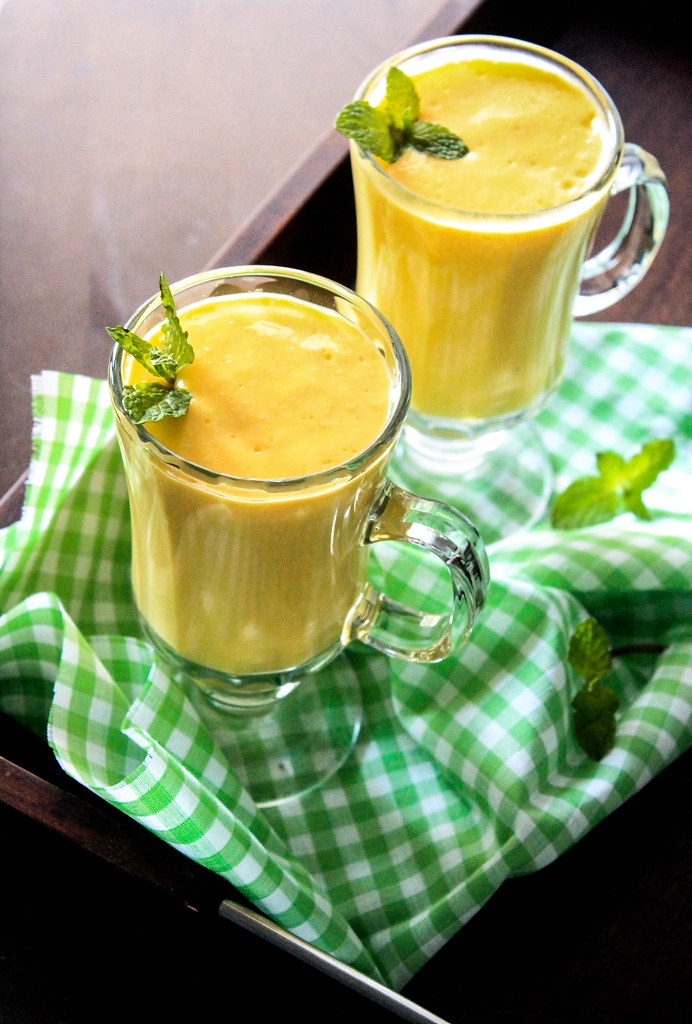
It was about 4 1/2 years ago when we both, right after moving to this town,went to buy Chicken Biriyani from a store which was a good 10 miles away from where we lived. While I waited in the car, Jobin brought me a plastic container filled with Mango Lassi. I was a bit hesitant to try it, even though I love Mangoes. Boy! I was so wrong! It was one of the most delicious drinks I've had so far. It was sweet, thick, cold and delicious down to the last drop. I don't know how they made it there but here's how I make it at home.

DELICIOUS MANGO LASSI
MANGO LASSI My own recipe
Serves 3-4

Ingredients:
1 cup thick whole milk yogurt
Scant 1 cup tinned sweetened mango pulp (or to taste)
1/4 cup whole milk
3 ice cubes
a pinch of ground cardamom (optional)


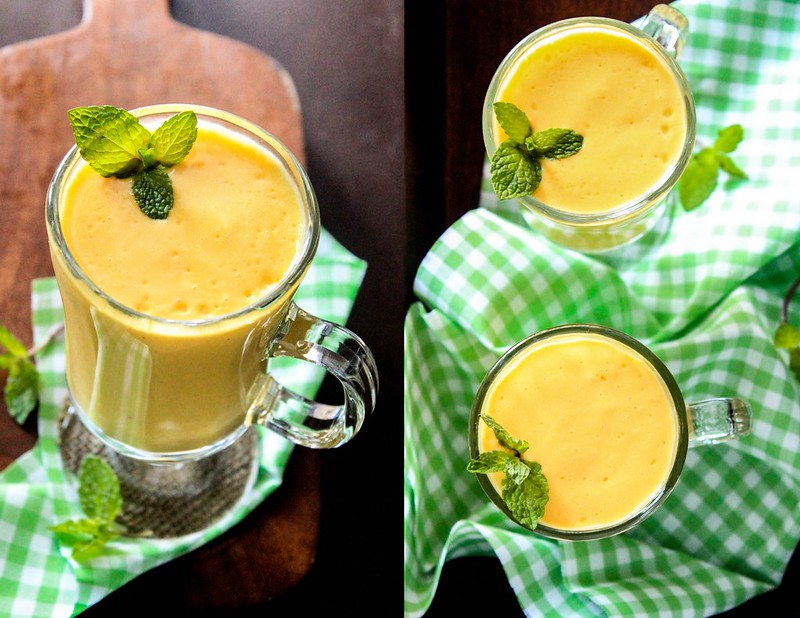
Method: Blend everything together until the ice blends in with the lassi.Serve cold garnished with a sprig of mint.


I bet you all knew how to make it already, right? This is hardly a recipe. A few things are thrown into the blender and that's it! All 3 of us love this,especially Ian. The first time he tasted this was when he was around 8 months.You will not believe if I told you the fuss he made when that got over! We ordered another one for him, which he gulped down happily, only half way though. He loves yogurt so it was not a surprise to me!
 

Wednesday, July 9, 2014

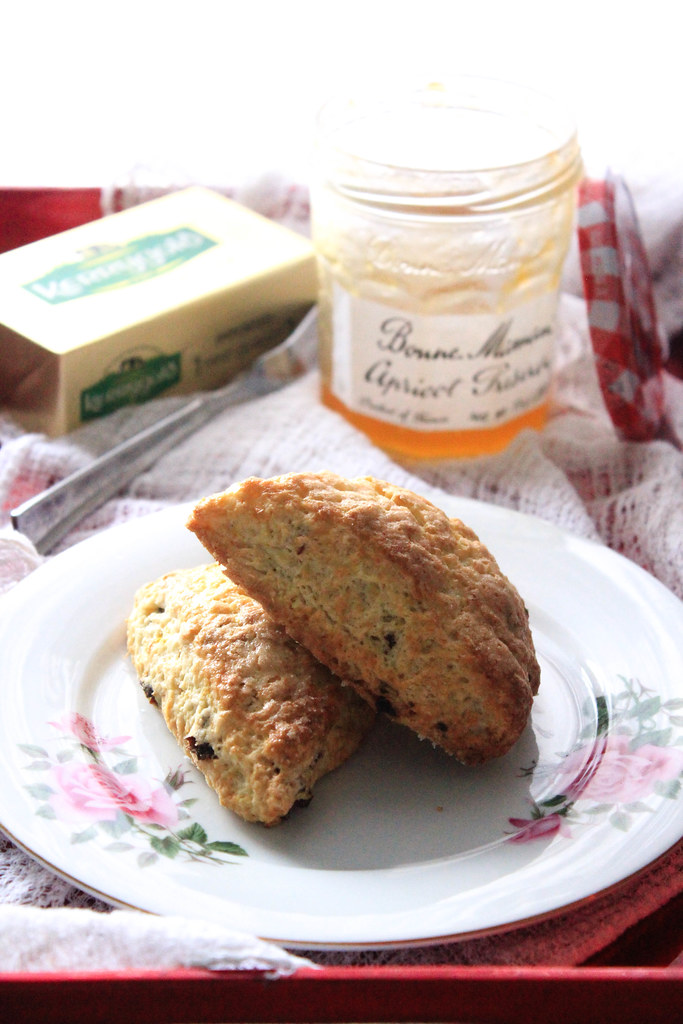
ORANGE - RAISIN BUTTERMILK SCONES

These have to be the best scones I've eaten in my whole life. It's not just about the taste, it's about how light,tender and buttery it is.Scone making is not a rocket science. Infact, nothing is.Atleast that's what I have understood. It needs some TLC. Tender loving care.Just like how we like to be TLC-ed, even food likes to be treated the same way and then you will see the magic working! For the best results,always use the best ingredients. I've read somewhere that whatever you put into your pot,is what you will be getting. There's no magic a pot can do. I think that is true.
ORANGE - RAISIN SCONES
Scones have been a part of my dreams ever since I started reading Enid Blyton's as a child. Especially the Famous Five series. You have no idea how much I wanted to eat them as a child. That's when I found a cookbook in my Mamma's stash, a book which had a few British recipes along with some Indonesian recipes.It had a recipe for griddle scones. Having no idea that they were different from the baked ones, I thought of giving that recipe a try.To be honest, I still remember how terrible they were. They tasted just like flour and egg cooked together.
ORANGE - RAISIN SCONES
These are different. Ever since I baked my CREAM SCONES WITH CHOCOLATE CHUNKS (my first!),I have been hooked. I tasted the first ones from a coffee shop here and wondered for days how good those were. Once I baked my own, I liked those much better than the store made ones. It was less sweet and much lighter in texture. If you don't handle the scone dough lightly, it will reflect in your baked product.You want them to be light,like clouds. Yesterday, I was itching to bake something and was wondering what that should be.Ian loves every single thing that comes out of the oven. Moreover, we just got back from Chicago after attending a wedding over the long weekend and that means, there's no food at home. I mean, to snack on.
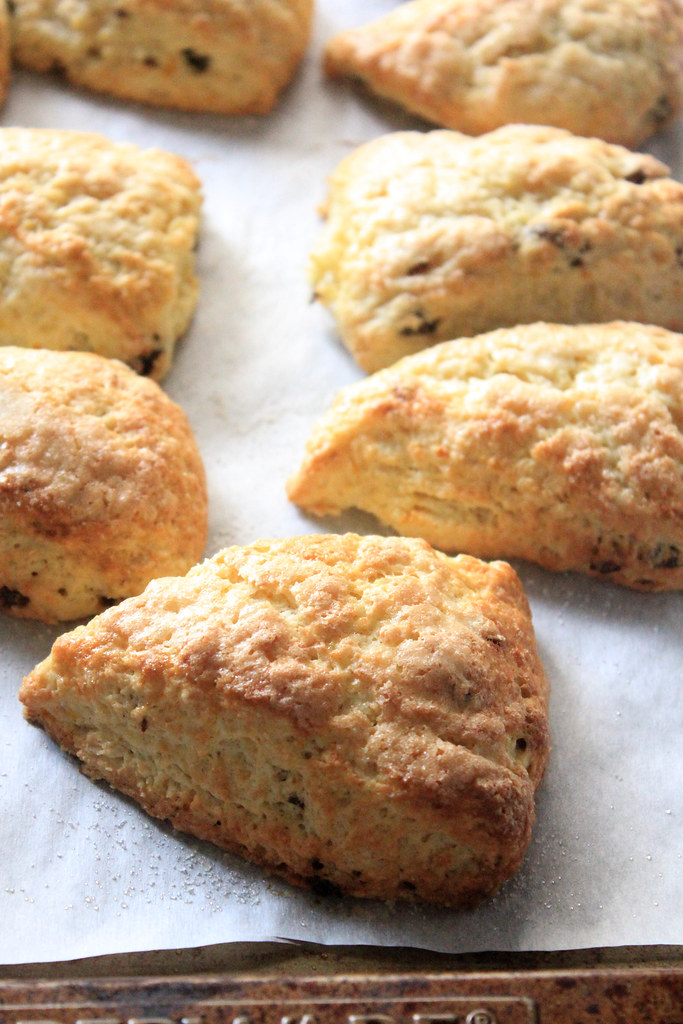
ORANGE - RAISIN SCONES
I opened the fridge for some inspiration and found an Orange and some raisins.That's when it clicked me that I've been thinking of trying an Orange - Raisin scone I found in Marjorie's book,The Road to Blue Ribbon Baking. That book is just awesome! She has won plenty of Blue Ribbons at the Minnesota State Fair. Her book contains 100 Blue Ribbon recipes of hers and I am so happy to have come across that book. I really have to bake my way through each of it. Her stories are so inspiring. Minnesota State Fair is a fun place to be,where all you can find is fried food. We go there every year and load up on our share of calories from there. I am so looking forward to going there this year as well. For that, I need to wait till it's September.
ORANGE - RAISIN SCONES
The past few days have been super crazy for me. I've been cooking in bulk which will continue until Saturday.In between all that, there's a class of mine coming up at a local cookery school. I am told that the class is sold out,which of course, is a good news for me!Now getting back to the scone recipe...this original recipe makes one big 8 inch circle yielding 8 huge scones .Since I decided to cut down on the serving size, I divided the scone dough into two 4 inch circles yielding 16 smaller ones.
ORANGE - RAISIN BUTTERMILK  SCONES
ORANGE - RAISIN SCONES Makes 16 small ones

Ingredients:
2 cups all purpose flour
3 tablespoons sugar
2 1/2 tablespoons baking powder
1/2 teaspoon baking soda
1/4 teaspoon salt
2 teaspoons grated orange zest
1/2 cup very cold unsalted butter
1/2 cup raisins
1 egg
1/2 cup buttermilk
1 egg, slightly beaten
3 tablespoons granulated sugar

Method: Preheat the oven to 400F.
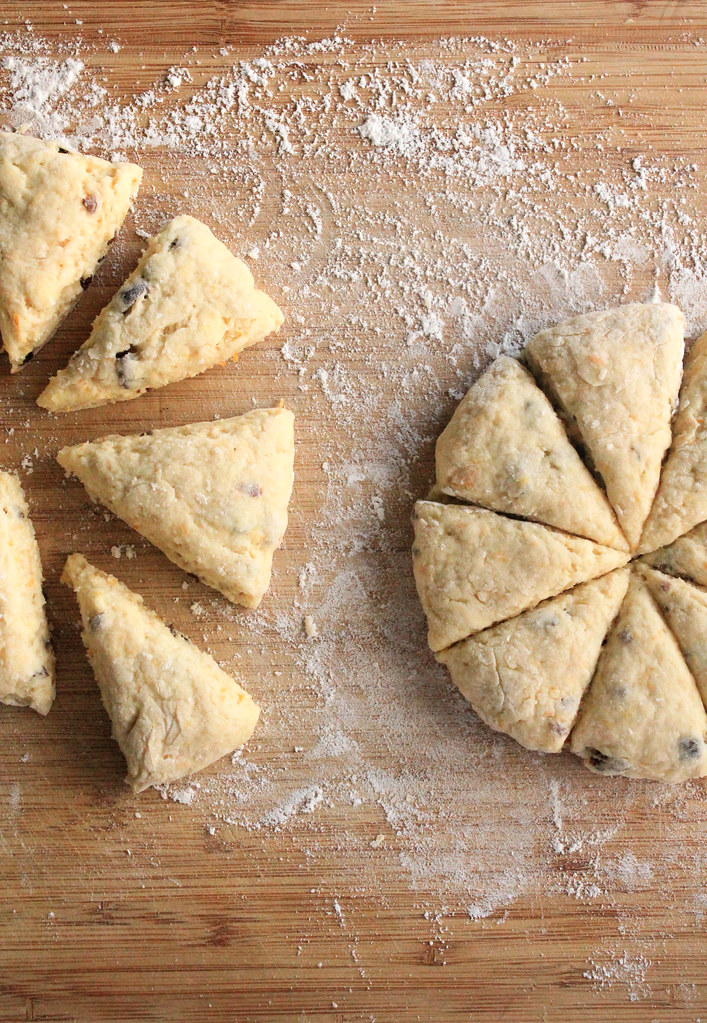
Combine flour,sugar,baking powder,baking soda,orange zest & salt in a bowl. Cut in the butter using a pastry blender until it forms a crumbly mixture. Stir in the raisins. Beat one egg slightly in a small bowl;add buttermilk. Stir egg buttermilk mixture into the dry mixture. Dump it onto a floured board and knead gently 10 times. Pat or roll it out to an 8 inch circle and cut them into eight pieces. Transfer them to a lined baking tin and brush the tops with beaten egg. Sprinkle the top generously with sugar and bake for 12-15 minutes or until the tops are golden brown. Serve warm.
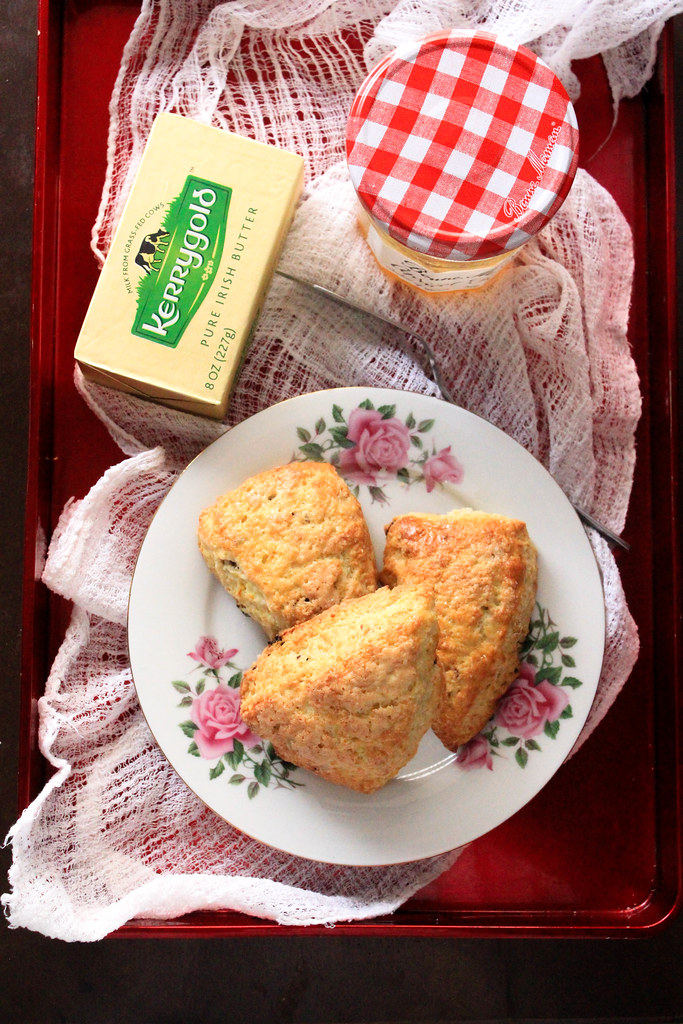
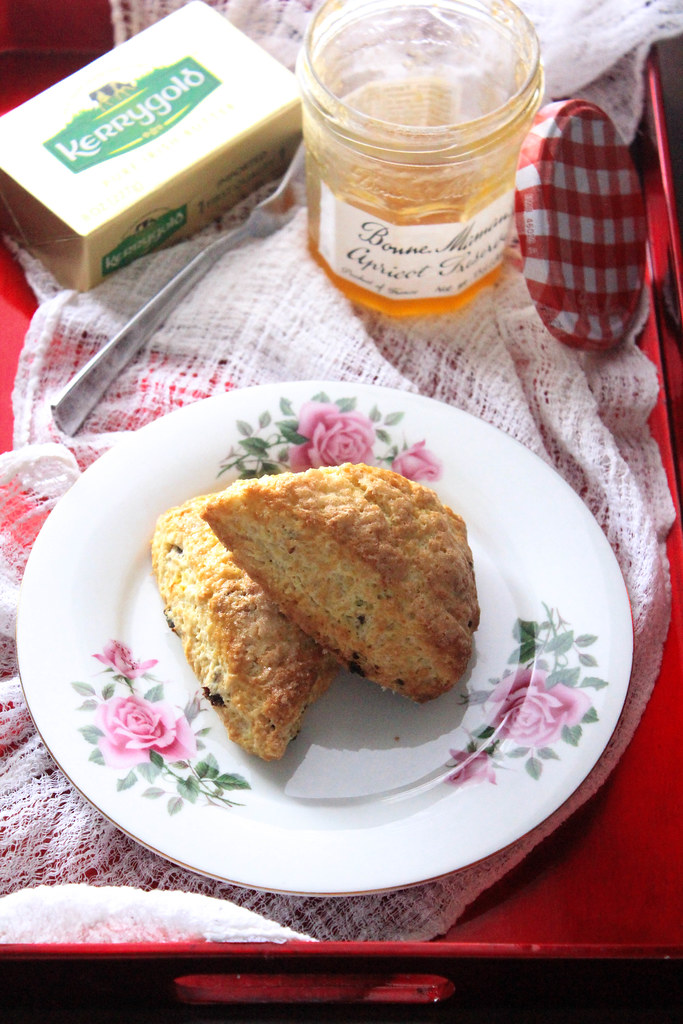
There are times when I sit back and wonder about the magic some flour,eggs and butter can do. I mean, that's the basic ingredients used for cakes, cookies, pies, tarts, cupcakes, scones, biscuits etc. So much variety from a few ingredients! This recipe blew my mind...it really is a good one. If you are a scone lover like me, you should really try making it once. You will never buy them again!
Related Posts Plugin for WordPress, Blogger...