Ria's Collection: March 2010

Wednesday, March 31, 2010

CHICKEN FRIED RICE ...re-kindling memories


My mom's fried rice is one of the best fried rice anyone could possibly have.It is definatley not just my testimony, but by others who have travelled around the globe and had a chance to taste all those wonderful food . It is actually an adaptation of my grandmother's. If there is anyone who does not agree to the comment I made above, it has to be my dad, because he still says, 'Mamma's is original!' :)

Today, while I was cooking with my cousin, we were talking about different tastes people have. I feel that most  women carry the taste of their own homes to the homes that they are married into, or the one they eventually set up. I am saying this because, I could see myself doing that everyday.

But, my mom, didn't know the ABC of cooking when she got married (well, she knew how to make omlettes and tea). It was my grandmother who taught her a LOT of stuff, so Amma still re-creates that taste at home... Lucky Dad but Poor Jobin! ;)

This fried rice was taught to my grandma by her cook in Malaysia...but eventually it was Indian-ised , a lot!

CHICKEN FRIED RICE
Recipe source: Mamma

Ingredients
Chicken- 100 g, boiled &shredded [ you can completely omit this or substitute with prawns/meat  etc]
Rice- 2 cups, boiled and cooled
Cabbage-100 g, shredded
Beans-100 g, cut finely
Carrot-100g, chopped fine
Soya sauce-2 tbsp or to taste and colour
Ginger -garlic paste- 2 tbsp
Spring onions- 2 stems, chopped
Salt- as needed
Oil- 5 tbsp
Method:
  • Boil rice [for 1 cup rice, use 1 1/1 cups water ] and lay it out on a cotton fabric or kitchen towel so that it is cooled well.
  • Heat oil, add the ginger garlic paste and saute well.
  • Add the vegetables and mix well. Cover and cook for 6-7 mins.
  • Add the chicken pieces and give it a quick mix.
  • Add the cooled ,lump free rice and mix.
  • Add soya sauce and  salt.
  • Mix well and let the rice get a bit crisp {keep it over the fire for 5-6 mins , mixing well in between.]
  • Garnish with spring onions & serve hot.
  •  
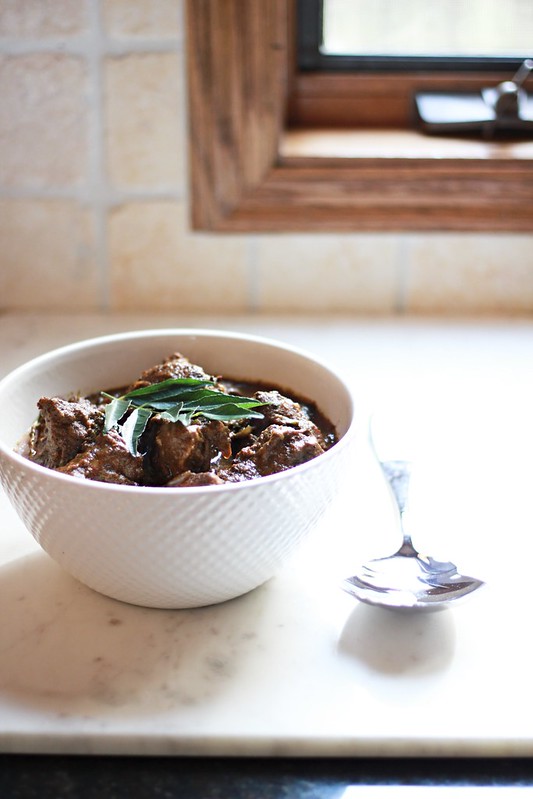
     Just incase you are wondering where the recipe for the curry is, it will be up on my blog very soon! Keep checking!! :)

    Monday, March 29, 2010

    FOOD BLOGGER COUSIN'S MEET!

    Most of you might know Priya Soshy,but I bet you guys do not know that we are first cousins :) We both grew up together in Kannur.

    We went over to her place last night for dinner and look what she served us!
    While she was in the kitchen getting things ready to lay the table I suddenly thought about it and joked around with her saying, Hey! it's food blogger cousin's meet! :) And the meal was ended with her famous Mango Pudding. It was really good! I had heard a LOT about it while I was in India!
    Oh yes! I did scrape the bottom of the dessert bow! It was really delicious!

    So if you all want to know how to make that dessert , hop over to her place and have a look at her beautiful collection!!

    Wednesday, March 24, 2010

    PAPDI CHAAT! Coming over for a chat?


    For the last few days, I have been craving for chaat. Now that I don't live in India anymore ( not that we had chaatwala's in Kannur), I have no other choice but to make it from scratch. I am not complaining, I always wanted to make the ever-loving tangy tamarind chutney and making papdi is a breeze.


    I started off thinking I would end with Pani Puri but, I ended up with Papdi Chaat due to lack of ingredients in our pantry.Nevertheless the end result was finger-licking, spoon-licking good. So, YAYY! ;)


    For all  my North Indian recipes Hetal & Anuja is my favourite source. Their recipes are fool proof. I have tried their  Besan Burfi,Kaju Burfi, Eggless Hazlenut & Date Cake, Molten Lava Cake,Reshmi Kababs, Silky Smooth Pedas and lot more recipes like Rasgulla, Rasmalai, Namak Paare which I never blogged about.

    Chaats are originally an Indian street food. Nowadays they are served even in high-end hotels too. They are popular equally among teens & elderly. There are different types of chaat like pani puri or golguppas,dahi bhalla, sev puri etc. All these are made with almost the same ingredients, main one being the tamarind chutney. It is a thick tangy, spicy ,sweet & sour sauce made out of tamarind pulp and jaggery . Papdi's are deep-fried pastry roundels (or squares). They add the crunch to the chaat. On the whole, any chaat is a very mouthwatering experience!


    How I made this simple: While the chutney was on the stove boiling & reducing away, I made the dough for the papdi and rolled & cut them. Once the chutney was done and safely put aside, I started frying the papdi's.Meantime I boiled channa /chickpeas (previously soaked)& potatoes. I could get the whole thing done in less than an hour's time! :)

    PAPDI CHAAT
    Things you will need:
    Tamrind chutney(homemade or storebought)
    Papdi's (homemade or storebought)
    Yoghurt - 1 1/2 cup, well beaten & chilled
    Onions- 1 small, chopped
    Coriander leaves- 1 small bunch, chopped
    Red chilli powder - 1 1/2 tsp
    Cumin powder- 1 1/2 tsp
    Salt- to taste

    HOMEMADE TAMARIND CHUTNEY
    Recipe source : Hetal & Anuja

    Tamarind pulp (storebought)- 2tbsp
    Water- 2 cups
    Salt- 1 tsp
    Jaggery-1/2 cup, powdered & packed
    Red chilli powder-1 tsp
    Cumin seeds-1 tsp
    Fennel seeds-1 tsp


    Method:
    • Heat one cup of water in a microwave (or stovetop) and add the tamarind paste to it. Mix well making sure there are no lumps in it.
    • Add the other one cup of water and boil it. 
    • Once it starts boiling, reduce the flame to medium and add the jaggery. Mix well and let it melt.
    • Let it boil till it reduces to half quantity.
    • Meanwhile, dry roast cumin seed and fennel seeds and powder them.
    • Once the chutney starts coating the back of a spoon, switch of the stove and add salt, red chilli poweder and powdered spices. Mix well.
    • Adjust the salt if needed.
    HOMEMADE PAPDI
    My own recipe

    Ingredients
    All purpose flour- 1 1/2 cups
    Oil- 2 tbps
    Ajwain-1/2 tsp
    Salt-to taste
    Water- 1/4 -1/2 cup


    Method:
    • Mix together flour, salt and ajwain.
    • Add oil to it and rub well. 
    • Add just enough water and make a hard dough (not as soft as chapathi dough).
    • Let it rest covered for 20 mins.
    • Roll out thin (If you have used the right amount of water, you wouldn't need any dusting of flour while rolling)
    • Pierce the pastry all over with the tines of a fork.Cut rounds or any other shapes from it.
    • Deep fry in hot oil and drain on kitchen towel.
    • You can make this ahead and store in airtight bags/tins.

    Assembly:
    Place 6-7 papdi's on a plate, add some channa/chickpeas and potatoes.
    Pour 3-4 tbsp of youghurt on it. Drizzles one tbsp of tamarind chutney on it.
    Garnish with coriander leaves and onions.
    Sprinkle salt, red chilli powder and cumin seed powder  as needed.

    Verdict: As soon as Jobin got back home, I served him a platefull. Zapp came the response:
    It was seriously delicious. I have some chutney leftover from yesterday. Just can't stop licking it everytime I open our refrigerator ;) Guess I'll have a chaat night every week :)

    Tuesday, March 23, 2010

    PERFECT CHOCOLATE DOUGHNUTS...the best homemade ones eva!

    Now, I can proudly say that I have mastered the art of baking those perfect doughnuts! It was a lil bumpy ride for me though :D From those hard biscuit like doughnuts( but they were delicious!) to chewy ones and whatnot, oh yeah!all that elbow grease too! :) So here I present to you the most perfect homemade doughnuts!

    I had posted their pictures long back on Facebook and many have been asking me for it's recipe. So this one is for you all, my lovely FB friends! Thanks for being so patient! :)
    THOSE PERFECT CHOCOLATE DOUGHNUTS
    Recipes source: Institute Of Baking and Cake Art

    Ingredients:
    250 g flour
    7.5 g (1 1/2 tsp)  yeast
    100 ml warm water
    4g (3/4 tsp) salt
    60 g granulated sugar
    5 g (1 tsp)  milk powder
    40 g margarine, frozen
    4g (3/4 tsp) baking powder
    1 egg,beaten
    Oil for deep frying

    Method:
    • Mix yeast, warm water and sugar and leave aside for 15 mins or till nice and frothy.
    • Sieve the dry ingredients together.
    • Cut and mix fat with flour. Mix well till fingertips till it resembles flaked rice (aval). 
    • Make a well in the centre & add yeast mix. Mix till well incorporated.
    • Add egg & mix well. If you feel the dough is sticky at this point, just add some more flour & mix till it is not sticky anymore. Knead for a good 5-6 minutes.
    • Let it rest for 30-40 mins or till doubled (in a warm place). 
    • After it doubles, punch down the dough with your palm. 
    • Roll out into 1/4- 1/2 inch thick and cut out shapes using a doughnut cutter or using 2 cookie cutters/bottle caps( one big & one small). Let it prove under wrap  for another 40 mins.
    • Deep fry in hot oil. (The oil should be real hot, but fry on medium flame . Otherwise, the centre will not be cooked and the exterior will brown soon!)
    • Drain on kitchen towel and serve as is or with a chocolate coating.

    Chocolate Ganache

    Ingredients:
    100 g Dark Chocolate
    100 g Fresh cream (25% fat- Amul)

    Method:
    • Chop chocolate into small chunks and leave it in a glass/staineless steel bowl.
    • Heat fresh cream in a saucepan till it comes to a boil .
    • Pour the hot cream over the chocolate and let it sit for 5 mins.
    • Stir it till you get a glossy chocolate-y mixture. Let it cool.
    • Dip the doughnuts half way into it , decorate with 100's & 1000's (multi coloured sprinkles) and serve.


    Note: This doughnut is best served on the day it is made.

    What are you waiting for now? Have you not waited enough for this recipe? ;) Get baking girls and boys!I hope the pictures have done justice in salivating you all :)

    These doughnuts are YeastSpotted!

    Monday, March 15, 2010

    OLD FASHIONED CHOCOLATE CAKE to celebrate our one month anniversary!

    Time sure flies! I feel it was just yesterday that I blogged about my wedding preparations and what not! But now, it's been a month! To be honest, we both still do not feel that we are married! :) Was it the same with you all? :)

    This morning, I gave Jobin a bunch of mistletoe. It is evergreen. I hope & pray that our love remains as evergreen as a mistletoe.

    Now, I am definately flaunting...BIG TIME!! See, see! All those ingredients that have been starring my dreams are being a reality! I touched and tasted 'sour cream' today. I must say I am not a big fan, it is a bit too sour for my standards ;) And yes, those 'stick' butter? I touched them too! Plus, those brown eggs which Nigella always cracked with so much ease! Now, that leaves me with a question! Are the egg shells harder in India? I have always tried to crack eggs with just a little tap back home, but, it never cracked as it cracks here! So Nigella does not have any special skill in cracking eggs :) Good Lord! I am really (yawn) boring right? ;) Sorry, I cannot help it! :)


    OLD FASHIONED CHOCOLATE CAKE
    Recipe from Nigella Feasts ( Jobin sent me a copy of it as my birthday gift last May :D And I was waiting for 'that' occasion to come so that I could bake from that book! )

    For the cake:
    200g flour
    200g caster sugar
    1 1/2 tsp baking powder
    1/2 tsp baking soda
    2 eggs
    40g cocoa powder
    150g sour cream
    175g unsalted butter
    2 tsp Vanilla ( I substituted it with instant coffee powder)

    Method:
    • Blitz everything together in a food processor and bake for 35 mins at 180 deg.C
    Chocolate Icing

    175 g chocolate, chopped
    75 g butter
    125g sour cream
    300 g icing sugar
    1tbsp golden syrup
    1 tsp vanilla extract ( I substituted it with coffee powder)

    Method:
    • Melt chocolate and butter together.
    • When slightly cooled, add sugar and mix well.
    • Add rest of the ingredients and mix thoroughly.
    • Frost the cake completely. ( I cut the cake horizontally into 3 layers and sandwiched them )
    Verdict: We just sliced the cake 5 mins ago, and he loved it!

    I am sending this cake as an entry for my dearest friend Divya's Best Chocolate Cake event.

    Welcome Spring 2010!

    Friday, March 12, 2010

    LEMON CUPCAKES from my mentor!


    Dear Ria and Jobin,
    Congratulations to the cutest couple who finally ended their long distance romance and boarded the bus of dreams and happiness, to start a beautiful journey together in life! Though I have not met you or talked  to you in person, for me Ria was always that chirpy new blogger who kept knocking on my blog doors in the beginning of 2009, asking for new posts , when I was on a long hiatus from the blogosphere ….the girl who  got magic on her fingers to weave ‘gold flowers’ and mint ‘gold coins’ ………and Jobin, you’ re her prince charming who promised her a cheese castle when she finally joined you in your kingdom……… A couple who easily found a place in my heart!
    So, sometime towards the end of last year when Ria approached me to do a guest post for her blog to keep her ‘hungry blog’ alive in her absence at the time of for her wedding, I immediately said ‘yes’ and started dreaming in pink shades of wedding petite fours…those pretty little heart shaped iced beauties and in my dreams I dotted some of them with silver dragees and embroidered some with cute little white hearts and oh yeah, they looked so pretty and appropriate for the occasion, in my dreams!!!!
    Amidst making promises, planning and decorating, what I ignored was the fact that I had been baking a cute little thing in my oven and it would be ready in a short period and from there, the once taken for granted things – like sipping a cup of my morning tea with the love of my life, after an undisturbed 6-8 hours of sleep or brushing teeth looking at the mirror and wondering why the morning skin glow is not like the usual or throwing myself into the couch to adore the beauty of clear blue sky through my French windows or read a book- would be a luxury that the time and sleep deprived are not even privileged to dream of …..and to even think about ‘blo….’ was an unpardonable mistake !
    Yet the promise I made was always at the back of my mind, especially on those sleep deprived nights while rocking my little king, all swaddled up and cozy in my arms. But I couldn’t bring myself to write even a line as the shores of creativity had got drained up and  I was caught up with a serious blogger’s block and the only words that flow in my mind now are ‘nap time, feeding time, diaper change’ !!!But an hour back when I checked your blog, I realised that the parade of guest bloggers was over long time back and you re well settled in your new kitchen and have started hosting parties and buying tubs of cream cheese and touching real peaches for the first time in your lifeJ So, I had to try scribbling something with one eye fixed on the baby monitor and that blinking red light makes me restless!
    I know that parade and party is over and the entire blog world celebrated your wedding and though late, I send you these humble cupcakes from three of us….perfect to relish on one of those afternoons when both of you relive the memories of your long distance romance……let there always be a sunshine smile on your faces and I wish you both years and years of togetherness and happiness J

    Lemon Cupcakes
    (Recipe Source : Gorgeous cakes by Annie Bell)
    For the cake:
    • ½ cup ( 1 stick) unsalted butter, cubed
    • ½ cup raw ( or regular) sugar
    • Finely grated zest of 1 lemon
    • 2 medium eggs, separated
    • 5 tablespoon milk
    • 1 cup flour, sifted with 1 tsp baking powder
    • ¼ tsp sea salt or regular salt
      For frosting:
      • 1 ¼ cup confectioners sugar, sifted
      • 2 tbsp fresh lemon juice strained
    Directions:
    • Preheat the oven to 350 F
    • Cream the butter and sugar in a food processor until almost white. Incorporate the lemon zest and egg yolks, then the milk ( it may look curdled at this point) . Transfer the batter to a large bowl. Sift the flour and baking powder twice, then fold them, a third at a time, into the batter, as lightly as possible, followed by the second half. Arrange paper cups inside a muffin tray and fill two thirds full with batter.
    • Bake for 17-20 minutes until risen and springy to the touch. Remove and let cool.
    • For frosting, blend the confectioner’s sugar with lemon juice, and tint it pale yellow with a little coloring. Smooth a heaping teaspoon of frosting on each cake. Let set for about an hour.
      Hope both of you will enjoy these lemon cupcakes that are so soft, spongy and springy. If you ‘re in a romantic mood, place a sugared violet or any other flower of your choice over this “ sugary blanket of sticky lemon frosting” J
      With lots of love and prayers
    Shn

    Dear Shn,

    Shn...that name was intruiging for me! And Mishmash...even more! It was not just that ,it was actually your way of bringing life and re-kindling old memories and the dishes that faded along with it. But, when I went through your archive, it showcased an array of baked goodies and whatnot!! I just simply love your blog!!

    I really thought you were a 'strict' woman, because there was something so 'no- nonsense' about you.And when it was time for me to ask you for a guest post, I was seriously scared, but, at the same time I wanted one from you! :D  So I gathered up all the li'l courage that I ever had ;) and sent you an email. And the response was a yes! WOO HOO! 

    Thank you SO much Shn, for accepting my offer and taking time from your busy busy days to think, bake, click & write for me! I wouldn't have had any problem if you sent the post after your li'l King's First Birthday too! :) 

    The cupcakes look SO cute , and I love that you dreamt a lot about doing that 'petit fours' for us :) As usual, your pics are marvellous!

    Thank You!

    Lots of love and prayers,
    Ria 

    Thursday, March 11, 2010

    FRESH FRUIT & CREAM CHEESE TARTLETS ...and I give up my throne of 'Substitution Queen'

    Cream cheese was my dream cheese #1. We rarely got anything other than processed cheese in Kannur, so getting a good cheddar was a blessing! When I joined Daring Bakers last April, we had to bake a cheesecake and I was bent upon not substituting with storebought paneer instead I made it at home.

    So in my first interaction with a US supermarket, I was in search for cream cheese. Needless to say, I was surprised & confused! There were SO many varieties! I didn't know which one to pick up. I kept asking Jobin which one is 'that' cream cheese I was dreaming about :) He was as confused as I was! Finally I just picked up one slab! That was the first time I ever touched a cream cheese! :D LOL! I might be sounding very childish...but I just cannot help it! :)

     Then the next day, we went shopping for fruits . That's when I touched fresh peaches in my life for the first time! Aaaannndd I grabbed a big box of them. Then strawberries, plums, mandarin oranges followed suit! :)

    My niece's adore fresh fruits! And they were asking  me to make something out of them. So I thought of combining the cream cheese + fruits. And last night I bought a box of frozen pie crust too! I am on a spree to make my life a LOT easier...let me use those 'dream' ingredients without substituting it! I am tired of being a substitution queen! I give up my throne! ;)

    Then the recipe hunt started and I finally I decided upon making some fresh fruit tartlets. They were seeing me cook & click at the same time and I must say, it is definately not an easy job handling kids+cream cheese+ cut up fruits+ a crackly crust! Oh yeah! And when it comes to clicking pics... I could see my bouncer falling into the tartlets and whatnot! :)


    FRESH FRUIT & CREAM CHEESE TARTLETS

    Ingredients:
    Puff pastry sheet/Pie crust-1
    Cut up fresh fruits - as needed
    Cream cheese-6 oz [Hung yoghurt is a good substitute]
    Orange rind-1/4 tsp
    Powdered sugar-3-4 tbsp or to taste
    Vanilla extract-1 tsp

    Method:
    • Thaw & roll out the pastry sheet slightly on a cookie sheet and perforate it with the tines of a fork. Bake it for 10-12 mins at 180 deg C.
    •  Thaw the cream cheese for atleast 30 mins on the counter & mix it well with powdered sugar,orange rind and vanilla.
    • Once the pastry has cooled down, spread a thin layer of cream cheese mixture and then arrange the fruits on it.
    • Chill well. Slice and serve.
    I will be back shortly with another new recipe, mostly with another set of new friends :)


    Wednesday, March 10, 2010

    VANILLA BUTTER CAKE with CREME PATISSIERIE & VANILLA STRAWBERRY COMPOTE FILLING


    So, I am back :) &I have no idea where to start with, so let me just say, we are happily married and is leading a beautiful life. I have moved to USA and we are currently living in Virginia. It was very cold when we landed here, but now, it looks like spring is settling in. So,while I was going through a phase of multiple changes in my life...I had my lovely blogging friends who took up my space and made it their own :) Thank you Maria,Avanika,Jamie,Deeba,Aparna &Divya SO much! Our wedding was made a celebration in the blogosphere.A big thank you to all my wonderful wonderful blogging friends!

    Now lets get back to the cake. I made this a month or so ago for a prayer meeting in our church. It was the last one before I left the country, so I wanted to bake something special. The vanilla butter cake is a firm favourite in my house now.We were throughly hooked onto it after the Tiramisu Cake episode :) So keeping that as the base, I sandwiched them with my favourite pastry cream and a vanilla strawberry compote . It was an instant hit at the church. Will you believe me if I said it go over in less that 5 mins? :) It actually did! :)

    VANILLA BUTTER CAKE with CREME PATISSIERE & VANILLA STRAWBERRY COMPOTE FILLING.

    Recipe source: Dorie Greenspan

    Ingredients:
    2 cups cake flour( I substituted using this proportion: 1 cup cake flour = 3/4 cup flour + 2 tbsp cornflour)
    2 teaspoons baking powder
    1/8 teaspoon baking soda
    1/4 teaspoon salt
    1 1/4 sticks (10 tablespoons) unsalted butter, room temperature (I used salted butter)
    1 cup sugar

    3 large eggs
    1 large egg yolk
    1 1/2 teaspoons pure vanilla extract
    3/4 cup buttermilk

    Method:
    • Sift together the cake flour, baking powder, baking soda, and salt.
    • Working with a stand mixer, preferably fitted with a paddle attachment, or with a hand mixer in a large bowl, beat the butter on medium speed until soft and creamy. Add the sugar and beat for another 3 minutes. 
    • Add the eggs one by one, and then the yolk, beating for 1 minute after each addition. Beat in the vanilla; don’t be concerned if the mixture looks curdled. Reduce the mixer speed to low and add the dry ingredients alternately with the buttermilk, adding the dry ingredients in 3 additions and the milk in 2 (begin and end with the dry ingredients); scrape down the sides of the bowl as needed and mix only until the ingredients disappear into the batter. 
    • Divide the batter evenly between the two pans and smooth the tops with a rubber spatula.
    • Bake for 28 to 30 minutes, rotating the pans at the midway point. When fully baked, the cakes will be golden and springy to the touch and a thin knife inserted into the centers will come out clean. Transfer the cakes to a rack and cool for about 5 minutes, then run a knife around the sides of the cakes, unmold them, and peel off the paper liners. Invert and cool to room temperature right-side up.
    Creme Patissiere /Pastry Cream:
    Recipe source: Joy Of Baking

    1 1/4 cups milk
    1/2 vanilla bean, spilt lengthwise
    3 large egg yolks
    1/4 c granulated sugar
    1/8 c all purpose flour
    3 tbsp cornflour
    3/4 tbsp rum

    Method:
    • In a medium-sized stainless steel bowl, mix the sugar and egg yolks together with a wooden spoon. (Never let the mixture sit too long or you will get pieces of egg forming.)  Sift the flour and cornstarch together and then add to the egg mixture, mixing until you get a smooth paste.  Set aside.
    • Meanwhile in a saucepan combine the milk and split vanilla bean on medium heat until boiling.  (The milk will foam up to the top of pan when done, so watch carefully.)  Remove from heat and add slowly to egg mixture, whisking constantly to prevent curdling.  (If you get a few pieces of egg (curdling) in the mixture, pour through a strainer.)  Remove vanilla bean, scrape out seeds, and add the seeds to the egg mixture. (The vanilla bean can be dried and placed in your sugar bowl to give the sugar a vanilla flavor.  This sugar can then be used in baking where you would like a vanilla-flavored sugar, e.g. pies, cakes, cookies.)
    • Place the egg mixture back into a medium saucepan and cook over medium heat until boiling, whisking constantly.  When it boils, whisk mixture constantly for another 30 - 60 seconds until it becomes very thick and it is hard to stir.
    • Remove from heat and immediately whisk in the liqueur (if using).  Pour into a clean bowl and immediately cover the surface with plastic wrap to prevent a crust from forming.  Cool.  If not using right away refrigerate until needed, up to 3 days.  Beat before using to get rid of any lumps that may have formed.
    Vanilla Strawberry Compote
    Recipe: My own

    200 g Strawberries
    3-4 tbsp Vanilla sugar, or to taste
    1/2 Vanilla bean , split lengthwise 

    Method:
    • Wash and halve the strawberries.Mix it with sugar and leave to macerate in a saucepan for 20 mins.
    • Scrape out the seeds from the vanilla bean and add it to strawberries.
    • Cook on meduim flame till stawberries start oozing out water .Mash it with a fork.
    • Cook till thick and spreadable. 
    Soaking Syrup for cakes:
    Icing sugar- 200g
    Water-400 ml

    Method:
    • Mix icing sugar and water completely and soak the cake layers using it.

    For the icing:
    200 ml whipped cream (I used non-dairy whipped cream)

    Assembly:
    •  Cut the cake into 3 layers, hoziontally.
    • Place the first layer on the cake stand and soak it by sprinkling the syrup uniformly.Spread the pastry cream on it.
    • Place the second layer on top of the first layer and soak it. Spread the vanilla strawberry compote on it.
    • Place the third layer and soak it. 
    • Cover the top and sides of the cake with whipped cream,and decorate with strawberry slices, chocolate curls, silver dragees etc.
    • Chill for atleast 2 hours. It is best served when chilled.

    Tuesday, March 9, 2010

    DEEP DARK CHOCOLATE CAKE from my first guest!


    ' A comment on CHOCOLATE BISCUIT PUDDING  from Divya Kudua' was the line that made me happy for weeks together as it was the first comment I ever recieved on my blog! :D And slowly that blogger became my friend...a real good friend! We made plans for meeting up but my stupid phone had to show some problems then and our plans flopped! BIG time! ARGH! Nevertheless we have our share of fun through twitter and chat! 

    Do not forget to check out her lovely blog...she has a Best Chocolate Cake event happening out there with a GIVEAWAY! So what are you'll waiting for??


    Over to my lovely friend Divya :)

    Hello all,I take great pleasure to be on Ria’s blog doing a guest post for her while she’s away enjoying her newly married status.Hope you are having a great time baby!!

    It was a few months back[or is it more than a year already?] that I hopped on to Ria’s blog.I immediately connected with her style of writing and left a comment not knowing that I was the first person to post a comment on her newly-started blog!!Yay..:).We started commenting on each others blog,chatting on Gtalk and tweeting on Twitter.We exchanged phone numbers too and spoke to each other and it felt so good to actually hear each others voices and giggle over it!!


    She was so excited about her marriage and is a head-over-heels-in-love bride.I haven’t come across a bride who did her own make-up and baked her own wedding cake.Now come on,isn’t the pre-wedding time to enjoy and have fun and be stress free??The only way she de-stressed herself was to crochet golden flowers for her wedding attire and planning her wedding to the last detail.Three cheers to you.Jobin is very lucky to have you as his life partner.

    When she asked me to do a guest post for her,I actually got goosebumps.I mean,look at her blog-her recipes,her wonderful pictures,would I be able to do justice to her blog?I was not so sure.But a bride has to have what she wants and this is my humble attempt to “feed” her blog while she’s away.During her pre-wedding “ban” on baking by her mom,she was craving for some Chocolate cake and I didn’t have to think twice about what I was going to bake for her!!


    Let us raise a toast to the wonderful couple Ria and Jobin.Hope you have a wonderful time with each other and Wish you both a very very Happy Married life!!


    Deep Dark Chocolate Cake
    Recipe source -
    Hersheys


    Ingredients


    Sugar - 2 cups
    All Purpose flour - 1 3/4 cups
    Hershey's Cocoa - 3/4 cup [ I used Cadbury's]
    Baking Powder - 1 1/2 tsp
    Baking Soda - 1 1/2 tsp
    Salt - 1 tsp
    Eggs - 2
    Milk - 1 cup
    Vegetable oil - 1/2 cup
    Vanilla extract - 2 tsp
    Boiling water - 1 cup [ I added a tsp of Instant Coffee Powder to this]


    Method

    Heat oven to 350°F.
    Grease and flour two 9-inch round pans or one 13x9x2-inch baking pan. [I used two 8' round pans]
    Stir together sugar, flour, cocoa, baking powder, baking soda and salt in large bowl.
    Add eggs, milk, oil and vanilla; beat on medium speed of electric mixer 2 minutes.
    Stir in boiling water (batter will be thin).
    Pour batter into prepared pans. Bake 30 to 35 minutes for round pans, 35 to 40 minutes for rectangular pan or until wooden pick inserted in center comes out clean.
    Cool 10 minutes; remove from pans to wire racks. Cool completely.
    For the frosting
    Dark Chocolate - 200 gms [ chopped ]
    Cream - 200 ml
    In a pan boil the cream on a low flame till it heats up and bubbles start forming on the sides of the pan.
    Pour the hot cream over the chopped chocolates.
    Stir well and let it cool to room temperature.
    For the garnish
    Melt about 50 gms of dark chocolate in a Microwave.
    Pour the melted chocolate on a sheet of parchment paper and spread it thinly using a palette knife.
    While it starts setting,use a heart shaped cookie cutter to make impressions on it.
    Keep the chocolate in the freezer for a while and then remove the heart shaped chocolate from the parchment paper.
    Keep refrigerated until use.
    Assembling the Cake
    In a serving plate place one cake and spread 1/3 of the ganache.
    Place the next cake over it and cover it with 1/2 of it.
    Spread the rest of the ganache all over the cake.
    Place the heart shaped chocolates over it.
    Chill and serve.
    My best wishes and regards to the lovely couple!!

    Related Posts Plugin for WordPress, Blogger...