Ria's Collection: Indian recipes
Showing posts with label Indian recipes. Show all posts

Wednesday, August 17, 2011

COFFEE CREAM WHEEL

Coffee Cream Wheel
We are on a roll these days.Rolling from one part of the country to another.It's just the beginning of our journey. When we booked the tickets, Amma & I insisted that we go in a train so that we get to rest atleast for that many hours!To be at home, is the best thing to ever happen to many of us and that's even more awesome if you can lose some weight, even though you are gorging on endless yummy Amma-made food!

IMG_3136
This recipe is sensational. It is such an easy one and something you just cannot go wrong with! Did it seem that easy to you? If you just look at it, you wouldn't think so but when you actually make it, you would wonder how something so simple to make can turn out to be so tasty! Amma got this recipe from Amma's twin sister, Daisy.
IMG_3140
Yes,my Amma,Susy, has a twin.They are identical twins, in almost everything.Sharing recipes is one of their favourite hobbies which is also passed down to me.I recently started writing another diary with just homemade recipes...mostly passed down from my aunt's and cousins. I hope to fill it by the time this vacation of mine, is over.
IMG_3146
I have been itching to put this recipe here for a long time while I was in Minneapolis but it never happened. Today, finally it is here for you all. This is an excellent make-ahead snack/dessert and it freezes very very well! The only thing that you need to remember here is that, you have to refrigerate it. Don't leave it outside for too long or else the filling will become soft yet the taste won't be compromised :-)
IMG_3130
You can make these really small, like a candy or big like a summer sausage. It's totally upto you as to how big or small you want these to be. Whatever size it maybe, make sure you wrap it well so that once you store it in the fridge, it doesn't get any 'fridge' taste. I always feel if desserts are not covered when left in the fridge,it get's a fridge taste and I don't like it. So whatever you keep in the fridge, cover it well. You don't want all the flavours to be mixed up or do you? ;-)
IMG_3137
So are you all ready to make this easy peasy snack/dessert with some biscuits, butter and sugar? Say YES! please! :-)

IMG_3126COFFEE CREAM WHEEL
Recipe source: Amma via Daisy Mummy

Ingredients:
250 g Marie biscuits/ Graham crackers, powdered superfine
150 Sugar, powdered fine
1/2 c Warm water plus 1 or 2 (if needed)
1 tbsp Instant coffee granules
100g Salted butter,softened
1/4 tsp Vanilla extract

Method:
In a large bowl, dump in the powdered biscuits.Dissolve the coffee powder in warm water and add it to the biscuits and knead to form a smooth dough. It should not be too dry nor too wet. You should be able to kind of knead it. It will be smooth and soft, almost like a Chapathi dough.Divide it into 4.
Cream the butter and sugar. Add vanilla and beat to mix. Reserve.
Take a rectangular sheet of foil and roll out one ball of dough. It should be about 1/4" thick,as seen in the photographs above.
Spread some buttercream over it making sure it's spread all over. It need not be very thick,just a good coating would do.
Now, start rolling from the shorter side. You should roll it away from you, with out the foil. Take the help of the foil to lift the dough and to aid in rolling.
The dough will crack at the first roll but it's OK, it won't be seen in the end. Keep rolling and  it will come off the foil easily.
With the seam side down, wrap the assembly in the same foil and secure the ends tight. Refrigerate till firm.
Cut into thin circles with a serrated knife, carefully with the seam side down.
Enjoy!!

Verdict: Dee-li-cious! If you like, you can serve it with an ice cream of your choice. This is something I've grown up eating and it's still one of my favourites!

Wednesday, April 27, 2011

HOMEMADE TANDOORI MASALA

Tandoori Masala

Ilove anything 'Tandoori'. It has a unique flavour and is so Indian. Whichever Indian restaurant you go to(atleast to the ones I've been), you will always find a Tandoori Chicken/Butter Chicken/Chicken Tikka Masala on the menu. It is so Indian. I think we should have a 'National Masala' and there will be a tough competition between 'Tandoori & 'Garam' masala for that title:-) I really wouldn't know which one to choose because I love both!
Tandoori Masala

There are some thoughts which bother me when I try to find the 'perfect' recipe. For me, if I have tasted anything homemade first and then go to a restaurant, I always compare it  'homemade' to 'restaurant'. But if I have eaten anything in a restaurant for the first time and I try to make it at home, then it's restaurant to homemade comparison. Whatever it is, I think it should be the former first as I feel that is the real cooking with real ingredients! It's not that the restaurants are serving anything plastic, but a lot of unhealthy amounts of butter,cream & oil goes into it. Some people feel that if you add  lumps of butter, your dish can go from poor to rich and taste exceptional and I've been a victim of that, a sad victim. It was like I was drinking butter in the form of a curry :-D
Tandoori Chicken

It's all about the freshness of ingredients, how much you add and where you add it  makes all the difference. Again, this is my personal opinion .Now what does all this have to do with a simple Tandoori Masala, you may ask! I just shared what was in my mind, that's all :-) I made the BEST EVER Butter Chicken for dinner last night with this homemade masala and that is for another post. So till then , find some time to make this masala and keep it ready! When I post the butter chicken recipe, if you feel like it, you can make it for dinner that night or else you can use it for other recipes :-)

HOMEMADE TANDOORI MASALA
Recipe source : My very good friend Sadhana Ginde

Ingredients:
2 tbsp garam masala
2 tbsp ground cumin
1 tbsp coriander powder
4 tsp paprika (you can use Kashmiri Mirch)
2 tsp Kasuri Methi /Dried Fenugreek Leaves
1 tsp turmeric
1/2 tsp red chilli powder

Method:
Combine all the ingredients above using a whisk/spoon/coffee grinder and store it in an airtight container. It stays fresh for 4-6 weeks.


Verdict: It tastes exceptionally good!! Jobin found me reaching for the bottle this morning to have a whiff of it :) It smells so nice!

Monday, April 18, 2011

PAVAKKA MEZHUKKUPURATTI/ BITTER MELON STIR FRY

Pavakka Mezhukkupuratti
If it wasn't for Appan telling me that my blog has become boring because I haven't updated for a few days now, I would have really enjoyed being in my cocoon. Once something comes up between me and blogging it takes a big effort for me to get back to it. I like to be lazy and not type so many words and arrange pictures in between each paragraph and then 'publish' the post only to realise that there's a mistake in the recipe that I need to correct and so I 'edit' the post and 'publish' again. Sometimes after that I realise that my favourite picture of the dish is not even there in the final post!  Anyway, that pretty much sums up my day when I get back to blogging after a few days :-)
Pavakka

Pavakka/ Bittergourd is one of my favourite nutritious veggie (very good source of Iron). I love it's bitterness balanced with other ingredients that we add to it. This is a very simple dish that you can make, but you will need some time as it takes a good 30 mins to crisp up from it former bitter and green state to the beautiful mouthwatering crunchy brown stage. You can stop the cooking process in between and be happy or sad (mostly sad actually ) as it will be bitter and don't blame me ;-)
Roses

I'm not in a great mood to talk (rather write) much today as I am kind of busy (in my head) planning all my chores for this week. We are having a party at home this weekend and I am so looking forward to all the cooking and entertaining that comes along with it. I really am. I know some of you must be thinking whether I am crazy, but what to do, I love to cook and entertain! I always wanted my home to be a home full of eatables, always! My home was like that. It was always stocked with food. The minute some one walks in , they will be fed with everything homemade. We hardly had any bakery snacks except for 'kadala muttai'/ Chikki, 'Paper-il pothinja cake/ Sponge cake in candy wrapper', 'Motta puffs/ Egg Puffs' etc.
Pavakka Mezhukkupuratti

So when I got married and moved to US, I used to plan of stocking my freezer with ready-to-fry 'cutlets', 'spring rolls', 'fish packets' 'chicken samosa' etc so that I just have to thaw and fry when guests come home. Sadly, it doesn't work like how it works in India. No, no, not that I am lazy to make them, but we don't have guests like how we have in India unless we call them for supper or a meal together. Yeah, life here is quite boring when you think that way. So whoever comes home, I make sure they are well fed...till their nose!

So now, how many of you want to come home?? :-)
PavakkaPAVAKKA MEZHUKKUPURATTI
My own recipe (Just love the way it sounds!)
Serves 2

Ingredients:
4 medium sized bittergourd,sliced fine
1 large red onion, sliced fine
1 1/2 tsp red chilli powder or to your spice level
Salt to taste
Oil as needed

Method:
As mentioned, slice the bittergourd as fine as you can. I used my mandoline to slice them both (the onions).
In a large pan, mix all of the ingredients together and cook on medium-high heat till you get them as crispy as you see in the picture. It will take about 30 mins maximum and some amount of oil which needs to be drizzled in as and when needed. You will know when to add the extra oil when you are cooking this.


Verdict: Trust me, it tastes really good! Especially with rice and yogurt.

I am sending this yummy side dish as an entry to The Kerala Kitchen hosted by yours truly!

Tuesday, March 1, 2011

MEEN VEVICHATHU / KERALA STYLE RED FISH CURRY

Meen Vevichathu
Kerala style fish curry could be made in millions of ways because each household has a recipe of their own! How diverse can we get ? :) This recipe is the way Amma makes Fish Curry at home so it has the Alleppy- Kottayam- Changanaserry style in it and it is DEELICIOUS! I cannot emphasize enough on that because I haven't had many fish curry's which tastes as good as hers.

Now that was the red colour fish curry made with Kokum/Kudampuli. The place I grew up,Kannur, has another take over fish curry. It's yellow in colour and is made with Sambar puli/Tamarind and also has ground coconut in it. Trust me, I can drink that curry and I have done so! It is so tasty but I have never tried my hand at it which I will, very soon! Janu chechy, our maid at home for the last almost 30 years makes the best Kannur Meen Curry/Fish Curry. She is really old and I don't think she can see clearly anymore but when she makes the fish curry, it is just WOW! I also love her 'Pacchadi' and had written it down in my diary as Janu chechy's Pacchadi :-)
Meen Vevichathu

This particular red colour fish curry, which I will refer to as Meen Curry now on is not that easy to master. I think the main problem comes in balancing the 'puli'/tanginess with salt. My first attempt at it was in 10th standard and I produced a decent curry. I don't even remeber how it tasted because along with that curry I had made 33 others too. It was for a competition at the District level from school that I had participated in. We had to cook as many dishes as possible in 3 hours using a Kerosene stove and nutritious ingredients. There was no way that we could use a pressure cooker to speed up the process.It had to be a balanced meal and we had to cook breakfast items, lunch items, 4'o clock tea snacks and dinner items, in 3 hours! I managed to make the most number of dishes (34) which included varitey of Puttu,Fish curries,Sambar,Banana Fritters etc. I don't even remember the list as it was 10 years ago!
Meen Vevichathu
My recent attempt at it for the first time after wedding was a half flop, according to me. I really didn't like the colour of the curry, it was orangish and not the maroon red I wished for. Jobin and his mom said the curry tasted fine but I just couldn't accept that I couldn't cook a basic Meen curry properly! The second time, I paid more attention to it plus Amma's tip of 'sauteeing the masala more' helped tons! I got the beautiful colour and taste since then! So I thought it's time for me to share the recipe and confidence with you all, especially for you guys who are struggling to make a decent Meen curry :-) I know that struggle because I just got over it :-)
Meen Vevichathu
MEEN VEVICHATHU
Recipe source: Amma

Ingredients:
1.5kg fish (I used King Fish/Neimeen/Aikoora. You can use any fish of your choice)
1 small onion, chopped (If you have access to 'chumannulli'/Shallots use that, maybe 4-5 nos.)
2 tbsp ginger garlic paste
1/2 tsp fenugreek seeds/Uluva
2 sprigs of curry leaves
11/2 tbsp red chili powder (I use a mix of Kashmiri and Hot chili powder,Kashmiri gives colour to the curry)
1/2 tsp turmeric powder
2 tsp fenugreek powder
4 pieces of Kokum soaked in 1 c warm water (for 10 mins)
1/4 c Coconut Oil (you can substitute it with vegetable/canola oil)
1 c water (optional) for the gravy

Method:
Clean the fish thoroughly using salt and vingear and let it drain.
Heat oil and when it is hot add the fenugreek seeds . Let it change colour lightly.
Add the onions, ground paste ,curry leaves and saute till you get a nice aroma (1-2 mins)
Add in the powders and mix well and saute for 5-6 mins till the colour changes to a nice maroon.
Add in the 1 cup water and kokum +water and let it come to a boil.
Add the fish and swirl the pan lightly so that nothing sticks to the bottom of the pan.
Let it cook till the fish is done. Taste test it.
If you feel it's tangy (a little) , it's okay. Once the fish absorbs it in, it will be perfect.
If you feel it's a lot tangy, remove the kokum pieces from the curry . You can discard them.
This curry tastes better the next day .
Don't refrigerate the curry. Before you go to sleep, re-heat it and leave it to cool.
Next day morning, re-heat the curry again. This way, the gravy might reduce and will end up sticking to the fish pieces, which is heavenly! But if you want gravy, add some water when you boil the curry.

I never refrigerate the curry, I just re-heat it twice everyday till it is over :-)


Verdict: I am person who can live on Meen curry and rice alone and when I asked Jobin if he liked it the same way, he said 'No'! Infact he really doesn't like fish curry at all! I was devastated (exaggerated, I know!)

But remember that half-flop Meen curry I was talking about? He said he liked that curry and I was like,' This one? I made a real sad curry and you like that??'. Now things have changed and he is a convert,if I may say so :-) He likes Meen Curry now maybe not as much as Dal and Ladiesfinger fry!

Thursday, December 9, 2010

CHOCOLATE CHIP NANCUTS/NANKATAI


Ihave never baked so much in so little time. Phew! That was a LOT of baking happening in my kitchen. I must say,my oven is still grateful. It hasn't given up on me :-) But trust me, it feels so good to be near the oven during winter...keeps you warm and keeps your house warm,too! Plus, you get to eat your favourite baked goodies!
                                                                  Photo Courtesy: Chris Ann
I met Chris Ann last month for a small blogger meet in Minneapolis. I have to say, she was a very graceful host! She brought us some yummy yummy homemade chocolate chip cookies! I remember her saying that she slaved over it...I don't think so! ;-) Anyhow, it was delicious. During the meet,we were having a casual chat and she mentioned that she would like me to do a guest post for their 'Cookie Exchange' event on the blog during the month of December. I agreed on the spot. Why wouldn't I? :-)

But the challenge for me was that she asked me if I could bake some sort of an Indian cookie. Umm, now that's interesting! Indian cookie? I had to think about it for a while because we Indians, really don't have a 'typical' Indian baked goodie.But then again, there should be something that we can call it 'Indian'...and yes! it was a cookie called 'Nankatai' or 'Nancuts' as we call at home. Indian cookies or 'biscuits' as we call it, is never soft like the 'cookies' that we get in US. It's crisp, crunchy and even crumbly, at times. So this is the texture of this cookie/biscuit too. :-)

Nancuts is the simplest of all the cookies. It's a very simple 3-ingredient recipe. You don't need any fancy equipment to get it done. At any given point, you can bake these cookies in less than half an hour!Usually this cookie is baked plain or maybe with a hint of crushed/powdered cardamom. I thought of giving it a twist and added chocolate chips to the dough.

For recipe..visit Love Feast Table!

I am sending these cookies as my entry for the Monthly Mingle- Chocolate Extravaganza hosted by myself! :)

Season's Greetings!

Friday, November 5, 2010

JALEBI for the Festival of Lights - Diwali


I
f you are a follower of my blog, you would have noticed that I usually do not celebrate a lot of festivals here. It's not because I am partial towards any,it's just that I am not sure whether I'd be able to follow it every year. But Christmas is celebrated big and wide here :-) And I am so waiting for this year's X'mas, as it is our first X'mas together, my first white X'mas and also my first X'mas outside India and my family being SO far away.

I had been planning to try out Jalebi for sometime now and it just happened to be today and so I thought I'd rather kill 2 birds with one stone :-) This is not the first time I am making Jalebi's. When I was in India, I had tried it out once and it did come out pretty nice.So this time around I thought I'd use a different recipe so that I can compare the results between the previous recipe. I would say, this recipe had a better outcome. Or maybe I have become a better cook now :-)

Anyhow, this recipe is a keeper and you all should try this sometime. You may have to be a bit patient, though. I tried squiggling with the batter and the batter wouldn't come out. It let out air into hot oil and I was seriously loosing my patience.My friend, Reeta, who was with me when I tried it out last afternoon , suggested that I keep the squeeze bottle nozzle - side down so that the batter will flow down...and it did! :-) Then we both had a great time making Jalebi's :-) Oh by the way, try to have it as hot as possible, there's nothing like it!


JALEBI
Recipe source: Hetal & Anuja
Please note that I made only half the quantity and it yielded me about 20-22 jalebi's.

Ingredients:
All purpose flour/Maida- 2 c
Cardamom powder-1/8 tsp
Yeast-1 tsp
Warm water-1/4 c
Cornflour/Cornstarch-2 tsp
Oil-1 tsp
Yoghurt-1 tbsp
Warm water- 3/4 c

For the syrup:
Sugar-1 1/4 c
Water-1cup
Lime juice-1 tsp
Red food colour- a pinch
Cardamom powder-1/4 tsp

Method:
  • Dissolve the yeast in 1/4 c warm water and keep it aside for 10 mins until frothy.
  • Mix rest of the ingredients together and add in the yeast mixture.
  • Place this bowl in another bowl filled with some warm water. Cover the bowl with the mix with a lid.
  • Leave this in a warm place and let the mix rise for 45 mins.
  • Once it's risen, stir with a spoon , just to mix everything together.
  • Pour into a mustard/sauce bottle and keep aside.
During the last 5 mins of the dough rising, make the syrup for the jalebi and also heat the oil for frying.

For the syrup:
  • Heat everything together on high for 2 mins. Reduce the flame to a simmer.
Making the Jalebi:
  • When the oil is hot, squeeze out some batter from the bottle and move your hand in a circular motion till you form one jalebi. You might have to go round and round 5-6 times. Make sure you don't leave any loose ends because the jalebi will be open, otherwise.
  • Fry till golden on one side, the flip it over. When the bubbles subside, they are done.
  • Transfer the hot jalebi's into the simmering sugar syrup. 
  • Do not leave it for more than 30 seconds in it.Turn them and make sure the sugar syrup is coated on either side.
  • Transfer them to a plate and serve them hot!

Verdict:
It was perfectly sweet, juicy and crunchy.We really enjoyed this treat! I don't think it can get any simpler or easier to make at home. If you are having guests coming for lunch or dinner, you can surely make this ahead and serve it to them. Jalebi's have a very high 'oomph' factor attached to it :-)

So here I am, wishing all my readers a very happy & safe Diwali! ~*Enjoy your day*~


Thursday, September 16, 2010

GUILT FREE PEANUT LADOO


Trust me, I am in no mood to talk today. I think I have a spoken enough for the rest of my lifetime already! Jobin says I talk less these days ,when I feel I kill him with my non-stop nonsense banter (do couples always think opposite? ) He says I have become funnier after our wedding, when I think I have become boring day by day (so couples do think opposite, 100% sure!)

Now don't ask me what is the connection between my talks and this sweet. Absolutely nothing.This is how I am when I am in no mood to talk. I talk about things which has no connection between them. I get so bored talking about one thing at a time and Jobin gets so confused switching between topics at the same speed that I switch topics. 

Let me let you in on a big secret. I speak Malayalam way way way too better than Jobin. He will never agree to this, though. If he happens to read this post ( I am sure he will) , he will ask me to speak in Hindi (Uh-oh!).
Anyway, let's get back to the ladoos. This is a 3 ingredients, ghee-less, guilt - free ladoo than most of the ladoo's around. Try it and you won't be disappointed.


GUILT FREE PEANUT LADOO
Recipe source: Anushruti RK

Ingredients:
Roasted unsalted Peanuts without skin- 2c
Jaggery-3/4 c, powdered (You can find it in Indian grocery stores ]
Cardamom-4,seeds powdered and pods discarded.

Method:
For all those who have only raw peanuts with you, like me:
  • Heat a flat bottomed pan.Add in the peanuts (skin on) and roast for 5-6 mins or till you get a nice aroma . Is still in doubt, bite into one and if you get the roasted taste, switch of the flame.
  • Take the pan off the fire and transfer the peanuts onto a kitchen towel.
  • While it is still warm, rub the peanuts together using the help of the towel. The skin will come off easily. 
  • Use these peanuts for making ladoo's.
For making these round beauties you need to:
  • Powder the roasted peanuts in your mixie/magic bullet (small jar & 4 blade bottom) stopping every once in a while to ensure that it doesn't turn pasty.Nuts release oil when they are ground, so be careful.
  • Transfer this to a bowl and add the powdered jaggery and cardamom seeds to it.
  • Mix very well, if you have lumps in the jaggery, mash the mixture with a potato masher. I skipped it because I love biting into jaggery pieces.
  • Form the mixture into ladoos. You will need to use little bit of strength here to form them into balls as you don't any wet ingredient. But trust me, it's easy.
  • The peanuts must be warm while grinding so that the mixture remains warm when you form the balls, or else it will be slightly difficult. Just in case your mixture turns cold, like mine, microwave it for 10 secs and proceed to form the ladoos.


Verdict:
 For all those who love the ultimate combination of peanut and jaggery, go for it. I thought it would taste like 'kadala muttai' or 'peanut chikki' . Not exactly. It has it's own magic of lending a different flavour altogether.

A very appealing, easy to put-together recipe for all occasions. Jobin & I loved it and I had a tough time keeping some aside so that I could take pictures of it.

 I am sending this post as an entry to Sugar High Fridays : Bite sized desserts hosted by the lovely Aparna of My Diverse Kitchen.

Friday, September 3, 2010

THE ART OF CURRY MAKING


I made this curry for our dinner last night. I didn't have any idea as to what to make. I knew I wanted something with an onion- tomato puree based, but what veggies should I add in it?
I was talking with Jobin's mom over the phone while I was sauteeing the masala. And the conversation went like this:

Mummy: So, what are you cooking today?
Me: Curry, but I don't know what curry to make though I am sauteeing the masala now.
Mummy: Don't you have chicken or something at home?
Me: I do, but we had chicken curry 2 days ago :-(
Mummy: Make an egg curry then!
Me: Jobin had eggs for brekky already...so no more egg dosage ( though I'd love to! )
Mummy: (smiles)
Me: Sigh! Will do something.

Whenever I am in confusion, I open my kitchen cabinet where I keep my veggies,dal etc and stare at it (sometimes play with my hair too), trying to make a decision. And I instantly found my answer! POTATOES! How could I forget about it?? They are our fave and used to be my saviour at all my ' I don't know what to make' situation. I have no idea how I could forget about it ! Maybe because it's a long weekend and I am super excited about our trip to Wisconsin! :)


'IT ALMOST TASTES LIKE AN ALOO MAKHANI' CURRY
My own recipe and I am so proud of it :-)


Ingredients:
Potatoes- 2,large peeled and cubed
Mustard seeds-1/2 tsp
Cumin seeds- 1/2 tsp
Green chillies- 4, slit
Dry red chillies- 2
Red onion- 1, large (If you are in India or elsewhere, please use 2 large onions. We get coconut-sized onions here :D )
Tomatoes- 2 large ( If you are in India or elsewhere, please use 3 medium sized tomatoes.)
Water- 1/2 cup + 1 cup
Ginger garlic paste- 2 tsp
Coriander powder- 1 1/2 tsp
Red chilli powder- 1 tsp
Turmeric powder- 1/4 tsp
Salt- to taste
Oil- 3 tsp
Kasoori Methi/Dried Fenugreek leaves- 1 tbsp

Method: ( I cooked the curry on medium heat since it involved puree and I didn't want my kitchen to be splattered red and pink!)

  • Puree the onions and tomatoes together adding 1/2 cup of water.
  • Heat oil, add the mustard seeds and let it pop. Add the cumin seeds and let it crackle .
  • Add the green chillies and dry red chillies to it and fry for 10-15 secs.
  • Add the pureed mixture and mix well . Cover with a lid and cook for 15 mins stirring every now and then.
  • Add in the ginger garlic paste and mix well for a minute.
  • Add in the powders,salt , mix well , cover and cook for 3-4 mins.
  • Add in the potatoes, mix to coat ( by now the water must have all reduced).
  • Add in the remaining 1 cup of water and cook till the potatoes are fork- tender.
  • Crush the Kasoori Methi in your palm and add to the curry. Mix well.
  • If you want the curry to be rich and more like the makhani gravies,use ghee instead of oil in the beginning & add 1/2 cup of cream and 2 tbsp of unsalted butter toward the end. mix well and serve hot with roti's ,naan's etc.


Verdict:
Nowadays curry making is like an art for me.Maybe I don't know what veggies should go into it, but I very clearly know how I want it to look and taste like. And when I achieve that, I am a very happy girl.

When I set forward to make this curry, I had an imagination as to how I wanted it to turn out. I wanted it to have onion-tomato puree base with a hint of spices and I even knew how it wanted to smell. And trust me, I was able to get it into reality.
This curry will make you lick your fingers clean, of course your plate too! It pairs very well with Basmathi rice or even Sona Masoori. I knew I wouldn't be satisfied with just rice and curry, so made some Chapathi's too, to go along with it.We did have a good meal!

My two cents: This is not a curry which you can cook in less than 10 mins and such.It needs time as it involves puree. You really need to cook it well otherwise it will taste raw. So give time for it cook at each step.I learnt it the hard way and I used to blame myself saying ,'my veg curries never turn out good!' But now it does and I don't want you all to learn it that hard way! :)

Monday, May 3, 2010

KERALA STYLE BEEF FRY aka ERACHI ULARTHIYATHU


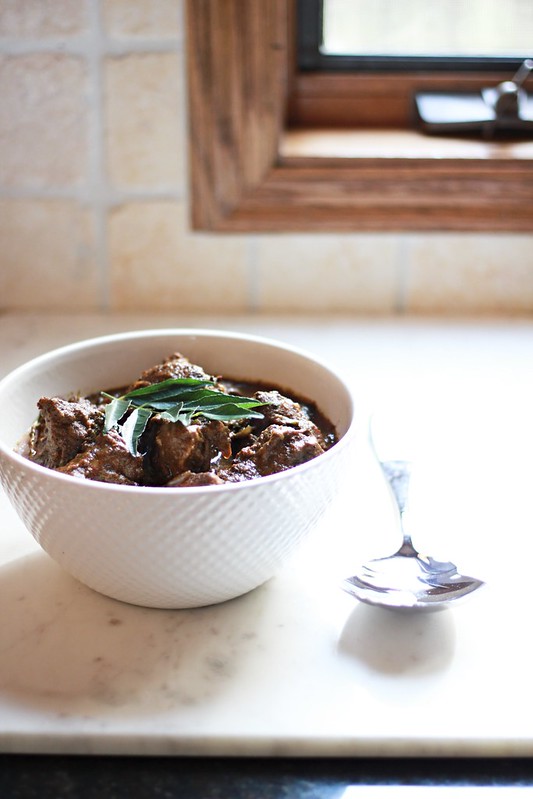
This is one of the food that I regularly make these days, especially when I crave for that typical Kerala food that we had at home. And whenever I used to see Amma making this, I don't know why,but I always felt that it was kind of a very -precise-calculated recipe. She never went by tablespoon of teaspoon measurements, maybe because of that ;)

So before our wedding, I had asked Amma to write down some of her recipes for me in a separate book. And she did! I must admit I own quite a lot of cookbooks from various authors, but I carried only 3 books with me to US. Those are Amma's handwritten recipes, her favourite Chinese cookbook and my recipe 'collection'. Afterall, that's all that you would really want for your daily cooking! :)

But when I had to make this, I couldn't find Amma's handwritten recipe book was nor did I have the time to hunt for it then. So I went ahead with the proportions I thought would be perfect...sometimes I even go by the smell of the food ;)
The knife that you see above was Jobin's surprise gift for me as soon as we moved into our apartment. It is one of the best gifts he has ever given me...a Wusthof 8" Chef 's Knife. And that's the first knife to enter our kitchen. It is marvelous! I don't think I need to talk about a Wusthof so I quote Jobin's bro here, 'It's the best knife money can buy ! ' It sure is!

So let's move on to the recipe. Finla, this is for you :) I am sorry to have kept you waiting for so long!


KERALA STYLE BEEF FRY/ERACHI ULARTHIYATHU
My own recipe

Ingredients:
Beef - 2 lb ,cut into 1" squares
Onions- 3, medium sliced fine
Tomatoes- 2, medium chopped
Coconut slivers/Thenga kothu- 1/2 cup ( I did not have any, so I skipped them)
Red Chili powder- 1 heaped tbsp (I used the spicy type, so 1 heaped tbsp was enough. Go as per your taste)
Coriander powder- 1 1/2 heaped tbsp
Turmeric powder - 1/2 tsp
Ginger -garlic paste- 2 tbsp
Salt-to taste
Water- 1/4 cup ( You need not add this at all if you are not draining/ drying the meat after washing it)
Vinegar- 1 tbsp ,optional ( You need to add this only if you feel your curry is lacking it. For me, tomatoes did the work)

For frying/tempering:
Onion- 1, medium sliced fine
Mustard seeds-1/2 tsp
Oil-6-7 tbsp

Method:
  • Put all the ingredients into a cooker , mix well and pressure cook it for 2 whistles. (The beef I use needs only 2 whistles, but if you feel your's is still uncooked, give it one more whistle and check.) Do not over cook the beef here, because it might break/crumble while we fry/temper it.
  • Once the beef is cooked and if you have water left in the cooker, cook till the water is evaporated almost completely. At this stage you can freeze the beef and thaw and use it later as follows.
  • In another pan, heat oil, crackle the mustard seeds and saute the onions in it till soft.
  • Add the cooked beef into it and fry it till you get a nice dark brown colour for the meat.
  • Serve hot with rice, chapathi , appam or bread!
Verdict: It was fingerlicking, lipsmacking-ly good! Jobin adores it! And I love cooking it! :) Your house would be wrapped in the aroma of it...whether you like it or not! ;)
Related Posts Plugin for WordPress, Blogger...