Ria's Collection: Our family favourite
Showing posts with label Our family favourite. Show all posts

Wednesday, June 1, 2016

HIS & HERS BIRTHDAY CAKES

Birthday Cakes
Hello June! I hope you are going to be as kind as May was to us. May literally flew by for us.  We both celebrate our birthday's in May,literally at the beginning and at the end so it's a busy month planning what to gift each other and what cake (s) to bake for each other. Our schedules have been so crazy that there have been days where I don't see Jobin at all! Sometimes I feel I need the time to stop moving by so fast because there's a little boy in our lives who is growing up at lightning speed! His vocabulary has increased so much now and he talks ALL the time! Jobin thinks he has taken after his mother when it comes to talking! ;-) I think so too!
Birthday Cakes
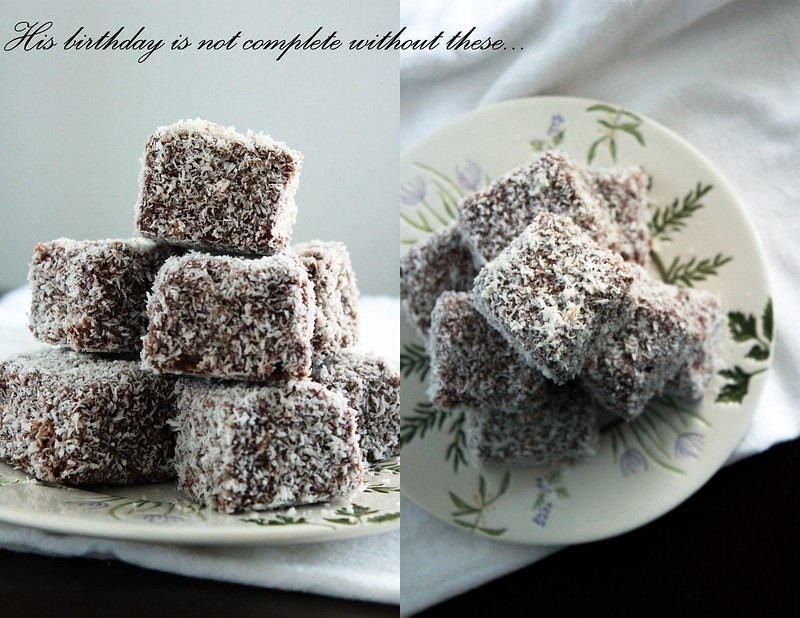
Jobin had two cakes for his birthday this year. His most favourite Lamingtons,which is slowly becoming 'our' favourite and another super soft,delicious Lemon Cake with Mascapone & Lemon Curd filling. That cake turned out super awesome! This month, our dear fridge had no space for anything else other than cakes and desserts. We are not complaining one bit,okay? :-)

Birthday
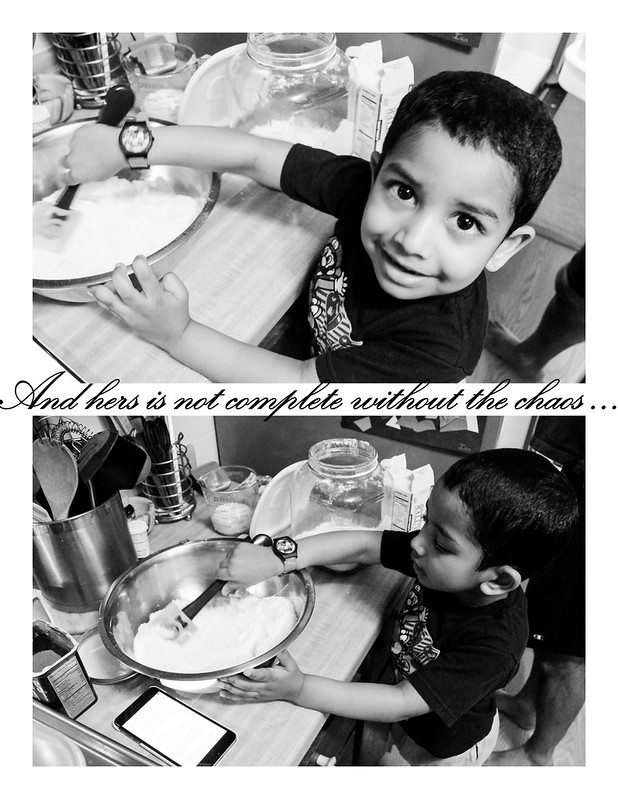
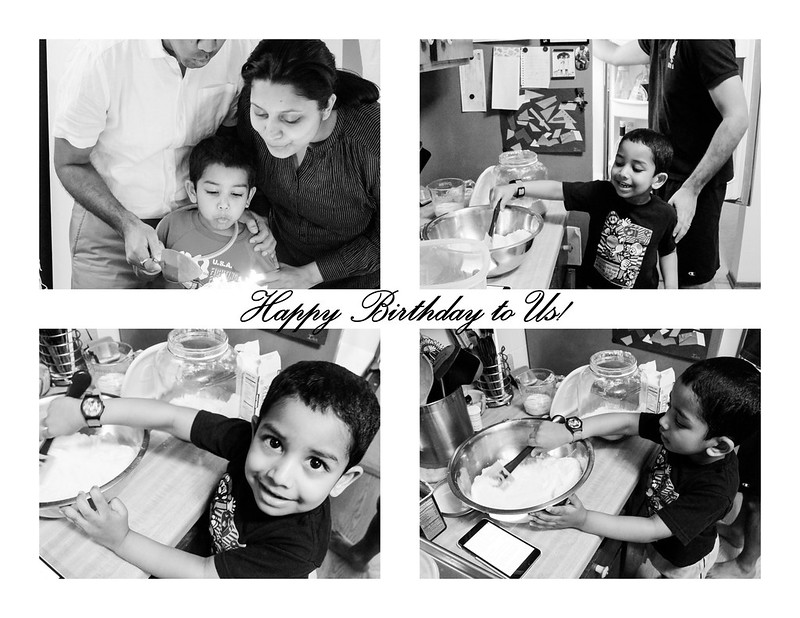
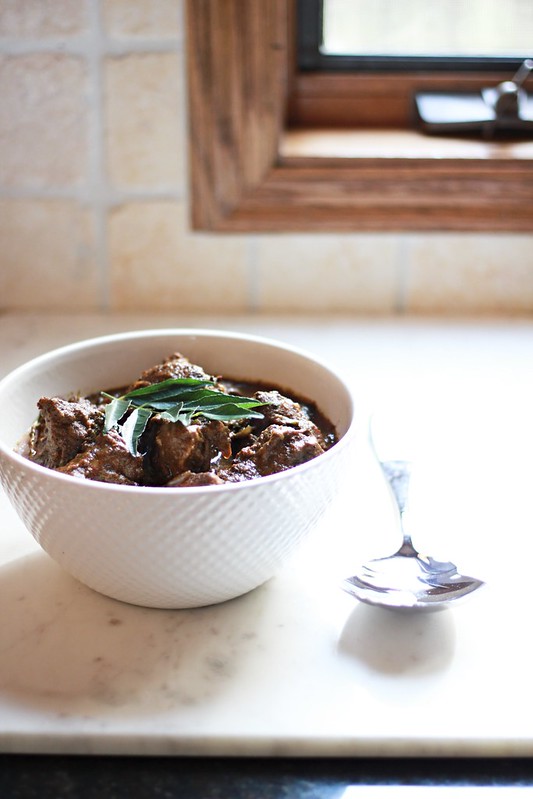
It was my birthday yesterday and as always, Jobin & Ian baked the most delicious cake for me! It was so soft that it fell off of the fork! Ian was super excited this time as he loves spending time in the kitchen,especially when it involves chocolate. The little spatula that he is using to stir, is his own. He's got two of those!It was my Golden Birthday, as well. For some reason, I did not want a cake this year which kind of put Jobin into a sad mood.He's been baking all my birthday cakes for all these years,so he was really excited for this year too! Finally, I gave in around 7.30 pm (on May 30th - which happens to be my parent's wedding anniversary!!)when he was watching a Suresh Gopi movie on T.V. I told him I needed a cake and I decided that to be a chocolate cake since that's Ian's most favourite flavour in cakes. Jobin loves Suresh Gopi's movies and likes the entire house to be pin drop silent when he watches any movie.So I was literally laughing in my head when I gave him the green signal for the cake. In return, he was offered some Kerala Porotta's & my Amma's special Kozhi curry for dinner that night! ;-)

Birthday Cakes
This small tradition that we built for ourselves, is something that I look forward to every year. There's something really special and magical about having your birthday cake baked by your beloved!

Wednesday, December 7, 2011

MINI AUNTY'S CHOCOLATE CAKE

Mini Aunty's Chocolate Cake
It doesn't usually happen this way...Jobin asking for a cake because there will be some cake at any point in our house,any time of the day. We ran out of cakes which means we were out of desserts after every meal! We don't need anything fancy, all the time but sometimes yes. When he asked me for a dessert the other day, I asked him what he wanted and he said that cake I made when newly-weds G &J came home for dinner. I knew it! He loves that cake and any cake made along that line.Finally we settled for a chocolate cake .
Mini Aunty's Chocolate Cake

So Chocolate Cake, huh? Hmm,I have umpteen choices in that one thing. Which one do I bake? Which one is my all time favourite? Which recipe  needs another try? Whose recipe should I try? Cookbook recipes or family recipes? Yes! Family recipe, it is!

Mini Aunty,Tia's mother,is one of my most favourite aunts! She is a fantastic cook! I love her cakes, savory pies,manga pacchadi,moru curry,meen curry,cheemmen fry ,beef olathiyathu and oh! how could I forget her paper thin ghee dosa's and thenga chammanthi! She made me a Dosa convert!
She is Amma's brother's wife and all their kids and we were of the similar age,so we all got along very very well! Infact all our vacations were spent together, we still do if we get a chance. This time, in September, right after her daughter's wedding,we went to visit Jobin's sister in Kashmir. That way, I'm so happy to have spent some quality time with her, after one and a half years!

Mini Aunty's Chocolate Cake
While I was studying in college, they lived in Bangalore for almost 3 years and I lived with them even though I was paying rent elsewhere :-) The power of lovely people and yummy food attracted me to their house. Mini aunty used to bake cakes once in a while and her chocolate cakes were really tasty. I got this recipe from her, long ago and she is very generous in sharing recipes, unlike a lot of other people who I personally know of! :-)
Mini Aunty's Chocolate CakeMini Aunty's Chocolate Cake 

Ingredients:
1 1/2 c flour
1 tsp baking soda
1/4 tsp salt
1 1/4 c sugar
2 eggs
1/2 c butter, at room temperature
1 c warm milk
4 tbsp cocoa powder
1 tsp vanilla


Method:
Pre-heat the oven to 350 F and line a loaf tin.

Sieve flour, salt and baking soda together. Reserve.
In a small bowl, mix together 1/2 c warm milk with 4 tbsp cocoa.
In another big bowl, on high, beat together butter and sugar for a minute. Add the eggs and beat till light and fluffy.Add flour and 1/2 c milk alternately and beat until fluffy. Add the cocoa-milk mixture and vanilla and beat for a minute. Pour into the tin and bake for 45-50 mins or till done.

Enjoy!

So I'm finally back baking with our baking group : A Sweet Punch. I have been away for a long time now and I hope this cake bring me back to baking with the group regularly.

This is just a good old cocoa cake. I love it and infact I really think you all should try it sometime as it is going to be your favourite too! You can slice it horizonatlly into 2 or 3 and then sandwich it with some yummy chocolate fudge frosting and then cover it with some more. Sprinkle some sprinkles and then stick a candle or two to make it into a birthday cake! :-) Plus, if you are looking to give something exciting for your lil one this season, maybe you could take a look at these kids kitchen play sets!


Monday, February 21, 2011

DILKHUSH...an Indian favourite my way!

Dilkush

In one of our telephone conversations Amma & I happened to speak about 'Dilkush'. We both had it in our respective hostels during our college days. It was served as a tea- time snack. When I mentioned it to Jobin that evening, even he remembered eating it. Actually we 3 had very fond memories of it so I thought of giving it a try. I knew it was not a puff pastry casing instead something in between rough puff pastry and shortcrust pastry and I had no idea as to how to make it. So I thought of using the rough puff pastry I made a few days ago.
Dilkush

I love the filling. You can really have it alone if you are craving for something sweet.I couldn't stop myself from digging into it while I rolled out the pastry shell. I don't know how far I was successful in it because I think this is the closest I can get to in replicating that sweet at home unless that Bakery guy shares his recipe with me.
Dilkush

Today (Feb 22) is Amma's birthday and I thought I'd post this for her. Last year, we were there in Kannur on that day to celebrate her birthday with her. This year we are continents apart from each other!
IMG_0928


DILKHUSH  my way!
Recipe for the rough puff pastry- My grandmother's cookbook
Recipe for the filling- My own


Ingredients:
For the rough puff pastry:
150g butter
200g plain all purpose flour
a pinch of salt
1 tsp lemon juice
125 ml ice cold water

For the filling:
1 c freshly grated coconut
3-4 tbsp granulated sugar
1/4 tsp cardamom powder, optional

1 egg, lightly beaten for glace
Dilkush

Method:
For the rough puff pastry:
Cut the firm but not hard butter into walnut sized pieces.
Sift the flour and salt together into a wide bowl and add the butter with lemon juice & water.Mix the ingredients lightly with a round bladed knife and maybe use your fingertips too, to form a soft elastic dough.
Turn out the dough to a floured surface & knead it lightly.Shape it into a rectangle and then roll it out into a strip about 3/4 " thick, 12" long and 4"wide keeping the edges straight. Butter will be clearly seen as yellow streaks in the pastry.
Fold the bottom third of the pastry up& upper third down.( It will look like a parcel)
Turn the pastry so that the fold points toward the left hand side, seal the edges lightly with the edge of the little finger.
Roll out the pastry again keeping it 1/2" thick and to a rectangle of 18" x6".Fold it once again.
Place in a plastic bag and leave it in a cool place for 20 mins. Repeat this 4 times more .
Rest the finished pastry for 10 mins before shaping .

For the filling:
Dump all the ingredients together in a pan. Cook on medium heat till the sugar dissolves and it becomes slightly sticky (about a minute or two).
Let it cool completely before you fill the pastry case.

Dilkush

Assembling:
Pre-heat the oven to 425F and position the rack in the centre.
Line a rectangular baking tray with parchment/butter paper.
Divide the dough into 2 parts and roll out each part on a lightly floured surface or using a parchment paper.
Take one rolled out circle and place on the baking sheet.
Top it with the filling. Place the other rolled out pastry sheet over it and seal the edges using water.Fold it over to create a decorative edge.
Brush the top with the egg and cut a small X in the centre of the pastry (just a steam vent).
Bake for 25-30 mins or till it is golden in colour.
Cool completely on a wire rack before serving.


Verdict: I wouldn't say this was the exact same replica, it was definately different. This was more crunchier than the original. Jobin had a totally different filling idea and I didn't know that until he ate a slice. 'Oh this was not the filling that I had in mind but whatever this filling is, it's really good' was his reply after he had a bite!

Thursday, December 9, 2010

CHOCOLATE CHIP NANCUTS/NANKATAI


Ihave never baked so much in so little time. Phew! That was a LOT of baking happening in my kitchen. I must say,my oven is still grateful. It hasn't given up on me :-) But trust me, it feels so good to be near the oven during winter...keeps you warm and keeps your house warm,too! Plus, you get to eat your favourite baked goodies!
                                                                  Photo Courtesy: Chris Ann
I met Chris Ann last month for a small blogger meet in Minneapolis. I have to say, she was a very graceful host! She brought us some yummy yummy homemade chocolate chip cookies! I remember her saying that she slaved over it...I don't think so! ;-) Anyhow, it was delicious. During the meet,we were having a casual chat and she mentioned that she would like me to do a guest post for their 'Cookie Exchange' event on the blog during the month of December. I agreed on the spot. Why wouldn't I? :-)

But the challenge for me was that she asked me if I could bake some sort of an Indian cookie. Umm, now that's interesting! Indian cookie? I had to think about it for a while because we Indians, really don't have a 'typical' Indian baked goodie.But then again, there should be something that we can call it 'Indian'...and yes! it was a cookie called 'Nankatai' or 'Nancuts' as we call at home. Indian cookies or 'biscuits' as we call it, is never soft like the 'cookies' that we get in US. It's crisp, crunchy and even crumbly, at times. So this is the texture of this cookie/biscuit too. :-)

Nancuts is the simplest of all the cookies. It's a very simple 3-ingredient recipe. You don't need any fancy equipment to get it done. At any given point, you can bake these cookies in less than half an hour!Usually this cookie is baked plain or maybe with a hint of crushed/powdered cardamom. I thought of giving it a twist and added chocolate chips to the dough.

For recipe..visit Love Feast Table!

I am sending these cookies as my entry for the Monthly Mingle- Chocolate Extravaganza hosted by myself! :)

Season's Greetings!

Monday, September 27, 2010

PORK VINDALOO


S
o it's officially Fall /Autumn here. We have been having heavy rains and very very wild windy days. I sometimes feel that I might get blown away with it whenever I stand on our balcony. These things have made my 'photography' session very difficult. I somehow find time in between my cooking to take some pictures and when I come out it is so windy that everything flies away...

I juggle between holding the placemat/napkin,my reflector,camera and myself in place. And in between my hair had to fly in the wind and fall all over my face! Stupid thing! :-P Today it was real bad after which I emailed Jobin saying ' I might end up in hospital with a back pain if you don't do anything about it!' . Poor thing! What can he possibly do :-) That's okay, I just took my irritation out on him :-D

When he gets back home and see that I made 'Vindaloo', he will be very happy :-) This dish makes both of us very happy and can eat a full bowl of it.

Vindaloo is a dish originally from Goa. The term Vindaloo derives from the Portuguese dish ' Carne de Vinha d' Alhos ' which is a dish of meat, usually pork, with wine and garlic. The dish evolved into the vindaloo curry dish when it recieved the Goan treatment of adding plentiful amounts of traditional spice and using malt vingear instead of red wine. ( Source: Wikipedia)


One of my reader's Maya, requested for this recipe a few weeks ago. This one is for you Maya! So just in case you have some request, do not hesitate to contact me.


PORK VINDALOO
Recipe source: Amma


Ingredients:
Pork- 2 lbs/1 kg approx. cut into 1" cubes (try with medium fat pork and not fatless)
Onions- 2, medium
Red Chili powder-1 tbsp
Coriander powder-1 tbsp
Vindaloo Masala * recipe given below
Oil-1/4 cup
Salt to taste

*Vindaloo masala:
Cardamom-5 no.
Cloves-5 no.
Cinnamon- 5 x 1" sticks
Fennel seeds/Saunf/Perumjeerakam- 1tsp
Black Peppercorns-1 tsp
Mustard seeds-2 tbsp
Ginger- 2" piece
Garlic- 8 cloves
Vinegar-1/4 cup

Method:

  • Soak the vindaloo masala in vinegar and leave aside for 1 hour.
  • Grind it to a coarse paste . Do not add water or anyother liquid, vinegar will help in grinding.
  • Heat oil in a pressure cooker( heavy bottomed vessel). 
  • When the oil is hot, add in the ground Vindaloo Masala.
  • Saute the masala till you get a very nice aroma ( take it in, it smells very good!).This masala has a tendency to stick to the bottom of the pan, so scrape the pan occasionally.
  • Add in the onions and saute till they are softened.
  • Add in the powders and salt and mix well for 2 mins.
  • Add in the meat, mix well, close the lid and cook under pressure for 2 whistles.
  • Once the pressure has dropped down and the steam has completely come off, open the cooker. You will see that there is some gravy/sauce in it.
  • You need to reduce the gravy till the oil starts to separate.Make sure you stir it well, every now and then.When you taste test, if you feel there is a need for more vinegar, add it. But always start with ONLY 1/4 cup.
  • We like it  dry, so that the masala is very well coated on the pieces.


Verdict:
Whenever Amma made this curry at home, I used to feel that it takes years to perfect this dish. But I was wrong...It is definitely an easy one to perfect! Just follow the recipe as is and you just cannot go wrong! Serve it to anyone and be ready to be floored with compliments.

Serve it along with Naan, Batura,Poori, Chapathi,Basmathi Rice, Ghee rice...or even just with some plain rice and curd.


Wednesday, April 14, 2010

SAUCY CHICKEN a.k.a SUSY CHICKEN!

Here it is as promised, the recipe for Saucy Chicken. This one comes straight from my mother's recipe collection.A curry which has been requested to be made over and over again because it tastes SO good! Eventually, this curry is now known as Susy Chicken (my daddy dearest is responsible for this!). Oh! For all those who are wondering who Susy is, well she is my superwoman celebrity Amma! :)

If there is a house where no curry should be re-heated because the father and son thinks a LOT of water is being added into the curry during the re-heating process [re-heating on a stovetop] or every curry needs to be freshly made or all 3 meals should have different stuff, it is mine! :)

Gradually my mother has learnt all the tricks that needs to fool such a husband and son and the daughter is planning to follow it dutifully! ;) Talk about 'like mother like daughter!' :D The first day it would be chicken roast, the next day it would be chicken curry...all with the addition of coconut milk etc! :)

But, this curry is not like that :D It was freshly made by the still-freshly-married young woman for her ever-loving husband! Ahem! Yes, love is very much in the air! ;)

SAUCY CHICKEN a.k.a SUSY CHICKEN

Ingredients
Chicken -1 kg, cut & cleaned
Soya sauce - 1 tbsp + 2tbsp
Tomato ketchup/sauce- 2 tbsp
Ginger garlic paste-2 tbsp
Onions- 2,large cut into squares
Carrot- 1, medium cut into squares [I don't like to see chunks of carrot ,so I cut into thin rounds]
Salt-to taste
Water /chicken stock- 1 cup
Cornflour- 1 tbsp diluted in 1/2 cup water
Pepper to taste.
Spring onion-1 sprig, chopped

Method:
  • Marinate the chicken pieces with salt, pepper and 1tbsp soya sauce for 15 mins or till you get the other ingredients ready :)
  • Slightly fry the chicken pieces in 4-5 tbsp of oil and keep aside. Reuse the oil for the curry cooking.
  • Heat oil, add the ginger-garlic paste and saute it till the 'most fave aroma of mine' seems to be flooding your kitchen.
  • Add the onions and carrot and saute it for 3 mins.
  • Reduce the flame to low, add the sauces and give it a good mix.
  • Add the fried chicken pieces and also a cup of water. Let it boil.
  • Add the diluted cornflour into it and let it thicken.
  • Garnish with spring onions and serve hot with Chicken Fried Rice.

Wednesday, March 31, 2010

CHICKEN FRIED RICE ...re-kindling memories


My mom's fried rice is one of the best fried rice anyone could possibly have.It is definatley not just my testimony, but by others who have travelled around the globe and had a chance to taste all those wonderful food . It is actually an adaptation of my grandmother's. If there is anyone who does not agree to the comment I made above, it has to be my dad, because he still says, 'Mamma's is original!' :)

Today, while I was cooking with my cousin, we were talking about different tastes people have. I feel that most  women carry the taste of their own homes to the homes that they are married into, or the one they eventually set up. I am saying this because, I could see myself doing that everyday.

But, my mom, didn't know the ABC of cooking when she got married (well, she knew how to make omlettes and tea). It was my grandmother who taught her a LOT of stuff, so Amma still re-creates that taste at home... Lucky Dad but Poor Jobin! ;)

This fried rice was taught to my grandma by her cook in Malaysia...but eventually it was Indian-ised , a lot!

CHICKEN FRIED RICE
Recipe source: Mamma

Ingredients
Chicken- 100 g, boiled &shredded [ you can completely omit this or substitute with prawns/meat  etc]
Rice- 2 cups, boiled and cooled
Cabbage-100 g, shredded
Beans-100 g, cut finely
Carrot-100g, chopped fine
Soya sauce-2 tbsp or to taste and colour
Ginger -garlic paste- 2 tbsp
Spring onions- 2 stems, chopped
Salt- as needed
Oil- 5 tbsp
Method:
  • Boil rice [for 1 cup rice, use 1 1/1 cups water ] and lay it out on a cotton fabric or kitchen towel so that it is cooled well.
  • Heat oil, add the ginger garlic paste and saute well.
  • Add the vegetables and mix well. Cover and cook for 6-7 mins.
  • Add the chicken pieces and give it a quick mix.
  • Add the cooled ,lump free rice and mix.
  • Add soya sauce and  salt.
  • Mix well and let the rice get a bit crisp {keep it over the fire for 5-6 mins , mixing well in between.]
  • Garnish with spring onions & serve hot.
  •  
     Just incase you are wondering where the recipe for the curry is, it will be up on my blog very soon! Keep checking!! :)

    Wednesday, March 24, 2010

    PAPDI CHAAT! Coming over for a chat?


    For the last few days, I have been craving for chaat. Now that I don't live in India anymore ( not that we had chaatwala's in Kannur), I have no other choice but to make it from scratch. I am not complaining, I always wanted to make the ever-loving tangy tamarind chutney and making papdi is a breeze.


    I started off thinking I would end with Pani Puri but, I ended up with Papdi Chaat due to lack of ingredients in our pantry.Nevertheless the end result was finger-licking, spoon-licking good. So, YAYY! ;)


    For all  my North Indian recipes Hetal & Anuja is my favourite source. Their recipes are fool proof. I have tried their  Besan Burfi,Kaju Burfi, Eggless Hazlenut & Date Cake, Molten Lava Cake,Reshmi Kababs, Silky Smooth Pedas and lot more recipes like Rasgulla, Rasmalai, Namak Paare which I never blogged about.

    Chaats are originally an Indian street food. Nowadays they are served even in high-end hotels too. They are popular equally among teens & elderly. There are different types of chaat like pani puri or golguppas,dahi bhalla, sev puri etc. All these are made with almost the same ingredients, main one being the tamarind chutney. It is a thick tangy, spicy ,sweet & sour sauce made out of tamarind pulp and jaggery . Papdi's are deep-fried pastry roundels (or squares). They add the crunch to the chaat. On the whole, any chaat is a very mouthwatering experience!


    How I made this simple: While the chutney was on the stove boiling & reducing away, I made the dough for the papdi and rolled & cut them. Once the chutney was done and safely put aside, I started frying the papdi's.Meantime I boiled channa /chickpeas (previously soaked)& potatoes. I could get the whole thing done in less than an hour's time! :)

    PAPDI CHAAT
    Things you will need:
    Tamrind chutney(homemade or storebought)
    Papdi's (homemade or storebought)
    Yoghurt - 1 1/2 cup, well beaten & chilled
    Onions- 1 small, chopped
    Coriander leaves- 1 small bunch, chopped
    Red chilli powder - 1 1/2 tsp
    Cumin powder- 1 1/2 tsp
    Salt- to taste

    HOMEMADE TAMARIND CHUTNEY
    Recipe source : Hetal & Anuja

    Tamarind pulp (storebought)- 2tbsp
    Water- 2 cups
    Salt- 1 tsp
    Jaggery-1/2 cup, powdered & packed
    Red chilli powder-1 tsp
    Cumin seeds-1 tsp
    Fennel seeds-1 tsp


    Method:
    • Heat one cup of water in a microwave (or stovetop) and add the tamarind paste to it. Mix well making sure there are no lumps in it.
    • Add the other one cup of water and boil it. 
    • Once it starts boiling, reduce the flame to medium and add the jaggery. Mix well and let it melt.
    • Let it boil till it reduces to half quantity.
    • Meanwhile, dry roast cumin seed and fennel seeds and powder them.
    • Once the chutney starts coating the back of a spoon, switch of the stove and add salt, red chilli poweder and powdered spices. Mix well.
    • Adjust the salt if needed.
    HOMEMADE PAPDI
    My own recipe

    Ingredients
    All purpose flour- 1 1/2 cups
    Oil- 2 tbps
    Ajwain-1/2 tsp
    Salt-to taste
    Water- 1/4 -1/2 cup


    Method:
    • Mix together flour, salt and ajwain.
    • Add oil to it and rub well. 
    • Add just enough water and make a hard dough (not as soft as chapathi dough).
    • Let it rest covered for 20 mins.
    • Roll out thin (If you have used the right amount of water, you wouldn't need any dusting of flour while rolling)
    • Pierce the pastry all over with the tines of a fork.Cut rounds or any other shapes from it.
    • Deep fry in hot oil and drain on kitchen towel.
    • You can make this ahead and store in airtight bags/tins.

    Assembly:
    Place 6-7 papdi's on a plate, add some channa/chickpeas and potatoes.
    Pour 3-4 tbsp of youghurt on it. Drizzles one tbsp of tamarind chutney on it.
    Garnish with coriander leaves and onions.
    Sprinkle salt, red chilli powder and cumin seed powder  as needed.

    Verdict: As soon as Jobin got back home, I served him a platefull. Zapp came the response:
    It was seriously delicious. I have some chutney leftover from yesterday. Just can't stop licking it everytime I open our refrigerator ;) Guess I'll have a chaat night every week :)

    Sunday, January 3, 2010

    HONEY ROASTED ALMONDS


    I had mentioned these golden beauties in the menu  for my Appa's 50th Birthday Party . These beauties are such simple li'l things which can give life to a party. I have had store-bought versions of it while I was studying in Bangalore and have always wondered how it was made without the nuts going soggy.

    Recently, an old family friend of ours sent us a packet of almonds which were bought from Dubai. They were so so crisp and nice. But I am not a complete almond person. I'd prefer cashew nuts or peanuts anyday! Nevertheless, my dad and mom were raving about it's goodness. 


    On the eve of my Appa's birthday, they had gone out to run some errands and I was thoroughly bored sitting at home. We didn't have good voltage ,so I couldn't bake anything.That was when I thought of roasting some almonds.


    After reading through many many recipes, I zero-ed in on one. It was very simple and quick recipe!

    HONEY ROASTED ALMONDS
    Recipe source: www.cooks.com 

    Ingredients:
    Almonds-2c , whole with skin on
    Sugar-1/4 c
    Salt-1/2 tsp
    Honey-2 tbsp
    Water-2 tbsp
    Oil-2 tsp

    Method:

    • Spread the almonds in a single layer in a shallow ungreased baking pan and place in a cold oven. Bake at 350 degrees, stirring occasionally, until the colour of nuts is tan (12 to 15 minutes). Remove from oven and set aside.
    • Thoroughly mix the sugar and salt. Stir together the honey, water and oil in a medium size pan and bring to a boil over medium heat. Stir in the roasted almonds and continue to cook and stir until all the liquid has been absorbed by the nuts (about 5 minutes). Immediately transfer to a medium bowl and sprinkle sugar mixture over all and toss. Spread on wax paper and cool.
    • Variations for the above recipe: You can try spicing it up by adding a pinch of nutmeg/cinnamon/cardomom etc.

    I was pleasantly suprised how good almonds could taste this way!! The salt and sugar combination makes it so addictive! My guests were completely hooked onto it...requests for the recipe were flying at me! My Appa's best friend even thought these were imported! Wee! What a compliment! :) This has become a firm favourite in my house. Amma just cannot keep her hands off of it! :D


    My sincere request to all almond lovers: Try these at least once in your lifetime, there is no better way of eating them! It is really delicious!

    Now I am thinking of trying some with peanuts/ground nuts. Might have to vary the cooking time depending on the type of nuts used...so will keep you all updated about how it goes! :D


    Related Posts Plugin for WordPress, Blogger...