Ria's Collection: Vegetarian
Showing posts with label Vegetarian. Show all posts

Monday, April 18, 2011

PAVAKKA MEZHUKKUPURATTI/ BITTER MELON STIR FRY

Pavakka Mezhukkupuratti
If it wasn't for Appan telling me that my blog has become boring because I haven't updated for a few days now, I would have really enjoyed being in my cocoon. Once something comes up between me and blogging it takes a big effort for me to get back to it. I like to be lazy and not type so many words and arrange pictures in between each paragraph and then 'publish' the post only to realise that there's a mistake in the recipe that I need to correct and so I 'edit' the post and 'publish' again. Sometimes after that I realise that my favourite picture of the dish is not even there in the final post!  Anyway, that pretty much sums up my day when I get back to blogging after a few days :-)
Pavakka

Pavakka/ Bittergourd is one of my favourite nutritious veggie (very good source of Iron). I love it's bitterness balanced with other ingredients that we add to it. This is a very simple dish that you can make, but you will need some time as it takes a good 30 mins to crisp up from it former bitter and green state to the beautiful mouthwatering crunchy brown stage. You can stop the cooking process in between and be happy or sad (mostly sad actually ) as it will be bitter and don't blame me ;-)
Roses

I'm not in a great mood to talk (rather write) much today as I am kind of busy (in my head) planning all my chores for this week. We are having a party at home this weekend and I am so looking forward to all the cooking and entertaining that comes along with it. I really am. I know some of you must be thinking whether I am crazy, but what to do, I love to cook and entertain! I always wanted my home to be a home full of eatables, always! My home was like that. It was always stocked with food. The minute some one walks in , they will be fed with everything homemade. We hardly had any bakery snacks except for 'kadala muttai'/ Chikki, 'Paper-il pothinja cake/ Sponge cake in candy wrapper', 'Motta puffs/ Egg Puffs' etc.
Pavakka Mezhukkupuratti

So when I got married and moved to US, I used to plan of stocking my freezer with ready-to-fry 'cutlets', 'spring rolls', 'fish packets' 'chicken samosa' etc so that I just have to thaw and fry when guests come home. Sadly, it doesn't work like how it works in India. No, no, not that I am lazy to make them, but we don't have guests like how we have in India unless we call them for supper or a meal together. Yeah, life here is quite boring when you think that way. So whoever comes home, I make sure they are well fed...till their nose!

So now, how many of you want to come home?? :-)
PavakkaPAVAKKA MEZHUKKUPURATTI
My own recipe (Just love the way it sounds!)
Serves 2

Ingredients:
4 medium sized bittergourd,sliced fine
1 large red onion, sliced fine
1 1/2 tsp red chilli powder or to your spice level
Salt to taste
Oil as needed

Method:
As mentioned, slice the bittergourd as fine as you can. I used my mandoline to slice them both (the onions).
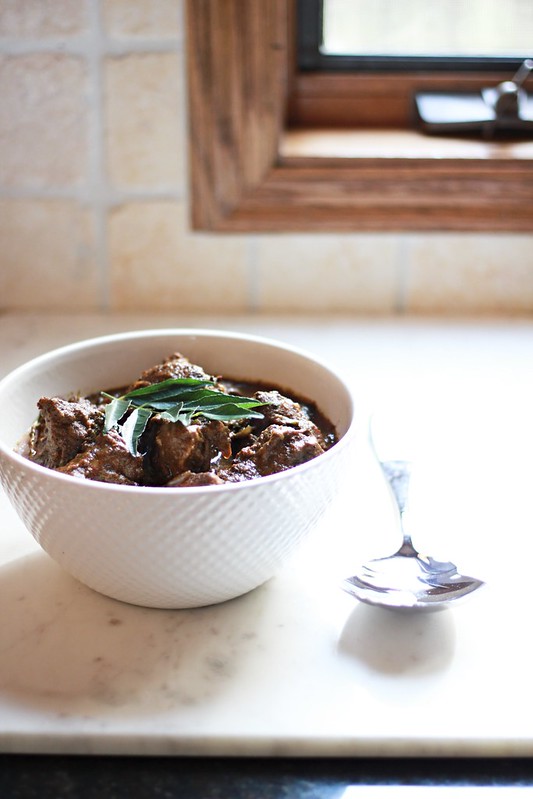
In a large pan, mix all of the ingredients together and cook on medium-high heat till you get them as crispy as you see in the picture. It will take about 30 mins maximum and some amount of oil which needs to be drizzled in as and when needed. You will know when to add the extra oil when you are cooking this.


Verdict: Trust me, it tastes really good! Especially with rice and yogurt.

I am sending this yummy side dish as an entry to The Kerala Kitchen hosted by yours truly!

Sunday, November 29, 2009

MYSORE PAK & an update after 20 days!


I'm back! :) with a bang from a 3 week shopping + no internet + a dead laptop charger scenario at home  :) A big thank you to you my dear readers for still being interested in my blog :)
I have to be honest that inspite of me travelling extensively in the last few weeks, I still managed to cook/bake a lot of stuff but I'm having a huge sugar craving right now hence none came out into the limelight :)

Mysore pak was something I always wanted to try and I did last year...before I started my darling blog. But the end result was bitter and what not! And you wouldn't believe how upset I was with the result...and Aparna knows the rest! I am still so sorry :)

But no matter how many days,weeks & months passed by, it was one thing that I wanted to perfect upon...and I did it! YAY! Thank you Aparna & Srivalli for helping me out with the one-thread consistency for sugar. You see, twitter SOS works like a charm! :)

MYSORE PAK
You can check Aparna's blog for the recipe


For all those who have never attempted making this sinful Indian sweet at home, please go ahead ! This recipe is a marvel! My pics haven't done justice to the ghee-yellow colour the sweet had. It does look a bit dry on the outside, but when you bite into it...it just melts in your mouth!

Monday, October 5, 2009

CHERUPAYAR ULARTHIYATHU / Stir fry with green grams


Everytime I eat this, it reminds me of my cousin Tia.She was ,is and forever will be an ardent fan of kanji and payar :-) I guess 'kanjiyum thayyirrrum payarum' was her favourite phrase when she was a baby! 'Thayir' means 'curd' in Malayalam,our mother tongue. So nowadays it is taken for granted that if Tia is visiting us, we will have kanji 'n' payar ready on the table :)This is a very common dish in every Malayalee household. I love the fact that it is very simple to cook but exceptionally tasty. 


This dish freezes very well! Our family is known for freezing curries because we never know when a guest can pop in :-) It is very often because we are now 73 members on my mom's side alone! :-D


CHERUPAYAR ULARTHIYATHU
Recipe source : Amma

Ingredients:
Green grams/cherupayar - 1 cup
Shallots- 5
Garlic- 5 cloves
Dry Red Chillies- 3
Salt & Pepper -to taste
Curry leaf- 1 sprig
Oil- 3-4 tbsp (we prefer coconut oil)

Method:
  • Wash the gram very well under running water.
  • Soak green gram in 4 cups water for 20 mins.Drain.
  • Using a pressure cooker, cook the gram using 1 1/2 cup water and salt.
  • Grind shallots,garlic and dry red chillies together.
  • Heat oil, add the ground paste and saute till you get a nice aroma.
  • Add the cooked gram and mix well but carefully so that it doesn't get pasty.
  • If you like a drier version, pour  another 2-3 tbsp oil and saute well.
  • Add pepper to spice up the dish.
  • Garnish with curry leaf and serve hot with kanji/rice


That is my idea of comfort food!


Monday, August 3, 2009

♥Espresso & Chocolate Shortbread Cookies♥


Shortbreads fascinate me that crunch, that melt-in-the mouth feel...hmmm...it's an all time fave of mine :)
It was just few days ago that Avanika n myself were chatting about Raksha Bhandan goodies that she was planning to make for her brothers . And that lead to some Shortbread discussions and eventually she sent me a link of one. And the moment I read through that...I knew what my next attempt would be :D

It is a very simple recipe which is done in a slightly different manner where you need to roll out in a plastic /zipper bag and trust me... that makes life much easier :) For all you coffee -ers this will win you over!

Espresso-Chocolate Shortbread Cookies

Adapted from Baking: From My Home to Yours & re-adapted from Smitten Kitchen

Makes 32 cookies

Ingredients:

1 tablespoon instant espresso powder
1 tablespoon boiling water
2 sticks (8 ounces) unsalted butter, at room temperature
2/3 cup confectioners’ sugar
1/2 teaspoon pure vanilla extract
2 cups all-purpose flour
4 ounces bittersweet chocolate (plain, or a toffee variety), finely chopped, or 3/4 cup store-bought mini chocolate chips
Confectioners’ sugar, for dusting (optional)

Method:

  • 1. Dissolve the espresso in the boiling water, and set aside to cool to tepid.
  • 2. Working with a stand mixer, preferably fitted with a paddle attachment, or with a hand mixer in a large bowl, beat the butter and confectioners’ sugar together on medium speed for about 3 minutes, until the mixture is very smooth. Beat in the vanilla and espresso, then reduce the mixer speed to low and add the flour, mixing only until it disappears into the dough. Don’t work the dough much once the flour is incorporated. Fold in the chopped chocolate with a sturdy rubber spatula.
  • 3. Using the spatula, transfer the soft, sticky dough to a gallon-size zipper-lock plastic bag. Put the bag on a flat surface, leaving the top open, and roll the dough into a 9 x 10 1/2 inch rectangle that’s 1/4 inch thick. As you roll, turn the bag occasionally and lift the plastic from the dough so it doesn’t cause creases. When you get the right size and thickness, seal the bag, pressing out as much air as possible, and refrigerate the dough for at least 2 hours, or for up to 2 days.
  • 4. Position the racks to divide the oven into thirds and preheat the oven to 325 degrees F. Line two baking sheets with parchment or silicone mats.
  • 5. Put the plastic bag on a cutting board and slit it open. Turn the firm dough out onto the board (discard the bag) and, using a ruler as a guide and a sharp knife, cut the dough into 1 1/2-inch squares. Transfer the squares to the baking sheets and carefully prick each one twice with a fork, gently pushing the tines through the cookies until they hit the sheet.
  • 6. Bake for 18 to 20 minutes, rotating the sheets from top to bottom and front to back at the midway point. The shortbreads will be very pale–they shouldn’t take on much color. Transfer the cookies to a rack.
  • 7. If you’d like, dust the cookies with confectioners’ sugar while they are still hot. Cool the cookies to room temperature before serving.


They were really delicious and is perfect with a cuppa coffee especially on a rainy day


Saturday, August 1, 2009

Rice, Fish Fry & Thoran -A simple lunch at home :)


This post is all about a quick simple lunch we have at home... my idea of comfort food! :) Almost 90% of Kerala homes has this kind of lunch. A fish fry,thoran/mezhukkuvaratti,rice,papad/pappadaum,curd/moru/sambar & a fruit which is usually our good old 'Poovan' pazham (a variety of plantain available in Kerala). We live on a coastal area...beach is just a 2 minute walk from my house...so fresh sea food is never a problem! Guess that applies to the whole of Kerala :)

So today the show is all about Fish fry,Cabbage thoran,Rice & Papad/Pappadam :)
Kerala Fish Fry:

Ingredients:

Fish (anykind like sardines, mackerel etc) - 4-5 cleaned & slitted
Chilli powder- 1-1 1/2 tbsp ( depending on your spice tolerance level & also the type of chilli powder used. We mix Kashmiri chilli powder + normal red chilli powder so that it has a beautiful colour and is not too spicy)
Turmeric powder- a pinch
Water- enough to make a thick paste with with the above masala
Salt to taste
Curry leaves- 1 sprig
Oil- 4-5 tbsp for frying ( We use coconut oil and we absolutely LOVE it! That brings out the 'Kerala/nadan' taste ! :D )

Method:
  • Make a paste using the powders,salt and water. It should be slightly thick.
  • Apply it onto the cleaned fish.Rub it slightly.
  • Leave it aside for 10-15 mins.
  • Heat oil in a shallow pan, add the curry leaves
I can live on Fish Fry, Rice and Curd :)
It's a simple n easy veggie preparation where in you can sub cabbage for any other veggie :) How about making it simple and nutritious?? Try cabbage & carrot thoran...it's very colourful too! :)

Cabbage Thoran:

Ingredients:
Cabbage - 250 g finely sliced
Onions-1 medium ,finely chopped
Green chillies-2,slitted
Coconut- 1/2 cup grated
Turmeric powder-1/4 tsp
Salt-to taste
Mustard seeds-1/2 tsp
Oil-2-3 tbsp ( we use coconut oil)
Water- 4-5 tbsp

Method:
  • Mix all the ingredients except mustard seeds,oil and water well in a bowl.
  • Heat oil, add the mustard seeds, let it splutter.
  • Add the vegetables. Mix well. Let it cook uncovered for 2-3 mins.
  • Sprinkle the water over it. Stir well.
  • Cover with a lic and cook on low flame till done stiring in between.
  • Check for salt ..
  • Serve hot!
The 'thoran' I love the most is Cabbage thoran! I can eat just that...no need of rice :)

This is the speciality of Kerala! No where else will you find people using this fat rice :) But trust me... if you want to get the exact Kerala taste this is a must! And I just cannot have 'kanji' (gruel) with anyother rice! Ah! LOVE YA boiled rice! :*

Rice:
Ingredients:
Boiled rice
Water
Salt

Method :
  • We usually boil rice in plenty of water and drain out the excess so that the starch is removed completely.

Here comes a highly addictive accompaniment to rice! For me I can munch on it anytime!! :P For those who don't know about this crunchy beauty...it's something like a deep fried wafer :D

Pappadum:

Pappadums (store bought/homemade)
Oil

  • Heat the oil and deep fry them.
  • Drain them on paper towels and store them in airtight containers.

Plantains have many varieties like 'Poovan' 'Palayamkodan' etc... I love 'poovan'variety the most!! This is widely eaten after lunch as a dessert...especially by elders!
And have you ever tried having Pazham(plantains) pappadam & neyy( ghee/clarified butter) with a spoonful of sugar?? If not...you are missing a lot in life!!!

  • Just take a few plantains, mash it well.
  • Add a spoonful or two of sugar.
  • Drizzle some hot ghee on it.
  • Crush some crisp pappadum on it and eat it! It's yummmm! :)

I can see many weird expressions now!! LOL!

So how was the lunch? I know there weren't any curries... but how about this , this & this ?? :)
Have a great weekend!! :)

Wednesday, July 29, 2009

URULAKKIZHANGU MEZUKUPURATTI


It was just few days ago Aparna & myself were twittering about this dish and I realised that I have never posted this before! How could I do that when this is my all time favourite?? Hmmm so the very next day we happened to make this at home and here it is :)

This dish has a lot of memories... it was my paternal grandmom( Mamma) who introduced this in our family and it was my dad's fave and now mine :) I can eat it anytime....as a snack or as a side dish! :) Just love it! It is perfect when paired with yoghurt/moru curry & rice.

Whenever Amma makes it...I tell her that I still clearly remeber how she used to feed me balls of rice mixed with moru curry and potato mezhukkuvaratti( which literally means 'smeared with oil')when we used to stay over in our estate... and that too when I was sitting on our trailer ( our jeep had a trailer for collecting all the farm produce and that was my place when I was fed :D )


Potato Mezhukkupuratti
Recipe by Mamma

Ingredients:
Potatoes-4-5 medium sized
Garlic-5-6 cloves
Pearl onions -8-10
Dry red chillies - 3-4
Chilli powder-1 1/2 - 2 tsp depending on your spice tolerance
Turmeric powder- a pinch
Water*-1/4 cup
Mustard seeds- 1/2 tsp
Salt- to taste
Curry leaves- 1 sprig
Oil-5-6 tbsp ( we use coconut oil & we swear by it :D )

Method:
  • Wash,peel and cut the potato into bite sized cubes and leave it in water so that it does not discolour.
  • Grind garlic,shallots & dry red chillies to a paste using a mixie or a mortar & pestle ( preferably the granite one)
  • Heat oil, splutter the mustard seeds.
  • Saute the ground ingredients till a lovely aroma comes.
  • Lower the flame and the powders and mix well.
  • Add the potatoes ( we usually just take them directly out of the water , shake of the excess slightly and add it to the masala) and mix well.
  • Close with a lid and let it on low flame cook for 5-8 mins stirring well in between ( If you are going to drain the potatoes completely and add them, sprinkle 1/4 cup of water over them and let them cook)
  • Once it is cooked, remove the lid and fry it slightly for 2-3 mins adding oil if needed.
  • Garnish with curry leaves and serve hot with plain rice.


Some notes:

We usually let it cook till it is almost dry...kinda fry types ...so that the potatoes are well coated with the masala and they are slightly crisp on the outer edges but soft inside. So it might call for more oil. But if you do not want to use too much oil, no issues...go ahead ! I really feel potatoes made in any form is really delicious!


Sunday, July 26, 2009

~It's cookie time at the Daring Bakers ~Milano Cookies ~ My 4th DB challenge

Milano cookies were something I have always loved...we use to get a share when my aunt visited us from Muscat. I don't remeber the brand but it used to come in white paper packets and they tasted real good. So the minute I knew this was our challenge for the month + a Mallow cookie...I was really excited. Wanted to give the mallow cookie a try BUT somehow that 'want' just din't materialise. So I gave in for the Milano cookie.

The recipe given on the DB forum had lots of egg whites and so I followed the Isa Chandra's Vegan version posted in one of the forums by
Singing Horse.

The July Daring Bakers' challenge was hosted by Nicole at Sweet Tooth. She choseChocolate Covered Marshmallow Cookies and Milan Cookies from pastry chef Gale Gand of the Food Network.


Vegan Milanos

Recipe by Isa Chandra

1/3 cup rice milk (or soy, whatever you got)
3/4 cup sugar
1/2 cup canola oil
2 teaspoons pure vanilla extract
Scant 1 teaspoon finely grated orange zest
2 cups flour
2 tablespoons cornstarch
1 teaspoon baking powder
1/4 teaspoon salt

6 ounces bittersweet or semisweet chocolate, chopped (or use chocolate chips)

  • Preheat oven to 350 F. Grease 2 large cookie sheets.
  • In a large mixing bowl, use a strong fork to mix together milk, sugar, oil, vanilla and zest.
  • Add half of the flour, along with the cornstarch, baking powder and salt; mix well. Add the remaining flour and mix until you have a soft, pliable dough.
  • Make sure your hands are very clean and dry, and dust them with flour. Stuffs about to get messy. Sort of.
  • Grab about 1 tablespoon’s worth of dough and roll it into a ball, and then roll into a log that’s about 1 1/2 inches long. Flatten with the palms of your hand to create an oval that is 2 inches long and 1 inch across, then straighten the edges out with your fingers. Basically, if you know what a milano looks like, that’s the shape your going for. But this is homemade, so don’t try to be perfect. You aren’t a machine (or are you?)
  • Continue with the rest of the dough, flouring your hands before you form each cookie, until you have 16 cookies placed about 1 inch apart (they don’t spread much.) I had to do this in 2 batches because of my small oven, so while these baked I started my next batch of 16. If you’ve got a big oven then do both trays of 16 at once.
  • Bake for 14 to 16 minutes, until tops are firm and edges are ever so slightly browned. Remove from oven and let rest for 2 minutes. Use a thin, flexible spatula to transfer to a cooling rack. Meanwhile, bake your next batch and melt your chocolate*.
  • Once cookies are cool enough to handle (only about 10 minutes), take a cookie and dip the bottom into the chocolate. Then take another cookie and dip it, and place the dipped sides together to form a sandwich. Don’t press them hard lest the chocolate smush out. Place them on a tray or several plates that will fit in your fridge. Continue with the remaining cookies until you have 16 sandwiches. Have a wet rag at the ready to wipe your fingers between putting the cookies together, to avoid chocolate fingerprints on the cookies. Or just lick the chocolate off. Or just decide that who cares about chocolate fingerprints.
  • Place cookies in the fridge to set for at least an hour. Bring back to room temperature before serving (about 1/2 an hour.)

The dough was easy to work with and it shaped up really well. But , it became very soggy as soon as it came out of the oven...blame the humidity? Not sure. As far the taste is concerned, it was OK and not what I expected it to be. It did taste fine... but not as good as a milano.

Friday, July 24, 2009

Homemade Banana Chips & I hit half century~51th post~


I hit half century today! Woohoo!! :)) Never knew I would come this far!! :) So today's post is an all Malayali's fave snack... Banana chips!! It is for sure that each Malayali carries atleast one pack of it when he/she goes out of Kerala! I used to carry min 1.5 kilos everytime I went to my hostel... loved munching on it :) And I still do :)
It might seem difficult to make these at home...but they are not and they taste 200% better than store made or even freshly fried from local shops. Once you are bitten by the home made taste then you will never buy from other sources.
Homemade Banana Chips
The way my mom makes

Ingredients:
Raw bananas
Oil
Water
Salt
Turmeric powder(optional)


Method:
  • Peel the raw bananas and leave it in water for 1 hour.
  • Heat oil (deep frying) and when it is real hot slice the bananas directly into the oil.
  • Stir slightly so that they dont stick together.
  • You can add salt and a pinch or two of turmeric into it at this stage. ( we don't add turmeric and we add the salt later otherwise we might not be able to use the salty oil later)
  • Fry till it's nicely yellow on the outside and crisp looking. Taste in between :D
  • Drain them on kitchen towels. You can add salt at this stage too and toss them well.
  • Store it in airtight tins.
Try this and be sure to get addicted! :) It's a perfect all-time snack! Let your mouth keep munching all the way!! :)
Happy Friday everyone!! :)


Thursday, July 16, 2009

Kappa Kuzhachathu / Mashed & Seasoned Tapioca - A definite food on board!


As promised in my last post , this one is loaded with pics from my recent trip to Pallikuttumma :) We always have family get togethers! My family on the maternal side is HUGE with 72 members and is growing stronger!! :D We always seem to have some sort of a get together... weddings,baptisms,birthdays,anniversaries and even if there is nothing we create a reason to come together and have fun! I really din't think I would be able to make it with my 'swollen ankle' but I did and I have to say I'm GLAD that I did ( inspite of all the 'painful' moments of limping!! ;P)
The main attraction this time was the 'house boat' trip! It was my nephew Rohan's 1st birthday and it was celebrated 'on board'! :) Must apologise for not including any of the birthday celebration snaps as my cam was downstairs and I had no means of getting it upstairs with my ankle. But I managed to click some when I could :) One of the main/must have food on such a trip is 'Kappa Kuzhachathu' with a spicy Kerala Fish Curry!! It's usually the main food in 'kallu shap' ;D which means TODDY SHOPS and they are seen every 100 mts in my 'motherland':DWhen I got back from the trip Amma was making this dish at home! It's perfect during rains! It's been raining in Kannur since 3 weeks... continously!!

Kappa Kuzhachathu/Mashed & Seasoned Tapioca

Ingredients:
Tapioca -500g
Salt-to taste
Water for boiling tapioca

Grind together:
Coconut, grated -1 1/4 cup
Green chillies - 3-4 (depending upon your spice tolerance)
Turmeric powder-1/2 tsp

For seasoning:
Dry red chillies, torn - 4-5
Mustard seeds - 1 tsp
Coconut oil - 4-5 tbsp
Shallots -5-6, cut into rounds
Curry leaves- 1 sprig

Method:
  • Peel & wash tapioca. Chop them into bite sized chunks making sure the centre strand of root is removed and boil in plenty of salted water.
  • Drain the boiled tapioca.
  • Grind together grated coconut ,green chillies and turmeric powder.
  • Take a heavy bottomed vessel .Add the boiled tapioca & the ground ingredients. Mix well. Mash lightly ( Do not make it pasty)
  • Let it cook on medium flame for 3-4 mins so that the raw taste of the ground ingredients is no more present.
  • Check for salt.
For the seasoning:
  • Heat oil.Splutter the mustard seeds & add the remaining ingredients. Fry till the shallots turn light brown.
  • Pour this onto the mashed tapioca and mix well. Serve hot with any spicy fish curry or have it as is.
Now is the time for the much spoken trip pics! :) I stayed with my Amma's twin sis & family for a night in their estate bunglaow in Kothamangalam,Eranakulam Dist (Cochin). They have been running a homestay at their estate for about 7 years now. It's called the Mundacakal Plantation Homestay and they have been given 'Diamond' rating by Kerala Tourism Board and have been recieving rave reviews by many ! They appear in almost all international tourist guides.

Click on the pic or here to check their website! Make sure you book ahead incase you want to stay with them because they are usually booked completely 8-9 months ahead!! :D


Now starts the journey! :)


I know I know there weren't many pics... but something is better than nothing right?? :P

Hope y'all have a great day!!


Related Posts Plugin for WordPress, Blogger...