Ria's Collection: Teatime recipes
Showing posts with label Teatime recipes. Show all posts

Monday, February 7, 2022

TEA CAKE

Tea Cake
There was a time in my life when I enjoyed cakes with some kind of frosting on them. It's slowly changing now and I see myself baking more plain cakes than frosted ones. I end up making frosted cakes mostly for some kind of a celebration these days. When I say plain cakes, I don't mean that they are boring. Instead, they are simple cakes where the main ingredients shine through. A good butter cake is our favourite and whenever I bake them, I try to get the best possible butter that I can lay my hands on. I love using Irish butter for it because they are extremely high in fat content and their flavour truly makes the cake shine!

Tea Cake
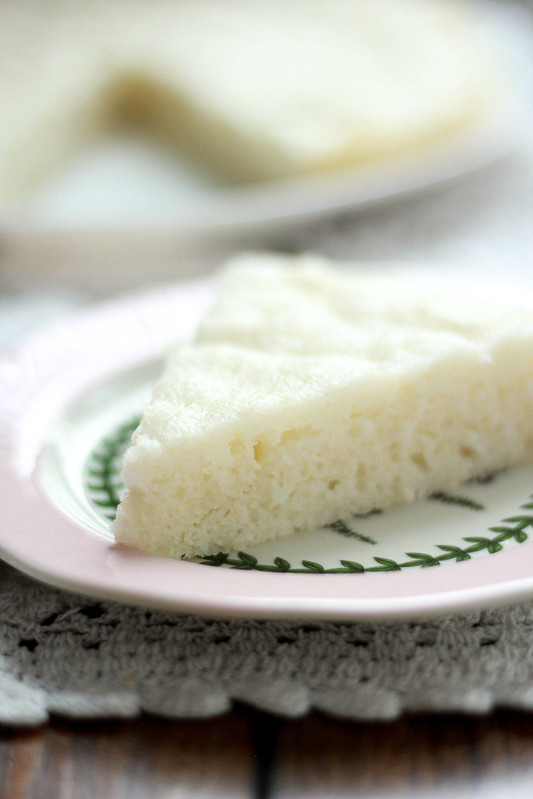
A tea cake can be made in three ways. The first one is where dried fruits are steeped in tea overnight and added to the cake batter while baking. The second one is the kind I've eaten the most in my life. It's a slightly dry cake when compared to a butter cake and is flavoured with caraway seeds. Both cakes are enjoyed with a cup of tea (or coffee!) and hence the name Tea Cake. The third one is like a cross between a cake and a cookie and is baked commonly in the Southern states. Oh, that reminds me of Snowball cookies which are also known as Mexican & Russian Tea Cakes! Do share if you know of any other tea cakes that I am not aware of! I love learning new things!

Tea Cake
I wasn't sure how Ian & Zara would enjoy this cake because it uses very little butter and they both are used to very buttery cakes. I was definitely surprised when they devoured the cake slices. They took to the taste of caraway seeds very well. Please know that caraway seeds are not the same as shah jeera. Caraway seeds are also known as cake jeerakam in Kerala. It has a very distinct flavour. It's widely available in most grocery stores here.

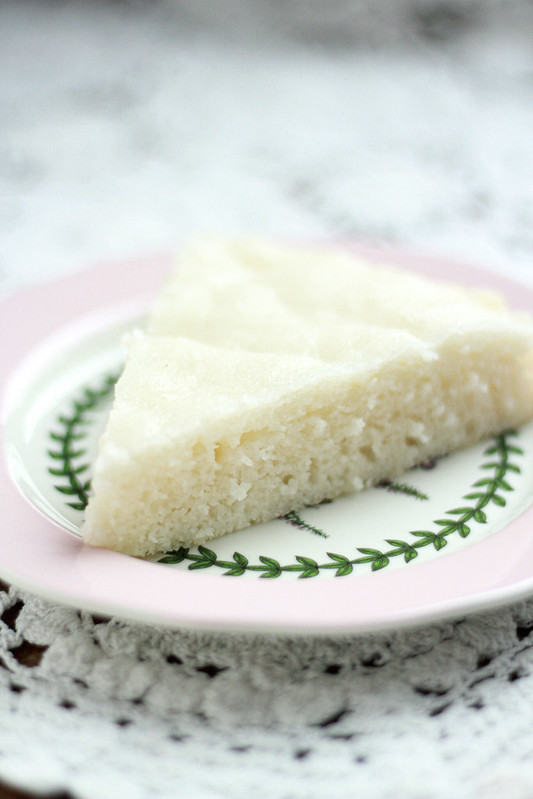
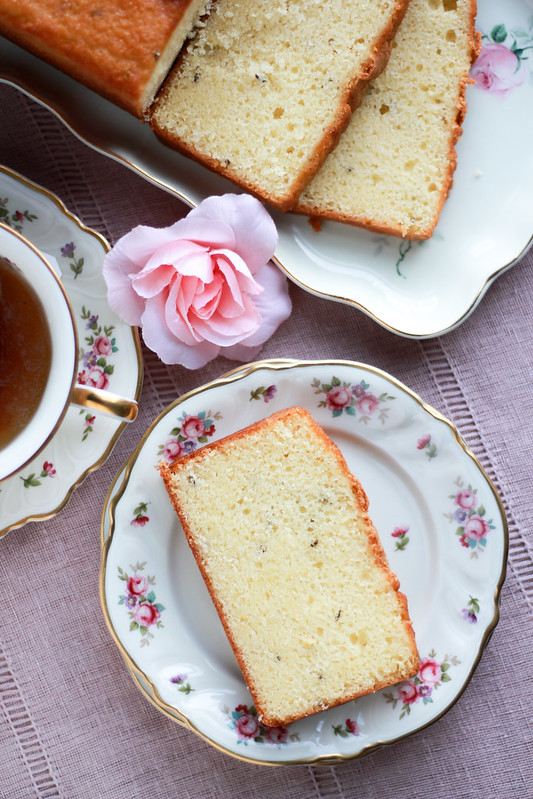
This recipe comes from Mrs Bava Lukose and is a keeper just like all the recipes I've tried from her book Suriani Pachakam. The cake keeps getting better by the day and it slices like a dream! She uses a different method for making the batter from what's done traditionally.  Try this recipe when you are looking for something simple & tasty to go along with your cuppa next time!

Tea Cake
Makes one 9 inch loaf
Ingredients:
2 cups all-purpose flour
2 teaspoons baking powder
4 eggs, room temperature
1 3/4 cups sugar
1/2 cup butter, room temperature
1 cup milk
1 teaspoon caraway seeds 
Method:
Preheat the oven to 350 F / 180 C and line a 9-inch loaf tin.
Sift the dry ingredients and keep them aside.
In a large bowl using a hand-held mixer beat the butter until pale and creamy, about 3 minutes. Add sugar and eggs alternately and mix well for 15 seconds after each addition. It will become a very fluffy and light coloured mixture.
Add flour & milk alternately and mix on low speed until just combined. Fold in the caraway seeds and pour the batter into the cake tin.
Bake for 50-55 minutes or a toothpick inserted into the centre comes out clean. Cool in the tin for 15 minutes and then turn it out onto a rack and cool completely. 
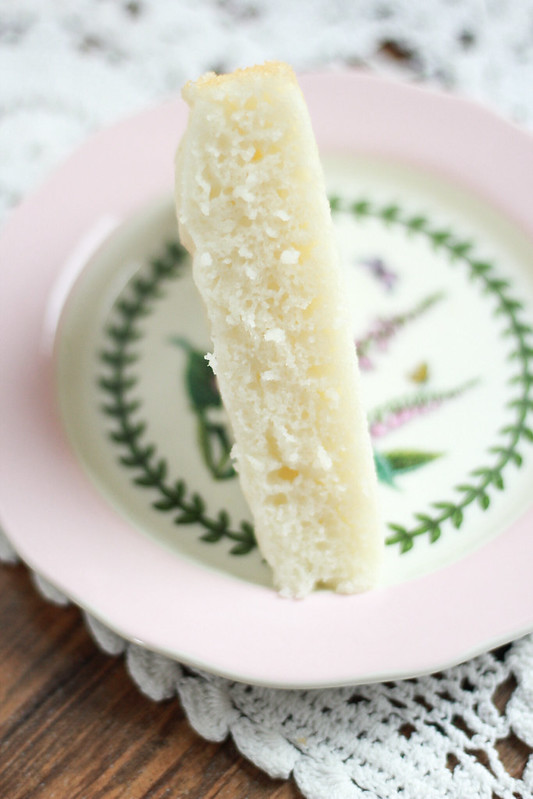
Slice them into thick slices and enjoy! Store the leftover cake in an airtight container for up to a week.
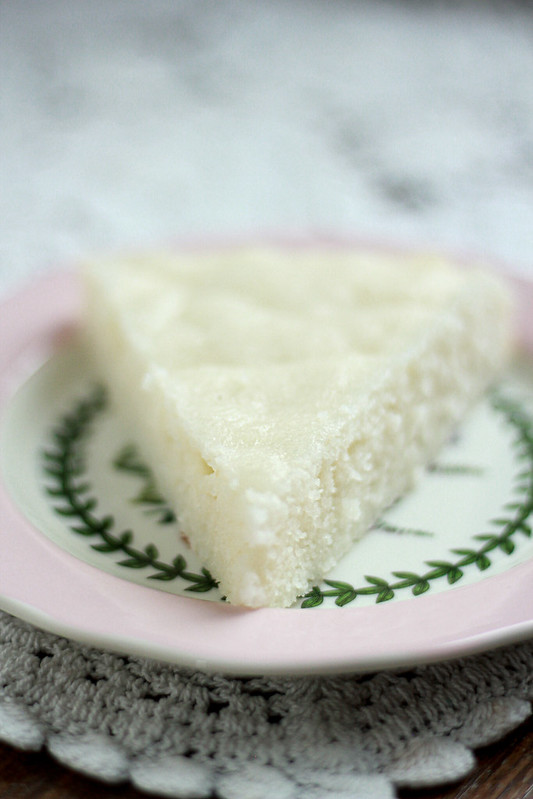
Like how I mentioned earlier, this is a very tasty basic cake. I wouldn't recommend any frosting for this, it's meant to be served plain. This will make a delicious cake to take with you for picnics. I cannot wait for it to be warmer here in Minnesota, just so that we can explore the outdoors as much as we can!

Monday, April 13, 2020

VATTAYAPPAM

Vattayappam
Life has been extremely fulfilling over the last one month. We've been under lockdown since mid March and personally, I am so grateful that we got this time to ourselves.  Even though the routines have all been disrupted, we have found a new routine and a new normal and we have been enjoying it as much as we can.  A major chunk of our plans have been cancelled but I am the kind who focuses her energy to the next best thing. I cannot wait for the sun to come out (we are in the midst of a snowstorm as I type this and I can barely see our neighbour's house at this point!) and start gardening! I am not a gardener and I have no idea on how to create a visually appealing one but I am going to try it this Summer. I have also bookmarked a lot of grilling recipes that I have been planning to try for the longest time! Hopefully the gardening and yard work will take care of my waist!
Vattayappam
Now to the topic of the day...our good old Vattayappam! I have tried my hand at so many Vattayappam recipes before and while most of them were really good, they involved a lot of steps. It's either extracting coconut milk and then 'kappi kachuka' and then another round of grinding coconut & rice and what not! In the end, I would be left with 6-7 dishes to wash and one Vattayappam.Whereas this recipe, it's pretty much a one bowl recipe and very straightforward.
Vattayappam
This recipe comes from Bava aunty, the author of Suriani Pachakam. I have shared many recipes from her book already on my blog and all of them have been excellent! This recipe is no exception. It gives you two extra soft, tender Vattayappam. The kind you always wanted to make and never figured how to! I have been making this recipe for a few months now and it's given me consistent results. I hope you enjoy this as much as we do!

VATTAYAPPAM
Vattayappam Makes two 8 inch rounds

Ingredients:
250 grams Idiyappam / Pathiri podi
1/2 cup lukewarm water
1 1/2 teaspoon yeast
1 teaspoon sugar
2 cups grated coconut
1 1/4 cups sugar (original recipe called for 1.5 cups sugar)
2 egg whites
2 tablespoons ghee
Salt

Method: In a large bowl, whisk together warm water, yeast and 1 teaspoon sugar and set it aside for 5 minutes.
In the meantime, grind the coconut to a smooth paste using water.
Once the yeast has been activated, add the rice flour, ground coconut, sugar and mix well. Add just enough water to make a batter of flowing consistency. Cover and let it ferment for 4 hours.
In a medium bowl, whip the egg whites to stiff peaks. Fold it into the fermented batter along with ghee and salt.
Transfer the foamy batter into two greased 8inch round cake tins and steam on high heat for 20 minutes. Cool and use as needed.

*You can add a few pods of powdered cardamom as well as garnish the top with fried cashews and/ or raisins. It was not included in the recipe . Amma always made hers plain and that's how we like it too!
*You can store the extras wrapped well in the fridge and re-steam it or zap it in the microwave for a few seconds as needed.
Vattayappam

This is one of Ian's most requested things to eat. He calls it 'Vattamappam' and loves it dearly!  Every time I make this, I plan on serving one for breakfast the next day but it never lasts and I never learn! I usually make this for our teatime and somehow a bite of this Vattayappam immediately takes me back home. Our nadan palaharangal always ensures a trip down the memory lane for me.
Every time I share a picture of our Vattayappam on Instagram, I get so many requests for it's recipe. So this recipe is for all of you who have waited patiently for all these months!I sincerely hope you give this a try at home. It's a good recipe!

Wednesday, October 23, 2019

ALMOND SHORTBREAD

Almond Shortbread 5
Shortbreads are a quick and easy treat to bake so I make it quite often. Our children love it, we love it and everyone who eats them seem to enjoy them. I usually have a few logs of frozen shortbread dough to bake up at the last minute when we have someone coming over or as an after-school snack. I've baked them with many flavor combinations as well. Today, I am sharing with you a recipe that I discovered recently, an Almond Shortbread...a sweet something special for my blog's 11th birthday!

Almond Shortbread 4
I chanced upon this recipe in a cookbook called Sweet by Valerie Gordon that I borrowed from our public library during one of our recent visits. It's a very straightforward recipe just like my basic shortbread recipe. It's rich and buttery and crisp! While baking these,make sure you bake them just until they are golden around the edges and firm to the touch. You should be able to lift it up,turn it over and see that the bottom is also golden. If you bake it any further, it ends up being very hard.
Almond Shortbread 1
If you are a beginner at baking cookies, this would be a good place to start. It's not that cookie baking is rocket science but straightforward recipes like these are hard to go wrong with. Also, please invest in a good, heavy baking sheet. I personally feel lightweight tins don't yield good results. They end up giving your cookie a burnt underside when the top is barely done. Also, lining your cookie sheets always gives you a better results unless the recipe clearly states that you don't have to line it, which is usually in the case of very buttery cookies.
ALMOND SHORTBREAD
Almond Shortbread  Yields 50 small cookies

Ingredients:
1 cup all purpose flour
3/4 cup toasted almond flour *
8 tablespoons unsalted butter, room temperature
1/4 cup light brown sugar
1/4 cup granulated sugar
1/4 teaspoon salt
1 teaspoon vanilla

Method:
Whisk together both flours and set aside.
In a large bowl using a hand beater, cream the butter and sugars on medium speed until light and fluffy, 3-4 minutes. Add the flours 1/2 cup at a time mixing thoroughly after each addition.Add the salt and vanilla and mix for 30 seconds.
Turn the dough out onto the counter top and divide it into quarters. Roll each piece into a log measuring about 1 inch thick and 6 inches long. Wrap the logs in plastic wrap and chill / freeze until needed.
Pre-heat the oven to 350F and line a cookie sheet.
Slice the logs into rounds approximately 1/3 inch thick and place them on a lined sheet, 2 inches apart from each other. Bake for 15-18 minutes or until golden around the edges. Cook on the tin for 10 mins. Remove carefully and transfer to a cooling rack to cool completely. Store in airtight tins.

* To make toasted almond flour : Spread the almond flour on a baking tin and bake at 350F for 6-8 minutes. Cool and use as needed.
Almond Shortbread 2
These cookies are perfect with a cuppa! They have a slight caramel undertones from the brown sugar that's used in the recipe. Ian is not very fond of nuts in it's direct form but loved these cookies. You can dress these up further by dipping a fork in melted chocolate and drawing some lines over the cookies or simply dip half the cookie into melted chocolate, dark or white! Plain or dressed, these will win your hearts for sure!

Tuesday, April 2, 2019

BREAD VADA

Bread Vada
I
don't know about you but I love Teatime! It's something we always cherished at home and I am trying my best to continue that tradition in our house too. I admit that it's a lot of work because it kind of happens right after you are done with the lunch clean up. It used to be a subtle affair earlier but now as the children are growing up, their appetite seems to be growing at lightening speed! No matter what I cook and how much I cook, everything gets over in no time at all.
Bread Vada
These days, I say a silent prayer while I cook. A one line prayer for the food to stretch for another meal so that I don't have to cook four times a day, everyday! So back to the topic... I cannot do a subtle Teatime anymore. It's full on...Boost, Tea, Coffee and sometimes even a glass of Green Juice for the little lady! Then the food. I honestly thank heavens because I enjoy cooking. If not, I would have walked out of the house already! :-)
Bread Vada
No one asks for it but if I make something around Teatime, it vanishes in two seconds. So I know, everyone is hungry! I try to make different things for 'naalumani' so when I came across this recipe by Lakshmi Nair, I made a mental note to try it sometime. Now that Jobin's mummy is with us, it's even more exciting to plan and execute THE snack for the day.
Bread Vada
While I was frying these vadas, Jobin reached back home from work and I immediately asked him if he could make some tea for us to sip while munching on piping hot vadas. While we were hankering around the stove, I told him about my prayer these days. He laughed and said that there's no way that the food I make can last long! I mean, seriously? But why? :-( He was like please don't even think that you can cook one day per week and stretch that food...because we LOVE to eat! I agree, all 4 of us live to eat.
Bread Vada
I sometimes dream of having a help in the kitchen like how Amma has. Like, there are days when I don't feel like touching another dirty cup! There's no paid help in our house and we do every chore ourselves. Kids have designated jobs to do everyday and they do it, luckily without hesitation.  Now that Spring is here, it's going to get extra crazy with ALL the yard work that's waiting for us outside. We have a huge wooded/ private backyard which is extremely beautiful throughout the year but maintaining it is work. When I am gone to India in Summer, Jobin is left with all the work in and around the house and he tells me that it's exhausting. I agree. But the satisfaction that you get when you do it for yourself is something worth experiencing!
Bread Vada
BREAD VADA
Bread Vada Makes 12-14 pieces

Ingredients:
10 slices white bread, crumbled
1 cup yogurt,whisked
2-3 tablespoons water
1/2 cup rice flour (puttu podi)
4 tablespoons semolina
1 medium onion, diced
2 green chilies, diced
1 inch piece ginger, diced
1/4 teaspoon baking soda
Cilantro, as needed
1 small sprig curry leaves, torn
Salt
Oil for deep frying

Method: In a large bowl, mix together the bread, yogurt and water and set it aside to soak for 5 minutes.In the meantime, heat the oil for deep frying. After 5 minutes,add the remaining ingredients to the soaked bread mixture. It should be like ' Uzhunnu Vada' consistency. Basically, if you scoop some batter in a spoon and tap the spoon, it should fall back into the bowl. If needed,add just enough water to get to that consistency. Wet your palm, pinch a small ball out of the batter, pat into the palm, mark a hole in the centre and gently drop it into the hot oil. Fry till golden on both sides,about 2 mins. Drain excess oil on tissue paper and serve hot!
It's a quick snack that you can make with easily available ingredients. Even though it doesn't taste like 'Uzhunnu Vada' it's a nice crisp snack with a faint sweetness from the bread and heat from the green chilies.You can serve it with Ketchup or any other spicy sauce of your choice. We really enjoyed it and as usual it vanished in under 5 minutes!

Friday, November 16, 2018

ENGLISH SCONES

Scones 1
This is definitely a trip down the memory lane for me. These were the stuffs my childhood dreams were made of! All of you who have read Enid Blyton books and literally drooled over the food that were mentioned,will understand what I am talking about. This was during the pre-internet era. There was no online shopping either. So when I read about it, all I could so was to imagine the taste of her stale Rock Buns, Fresh Lemonade made with left over homemade jam from the larder and all those sardine sandwiches that were packed in their picnic baskets along with the bottles of chilled ginger beer!
Scones
Of all the places, Kannur was not the right place to find even a tin of sardines! Whenever Appan would travel, he would come back with goodies for us. So once, when we was travelling to Bangalore, I asked him if he could bring back some bottles of ginger beer and sardine sandwiches for me. He promptly took the help of Rosily chechy, my cousin in Bangalore to hunt for the items I had mentioned. In those days, Nilgiris was the gourmet store in Bangalore. If Nilgiris didn't have it, no one else would. Sadly for me, Nilgiris didn't carry ginger beer nor the sardine sandwiches.
Scones 2
Mamma, my paternal Grandmother did once tell me that she used to drink Ginger Beer in Malaysia and I was so intrigued to hear more about it. She told me it was a tasty drink! So many years passed by and one day while flipping through Mamma's cookbooks, I chanced upon a 'Dropped Scone' recipe. I immediately made it but sadly,it didn't taste all that exciting. Atleast not as exciting as the Enid Blyton's scones.
Scones 6
It was only after I moved to the US that I ever had my very first sip of Ginger Beer/Ginger Ale. I couldn't contain my excitement when I first spotted it after ALL these years!! It still is one of my favourite beverages till date.  I baked my first set of scones about 8.5 years ago and it's been one of mine as well as my family's personal favourite thing to eat! Scones make a regular appearance at our dining table and it's never failed to please anyone who has had a chance to eat it.
Scones 4

ENGLISH SCONES
Scones 2 Makes about 18-20 scones

Ingredients:
450 grams self raising flour*
2 level teaspoon baking powder
50grams sugar
100 grams butter,softened
2 eggs
a little milk

handful sultanas, if you'd like

Method:
Preheat your oven to 400F and line a baking sheet with parchment paper.
In a large bowl, mix together the flour, baking powder & sugar. Into that, add the butter and rub it into the flour using your finger tips until it resembles breadcrumbs. Crack the eggs into a measuring jar and pour enough milk to each the 300 ml mark. Which them together.
Pour almost all of the milk-egg mixture into the flour mixture (holding back some, about 2-3 tablespoons worth )and stir using a spoon to form a soft,slightly sticky dough.
Turn out the dough onto a lightly floured surface and gently knead and work in the sultanas. Roll out the dough to a 3/4 inch thickness and cut out as many rounds as you can using a 2 inch fluted cutter. Place them slightly spaced on the prepared tin, brush the tops with the reserved egg - milk mixture and bake for 12-15 minutes.

You can reuse the scraps, just bring them together gently and proceed.

Serve them warm with clotted cream and raspberry / strawberry jam and a pot of tea!

* For every 1 cup of self raising flour I use 1 cup all purpose flour + 1 1/2 teaspoon baking powder + 1/4 teaspoon salt. This recipe requires a lot of leavening agents.

The other day after Ian was dropped off at his Choir practice, we went to a grocery store to kill time. Yes, grocery store is where we kill time! :-) So as I was glancing at the shelves, I came across this lovely little jar of Clotted Cream and I literally jumped up and down like a little girl. I really don't need a lot of things to make me happy, a bottle of clotted cream is plenty!

All 4 of us are hungry around Tea Time so I usually make something special everyday. Since I had Clotted Cream on hand and since we all LOVE scones, I decided to make the ones Mary Berry had made during her 'Country House Secrets' episode. I am a sucker for food, crockery, English countryside along with the beautiful historic homes they have there.
Scones 5
So here's how I ate them. I took a scone, split it in half by gently pulling it apart at it's waist, slathered some clotted cream first on one half and spread some raspberry jam over it, sandwiched the two halves together and took a bite of it with my eyes closed. It was a treat in every possible way! They are delectable! Clotted cream is a thickened cream with a very faint tang. It's lovely and has a custard like consistency. Freshly whipped cream can be the next best alternative. All of us LOVED it and I saw Jobin go back to it many times in the evening!
All of you Enid Blyton lovers, go and make some for yourselves and relive your childhood memories through a plateful of delicious scones!
Related Posts Plugin for WordPress, Blogger...