Ria's Collection

Tuesday, August 3, 2010

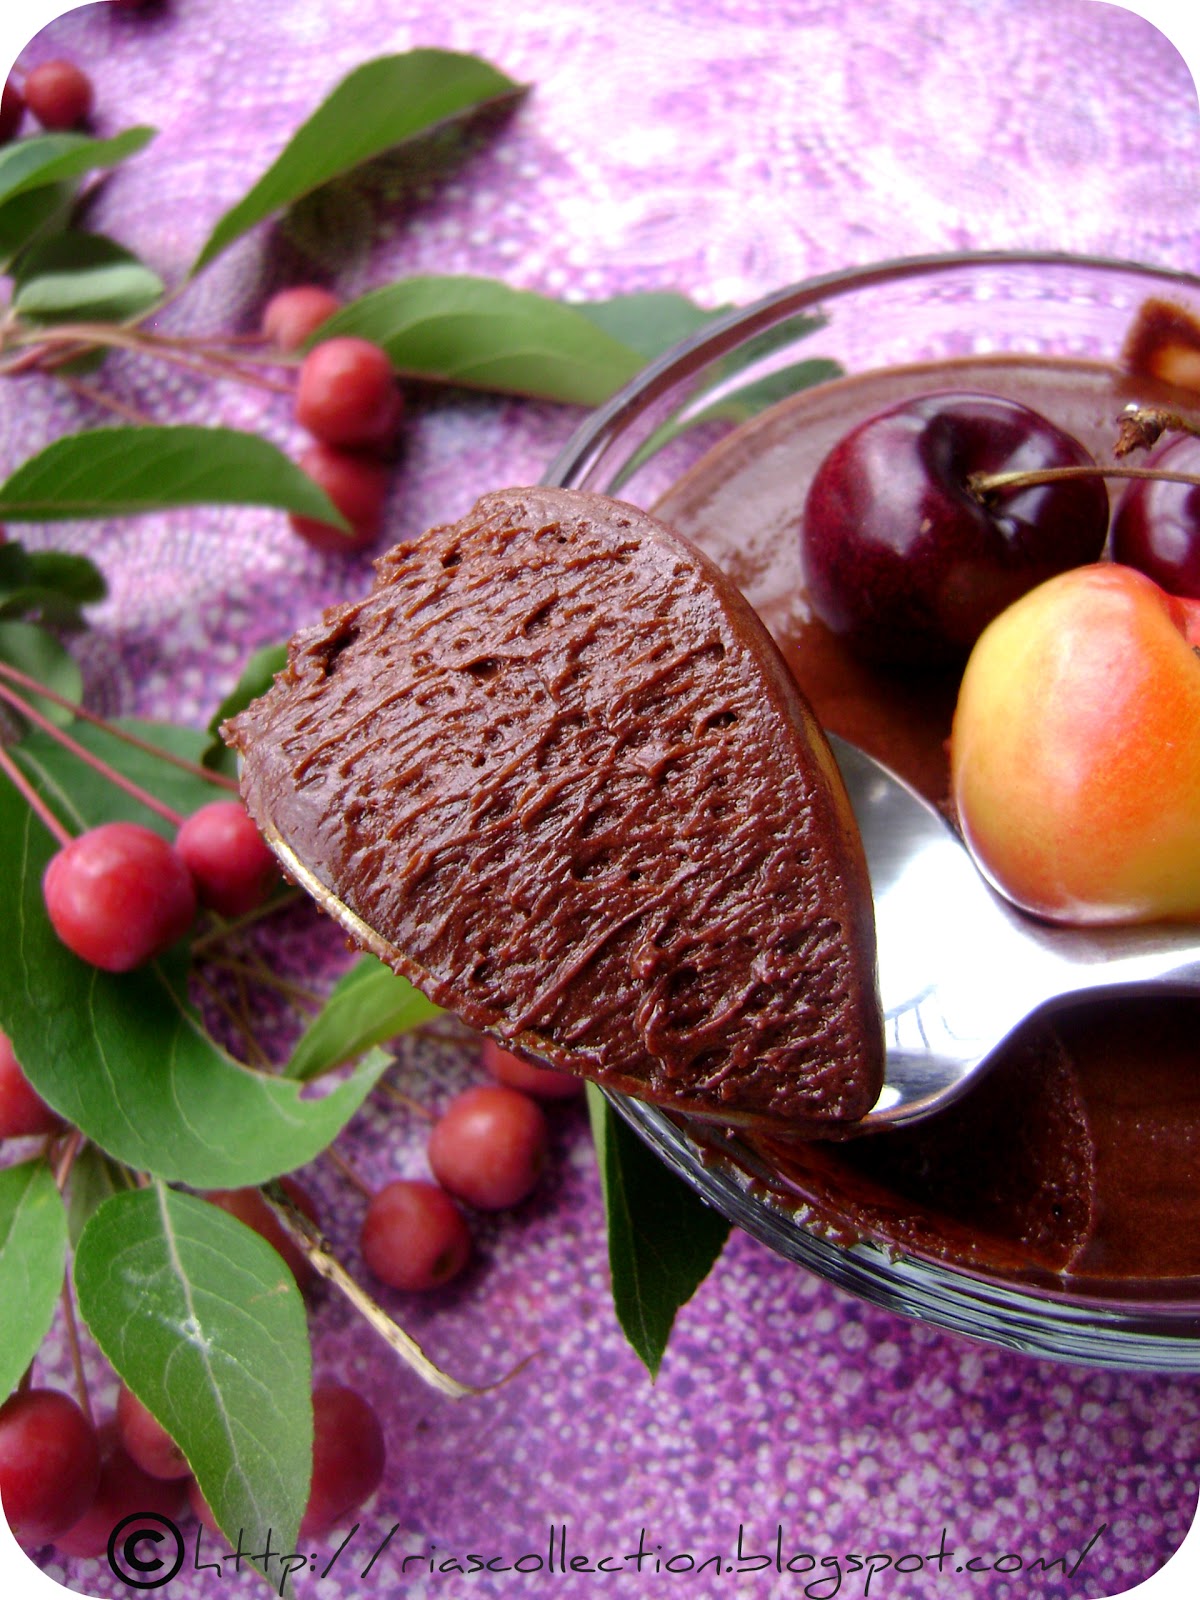
INSTANT TRIPLE - CHOCOLATE MOUSSE...the eggless way!


What do you do when you have a guest coming over for lunch in less than an hour? I will be doing the headless chicken dance between the appetizers, main course and of course, my favourite part of the meal, dessert. Oh yeah! I do elaborate meals when we have guests. Like how I had mentioned in my previous post, I think of dessert first. So, I made this instant chocolate mousse and left it in the fridge to set,then I continued my dance juggling  between the pots on the 4 burners :-)

Clank! Plonk! Bang! Sometimes they are music to my ears, not necessarily all the time!
Some of the best things in life comes in small sizes! And that can be very true sometimes! For eg: Mini Marshmallows are the life saver of this delectable dessert. If I were to use eggs like the traditional method, I would have had to wait for another 6-7 hours for the mousse to set (unless you use gelatin) and serve it for dinner rather than lunch! :-)
Mousse's have always been a favourite of mine.One of the first recipes that I blogged about was a Chocolate Mousse Cake. Whenever I make or eat a mousse, especially Chocolate, I always think of my college friend, Priyanka. We were the mousse eating partners :-)


INSTANT TRIPLE - CHOCOLATE MOUSSE
Recipe source: Nigella Lawson


Ingredients:
Mini marshamallows - 150 g (you can use regular marshmallows too)
Butter-50 g, softened
Chocolate- 250 g (I used a mix 70%, semi-sweet and milk), chopped into small pieces
Hot water-60 ml
Cream-284 ml
Vanilla extract- 1 tsp

Method:

  • In a heavy-bottom saucepan, melt the marshmallows,butter,chocolate and water together, stirring every now and then.
  • Meanwhile, whip the cream with vanilla until thick.
  • Fold it into the cooling chocolate mixture until you have a smooth mixture. ( I let the chocolate cool very well for the fear that the cream might melt.)
  • Pour into individual ramekins and let it set in the fridge for about 1 hour. 


Verdict: Silky smooth luscious wonderful heavenly decadent  perfectly textured dessert!

Friday, July 30, 2010

CHERRY CRUMBLE


Burp! Oopsie! I should have known that would happen when I gorged on those red beauties. I just don't seem to get enough of it. Ripe.Sweet. Juicy. That's exactly how I would describe the cherries that we get here now. Too good! Everytime I buy them, I plan to bake with it. But it never happened until now.

As I picked the cherries and popped them into the bag, I was already making plans of baking a crumble with it. I can sometimes be so oblivious  because I am busy planning my next move! ;-)

I love warm desserts and cold too...basically I love desserts. So there is no way that I'll turn away from a dessert unless it has weird ingredients like prawns or something! Wait! I wasn't kidding! Last year we had a cake competition in Kannur and my mom participated for it. And me being an onlooker went around reading the name of the other participants and their cakes. My face twitched when I read 'Prawn and Almond Cake'. I thought it must have been a typo and it should have been 'Prune and Almond Cake ' (so much more soothing for the ears!).

Well, it was not a typo and when she presented her cake for judgement, we both could see bits and pieces of prawn sticking out of the cake! Eeeww! That was my instant reaction. I have no idea how the judges ate that! Anyway, my mom bagged the price and we went home happy! :-)


CHERRY CRUMBLE
Recipe source : My Baking Addiction


Ingredients:
2 cups pitted cherries
1/2 c sugar
2 tbsp flour


For the topping:
1/2 cup oats
1/2 cup flour
1/2 cup brown sugar, packed
1/8 tsp baking powder & baking soda
1/4 cup butter, melted


Method:
  • For the filling: Mix fruits, flour and sugar together and divide them among 4 ramekins.
  • For the topping: Mix all the dry ingredients together and pour in melted butter. Mix well and top the fruits completely with it.
  • Bake in a pre-heated oven  at 350 F /180 C for 35 mins or until the topping is golden brown in colour.
  • Serve warm or at room temperature.


Verdict: I must be repeating myself,but I don't care! We loved it very much. I loved the crunch of the crumble topping and the sweeteness of the soft cherries beneath it.
Make sure you choose the right fruit,if it's over ripe it will be a mushy business.

Wednesday, July 28, 2010

NECTARINE & BLUEBERRY GALETTE


I love summer for 2 main reasons : Stone fruits & BBQ. I was amazed by the variety of stone fruits that are available here. Off late I have been hooked onto cherries and nectarines. I must have bought some 4-5 lbs of cherries thinking I shall bake with them. Unfortunately it all went into my stomach the non- baked way.

I made these the last weekend because we usually meet up with our friends for dinner. And it was my turn to play hostess. For me, I have to make dessert even before I start thinking about the main course and appetisers!I opened my fridge and I see the juicy nectarines and ripe blueberries sitting pretty next to each other. That's it, their fate was decided! So Galette it was!

I must not have done a very good job in stoning the fruits as they were so ripe that they got squished between my not-so-delicate hands ;-)

NECTARINE & BLUEBERRY GALETTE
Recipe source : Susan

Ingredients:
Dough:
All purpose flour- 1 3/4 c
Granulated sugar- 1/3 c
Coarse cornmeal-1/4 c
Salt-1/4 tsp
Cold butter- 1/2 cup, cut into small pieces
Butter milk- 1/3 cup

Fruit filling:
Fresh blueberries- 2 1/2 c
Nectarines - 3 , chopped
Granulated sugar-1/2 c
Light brown sugar-1/4 c
Ground Cinnamon-1 tsp
Vanilla extract- 1tsp
Fresh ginger- 1 tsp, minced
Cornflour-3 tbsp

Egg white-1
Milk- 2 tbsp
Sugar-1 tbsp

Method:
  • To make the dough, combine flour, sugar, cornmeal, and salt in a large bowl and mix well with hands. Add butter and mix with fingertips until mixture resembles coarse meal. Slowly pour the buttermilk and mix with fingertips until the dough forms a ball. Take the dough ball and adhere any remaining pieces of dough to it, then wrap in plastic wrap or parchment paper. Refrigerate for 30-35 minutes.
  • Center a rack in the oven and preheat to 350 degrees F.


  • To make the fruit filling, combine all ingredients in a large bowl, and toss gently, making sure that the cornstarch is coating the fruit. (This will prevent too much juice from leaking out while the galette bakes.)
  • Remove the dough from the refrigerator and place on a sheet of parchment paper. Starting at the center of the dough, roll out, forming a 14-15-inch wide circle. Place the dough with parchment paper on a baking sheet. Add the fruit mixture to the center of the dough, leaving a 2-inch border. Fold the border over the filling, overlapping where necessary and pressing gently to adhere the folds.
  • Lightly whisk the egg white and milk in a small bowl. Brush dough with egg wash, and sprinkle with turbinado sugar. Bake for 1 hour, or until crust is golden brown and the filling is bubbly. Transfer the baking sheet to a wire rack to cool for at least 20 minutes. (Cutting it too quickly will cause the dough to crack). It's best served at room temperature or slightly warm. 
Verdict: Perfect summer dessert! I love the pastry, it was crisp even after I left it outside for 4-5 hours! You can use any fruits of your choice to make this dessert. 
Our friends loved it, infact one of them went home with 2 galettes! :)

Thursday, July 22, 2010

PASTRY CRACKERS WITH BLACK PEPPER AND CAROM SEEDS


I have discussed it before, my love for Matri. I somehow cannot stop raving about this snack whenever I eat them. These days I have been eating the store bought one and somehow I forgot how the homemade ones tastes like. Nah! I was just kidding, how can I forget homemade taste like that! ;-) That was just another excuse for me to make them at  home ;-D

I am like a peacock. I get so happy and excited when I see the skies darken because of rain clouds. It reminds me of monsoons back in Kannur. I used to hate monsoons then because we used to get drenched completely when we went to school. But that was the only time we were allowed to wear sandals to school though.So, no complaints ;-)

So today, as I write this post...it's very dark outside and I am listening to Mozart. I love piano. I  have been planning to take piano classes since forever! It's never happened though.Today while we were having lunch, I was asking Jobin about the pottery classes that we might be having here. I love doing creative stuff, especially hand embroidery. That reminds me of the piece I started to stitch for our kitchen. I went wrong somewhere in between and I am in no mood to trace the mistake and get back . Been keeping away that work for more than a week now.


So while I get back to my work of searching for pottery classes, finishing or rather re-starting my embroidery work, at the same time getting excited because it's Friday tomorrow and lots of planning needs to be done as our friends will be coming over to our place for a game of Sequence and UNO and also plan out the dinner and getting back to the book I was reading...let me leave you all with the recipe for one of my favourite favourite all time snack...Matri.

PASTRY CRACKERS WITH BLACK PEPPER AND CAROM SEEDS
Recipe source : 1000 Indian recipes by Neelam Batra

Ingredients:
All purpose flour/Maida- 2 cups
Semolina/Rava-1/4 cup (not roasted)
Oil-1/4 cup (not coconut/peanut/olive)
Melted Ghee/Clarified butter-2 tbsp
Carom seeds/Ajwain- 1 tsp, coarsely ground
Pepper-1/2 to 1 tsp coarsely ground
Peppercorns-16 nos.
Salt- 1tsp or to taste
Warm water-1/2 cup
Oil for deep frying


Method:

  • Place flour,semolina,oil, ghee, ajwain ,pepper, salt in a bowl and mix well with fingers.
  • Add in the warm water little by little and mix well to for a semi-firm dough.
  • Divide the dough into 16 portions and roll it out into 3-4" circles of 1/8" thickness.If the dough is sticky, use oil and not flour to help in rolling them.
  • Pork holes all over the rolled out matri using the tines of a fork
  • Stick one peppercorn each into the centre of each matri and press firmly.
  • Heat oil on medium hight to 300-325 F and deep fry the matri's until golden brown.
  • Drain on paper towels, let cool completely and store in airtight containers.
  • Will stay fresh for 2 months.


Verdict: I heart it! I can eat it plain or even better, dipped in some spicy Stuffed Green Chilli Pickle.
 I think it was the first time that Jobin ever had one and I must say he mentioned about 'Matri' to everyone whom he met yesterday evening! :)


Monday, July 19, 2010

BARBECUED PORK SPARE RIBS


Phew! It's hot! These days are very hot in Minneapolis. The sun seems to be having a good time glaring down at us. I feel baked sometimes. Oh,I think it's good to know how our cake batter feels in the oven! 8-)

Summer brings it's own joy! Joys of wearing my sleeveless tops, skirts and shorts as well as fruits and BBQ! I love the BBQ part the most! Back home, Appan was the one in charge of BBQ on his made- to -order charcoal grill. It was a big affair then because sourcing the charcoal was not that easy as it is here, then to beat the humidity and heat of the coastal town while fanning the coal. Nothing can beat it's taste though!

We have our new Weber gas grill place out on our balcony on the 14th floor facing downtown Minneapolis. It's not only the view, the wind up here is so good! We can overlook the entire city ,enjoy the cool breeze and munch and sip on a hot summer evening! For me, I love the smell that my mint plant gives away when it sways in the breeze! It is very refreshing!

This has been my forever- favourite recipe!


BBQ-ed PORK SPARE RIBS
Recipe source: Amma


Ingredients:
Pork spare ribs- 1 kg
Honey-1 tbsp
Oil-1 tbsp
Vinegar-2 tbsp
Pepper powder-1/2 tsp
Tomato ketchup-2 tbsp
Soya sauce-2 tbsp
Red wine-1/4 cup
Ginger paste- 1 tsp
Garlic paste- 1tsp
Salt- to taste
Red Chilli powder- 2 tsp

Method:
  • Clean the ribs well and pat dry with a kitchen towel.
  • Whisk all the other ingredients together and mix with the ribs.
  • Let it marinate for a minimum of 2 hours, overnight if possible.
  • Cook on a hot covered grill , 10 mins on each side.
  • Baste the marinade on the pieces while turning to ensure that the meat remains moist.
  • Serve hot!
Verdict: We both love it! I can have it hot or cold! We have tried the same marinade with chicken and veggies like mushrooms, bell pepper and red onions. They tasted fabulous! So all in all, this recipe is a keeper!

Thursday, July 15, 2010

KATHARINE HEPBURN BROWNIES...best ever!


Phew! I rest my hunt for the perfect brownie recipe! That's what I mumbled to myself as soon as I had a bite of this decadent brownie. It had the perfect crackly crust that every brownie baker searches for. Sadly, you won't be able to see my crust as it was baked in a bundt tin and when you unmould it, it goes to the bottom.

I remember myself writing down all the possible brownie recipes available.I have seen this recipe many times, but deciding to make this was instantaneous. It was for my 2 little niece's in Virginia. Jobin's mom was with us for a month and she flew to Virginia this morning, so I sent a little package of these cuties along with her.


These are very simple to make, that one- bowl recipe that you are looking for when in a hurry to bake & take! I used the microwave oven to melt the chocolate & butter and that's how it was a one-bowl affair for me!

From my experience, to make good brownies, use your hand to mix the batter. Do not whip it up and trap air, it will be cake-y.The most important step is never to over bake the brownies. When you do the skewer test, it should come out with some of the batter/crumbs still clinging on to it.Then, let it cool completely! You need to wait for a while to take the plunge! :)


KATHARINE HEPBURN BROWNIES
Recipe source : Leites Culinaria

Ingredients:
Unsalted butter- 1 stick
Unsweetened Chocolate-2 oz ( I used 70% dark chocolate)
Sugar-1 cup
Eggs-2
Vanilla- 1/2 tsp
Flour-1/4 cup
Salt-1/4 tsp
Walnuts, chopped- 1 cup ,optional ( I skipped them as one of them are allergic to nuts)

Method:
  • Pre-heat the oven to 325F .Prepare your baking pan.
  • Melt the chocolate and butter together.
  • Stir in the sugar until combined. Add eggs, 1 at a time, mixing well after each addition.
  • Stir in vanilla and beat the mixture well.
  • Fold in flour,salt & walnuts if using.
  • Pour into the prepared baking pan and bake for 40 mins.
  • Cool and cut into squares.


Verdict: These are one of the best brownies I have baked so far! This recipe is a keeper and I can see myself baking batches of it in future!
Related Posts Plugin for WordPress, Blogger...