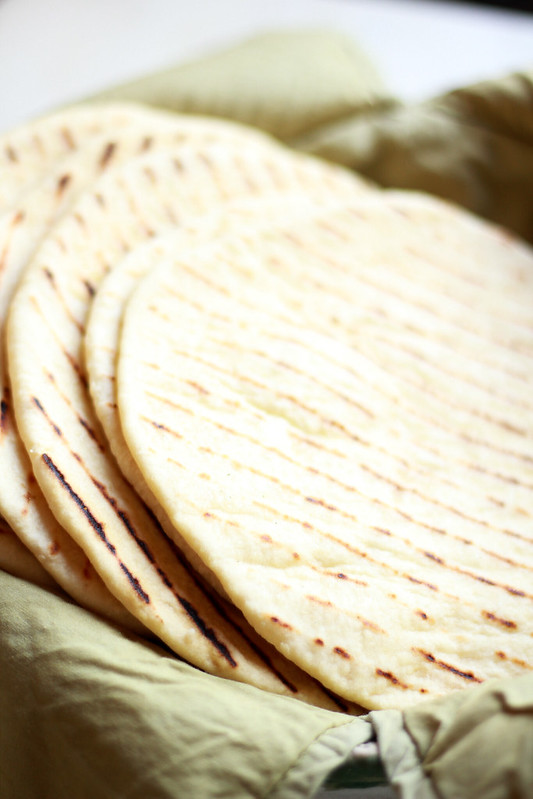
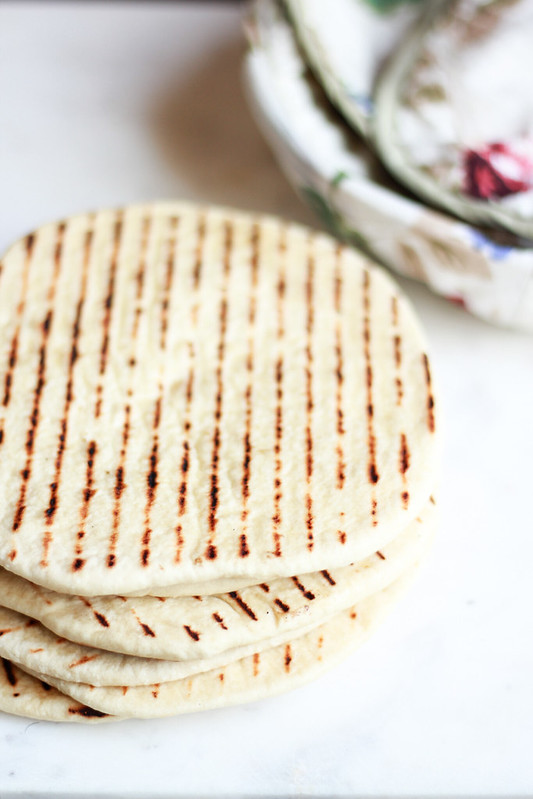
Ria's Collection: April 2020

Thursday, April 23, 2020

GRILLED FLATBREAD

Grilled Flatbread
I have been making this flatbread for a long time now and it always turns out good! Like soft, roll-able, perfectly chewy flatbread that goes with pretty much everything you want to wrap it with. We usually eat these with the Shawarma that  I make and we cannot think of replacing this bread with another. I love a good Pita bread but I love this one a little bit more. If you having been looking for a perfect vehicle for all your wrap needs, look no further! This is it!
Grilled Flatbread
This recipe comes from the brilliant Mark Bittman and you can never go wrong with his recipes. I recently found a copy of his extensive How To Cook Everything cookbook at our local thrift store for under a dollar! I can never pass on a deal like that. Thrift stores shelves have such hidden cookbook gems! Actually, I have found quite a few amazing books over there. Most of them are in near-perfect condition.
Grilled Flatbread
Flatbreads like these are so easy to pull off. You only need the basic ingredients on hand and it's done in under an hour and a half, including the rising time. I use it plain while making Shawarma but Mark suggests a sprinkle of za'taar over it. He calls it the Grilled Lebanese Flatbread. I am sure it tastes fabulous on it's own. I usually make Pita Chips with leftover Pita bread with za'taar on top. I love the flavor it imparts.
GRILLED FLATBREAD
Grilled Flatbread Makes 8

Ingredients:
2 teaspoons salt
1 teaspoon sugar
1 tablespoon yeast
3 cups all purpose flour
Extra virgin olive oil

Method: In a large bowl, combine salt, sugar, yeast and 1 cup warm water. Set it aside until it foams up,about 5 minutes. Add the flour and mix well until combined. Sprinkle warm water by the tablespoon and mix if you feel your dough is dry. Cover and let rise for about an hour or until doubled in size.
When the dough has puffed up, knead it for 5 minutes on a floured surface until smooth and silky. Divide into 8 pieces and roll out each one into an approximate 6 inches in diameter. Brush one side with olive oil and cook on a hot grill, oiled side down on medium high heat . Brush some more oil on the second side and flip when bubbles begin to appear. Cook the second side for an extra 30 seconds.
Serve it immediately or at room temperature.

* I rolled mine out thinner. If yours is a seasoned grill, you can make it without the oil as well. 
Our kids love this bread! They eat it plain as well as filled. I made these last night because Ian had been asking me to make Shawarma for a while. Now that we have all the time in the World, why not make use of it? You can get the kids to help you in the kitchen when you make bread. They will find it very exciting, especially when the yeast foams up and when the dough doubles in size. I hope you enjoy this recipe as much as we do!

Monday, April 13, 2020

VATTAYAPPAM

Vattayappam
Life has been extremely fulfilling over the last one month. We've been under lockdown since mid March and personally, I am so grateful that we got this time to ourselves.  Even though the routines have all been disrupted, we have found a new routine and a new normal and we have been enjoying it as much as we can.  A major chunk of our plans have been cancelled but I am the kind who focuses her energy to the next best thing. I cannot wait for the sun to come out (we are in the midst of a snowstorm as I type this and I can barely see our neighbour's house at this point!) and start gardening! I am not a gardener and I have no idea on how to create a visually appealing one but I am going to try it this Summer. I have also bookmarked a lot of grilling recipes that I have been planning to try for the longest time! Hopefully the gardening and yard work will take care of my waist!
Vattayappam
Now to the topic of the day...our good old Vattayappam! I have tried my hand at so many Vattayappam recipes before and while most of them were really good, they involved a lot of steps. It's either extracting coconut milk and then 'kappi kachuka' and then another round of grinding coconut & rice and what not! In the end, I would be left with 6-7 dishes to wash and one Vattayappam.Whereas this recipe, it's pretty much a one bowl recipe and very straightforward.
Vattayappam
This recipe comes from Bava aunty, the author of Suriani Pachakam. I have shared many recipes from her book already on my blog and all of them have been excellent! This recipe is no exception. It gives you two extra soft, tender Vattayappam. The kind you always wanted to make and never figured how to! I have been making this recipe for a few months now and it's given me consistent results. I hope you enjoy this as much as we do!

VATTAYAPPAM
Vattayappam Makes two 8 inch rounds

Ingredients:
250 grams Idiyappam / Pathiri podi
1/2 cup lukewarm water
1 1/2 teaspoon yeast
1 teaspoon sugar
2 cups grated coconut
1 1/4 cups sugar (original recipe called for 1.5 cups sugar)
2 egg whites
2 tablespoons ghee
Salt

Method: In a large bowl, whisk together warm water, yeast and 1 teaspoon sugar and set it aside for 5 minutes.
In the meantime, grind the coconut to a smooth paste using water.
Once the yeast has been activated, add the rice flour, ground coconut, sugar and mix well. Add just enough water to make a batter of flowing consistency. Cover and let it ferment for 4 hours.
In a medium bowl, whip the egg whites to stiff peaks. Fold it into the fermented batter along with ghee and salt.
Transfer the foamy batter into two greased 8inch round cake tins and steam on high heat for 20 minutes. Cool and use as needed.

*You can add a few pods of powdered cardamom as well as garnish the top with fried cashews and/ or raisins. It was not included in the recipe . Amma always made hers plain and that's how we like it too!
*You can store the extras wrapped well in the fridge and re-steam it or zap it in the microwave for a few seconds as needed.
Vattayappam

This is one of Ian's most requested things to eat. He calls it 'Vattamappam' and loves it dearly!  Every time I make this, I plan on serving one for breakfast the next day but it never lasts and I never learn! I usually make this for our teatime and somehow a bite of this Vattayappam immediately takes me back home. Our nadan palaharangal always ensures a trip down the memory lane for me.
Every time I share a picture of our Vattayappam on Instagram, I get so many requests for it's recipe. So this recipe is for all of you who have waited patiently for all these months!I sincerely hope you give this a try at home. It's a good recipe!
Related Posts Plugin for WordPress, Blogger...