Ria's Collection: 2014

Monday, December 29, 2014

BAKLAVA

Baklava
There was a time when I pretty much hated everything that had dry fruits or nuts in it. I would never eat a Cadbury Fruit & Nut and always wondered how people loved a Christmas fruit cake! Things didn't change much with regards to dry fruits until a few years ago when I first ate a Baklava. It was during my Masters when a friend of mine visited Dubai and brought some goodies for us. It was good. Things changed when I moved to Minneapolis post wedding. We found a good Mediterranean cafe in our little city which sold exceptionally good Baklava. Pistachio and Walnut. They were sold in tiny squares which made it even more special. Talk about portion control!
Baklava
We are in Kannur right now. It's our second trip this year. So, the last time when we came here, which was in March, I made a batch of Baklava and brought it to Kannur, for Amma. She fell in love with it when she tasted it back in Minneapolis. I really wish Phyllo dough was easy to source here. I have read a couple of recipes online where they have used packaged Samosa sheets. I haven't tried it myself,so cannot really comment on how the outcome would be.
Baklava
Baklava

A long time back,I made an Apple Strudel for the Daring Bakers monthly challenge. That dough was super easy to put together and bakes up very well in the oven. I am guessing,maybe that could be used instead of phyllo. The Apple Strudel dough had to be rolled super duper thin,like a phyllo dough,so it might work. I took this recipe from this popular website,a site I rarely visit though. No regrets. It turned out to be really good. Making a Baklava can be intimidating to some, but, it really is simple if you follow the directions the first time you make it. Once you are happy with what you made, then, the next time onwards, you can adjust the recipe to your taste. Atleast, that's what I do. That way, I will know if it's my mistake or not if the dish doesn't turn out the way I expected it to be.
BAKLAVA
Baklava Makes about 2 -3 dozen

Ingredients:
One 16 ounce package phyllo dough,thawed
1 pound chopped walnuts
1 cup unsalted butter,melted
1 teaspoon ground cinnamon
1 cup water
1 cup white sugar
1 teaspoon vanilla extract
1/2 cup honey

Method:Preheat oven to 350 F / 180 C. Butter the bottom and sides of a 9 X 13 inch baking tray with tall sides.
Syrup: Boil water and sugar until the sugar is melted. Add honey and let it simmer for 20 minutes. Turn off the heat and add the vanilla. Let it cool,while you assemble the baklava.

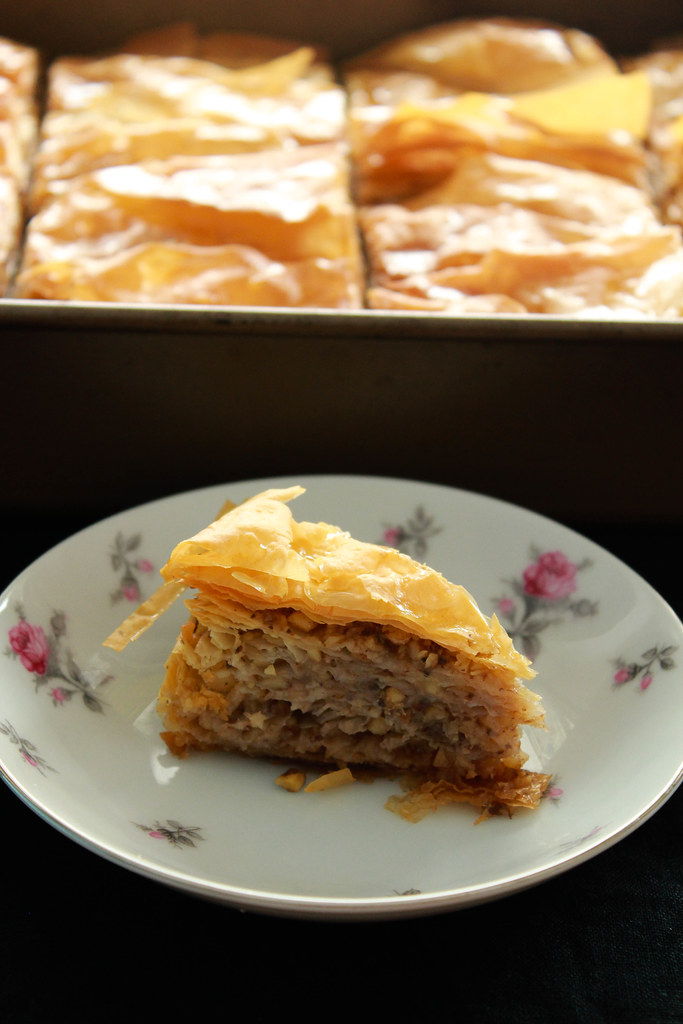
Toss the chopped nuts with cinnamon. Trim the phyllo dough, if need be, to fit the baking tray.Cover the phyllo dough with a damp cloth,if you are slow at working with it,because it will dry out otherwise.Place two sheets of phyllo in the pan and brush with butter. Repeat till you have 8 layers of phyllo sheets.Top it with 3 tablespoons of nuts. Top the nut mixture with two sheets of phyllo,butter it and then layer it again with nuts. Repeat till you have 8 sheets left.
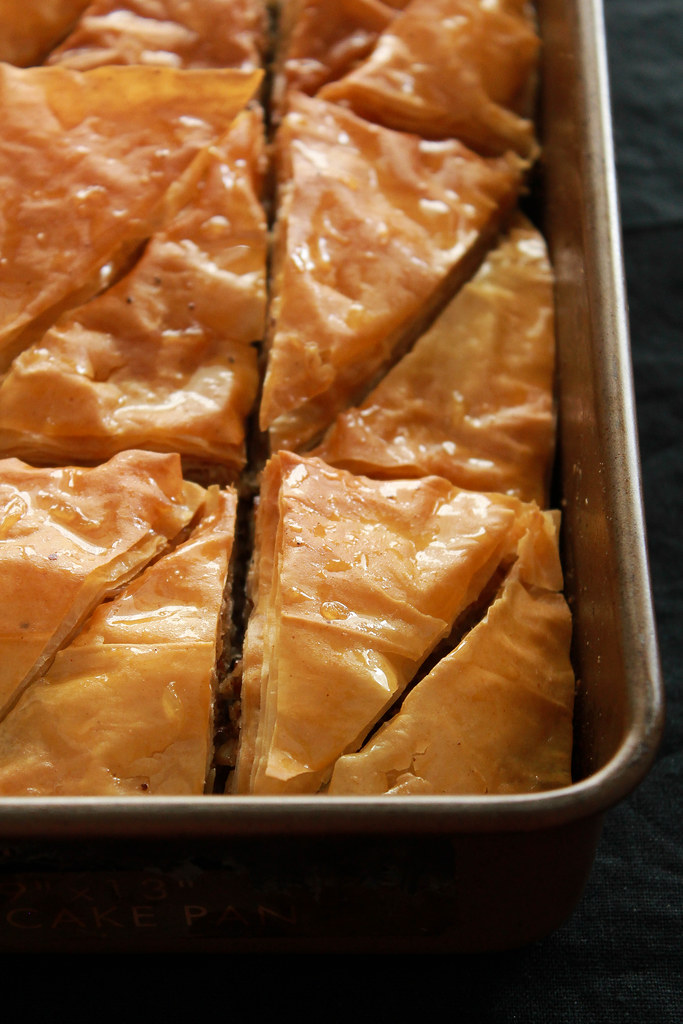
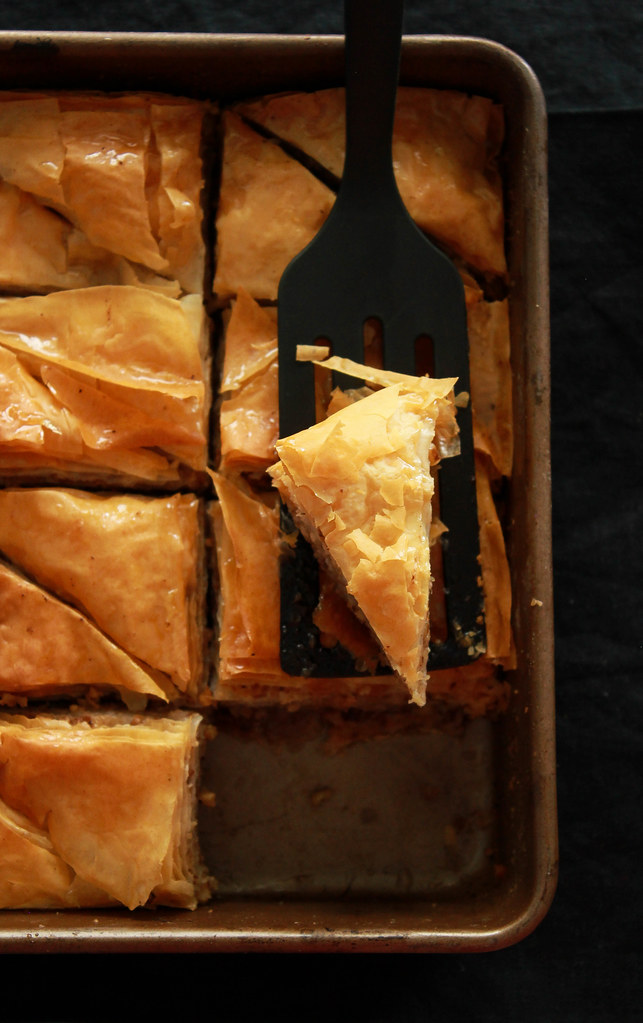
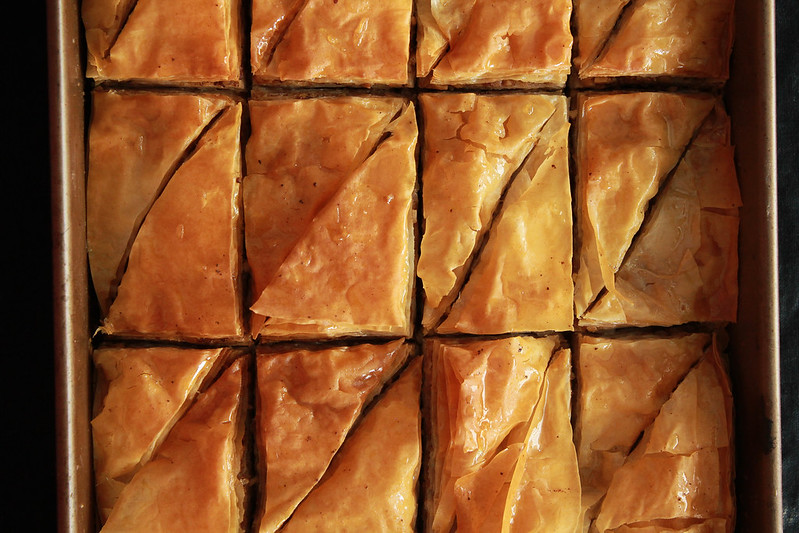
Butter every second sheet of phyllo,just like how you did in the beginning.Butter the topmost sheet too. Cut them into desired shapes all the way through, using a very sharp knife. Bake for 50-55 minutes or until the top is golden brown and crisp.
Immediately,pour the cooled syrup slowly evenly over the Baklava and let the whole thing cool completely. Serve as needed. Do not cover the Baklava tightly. It will get soggy.

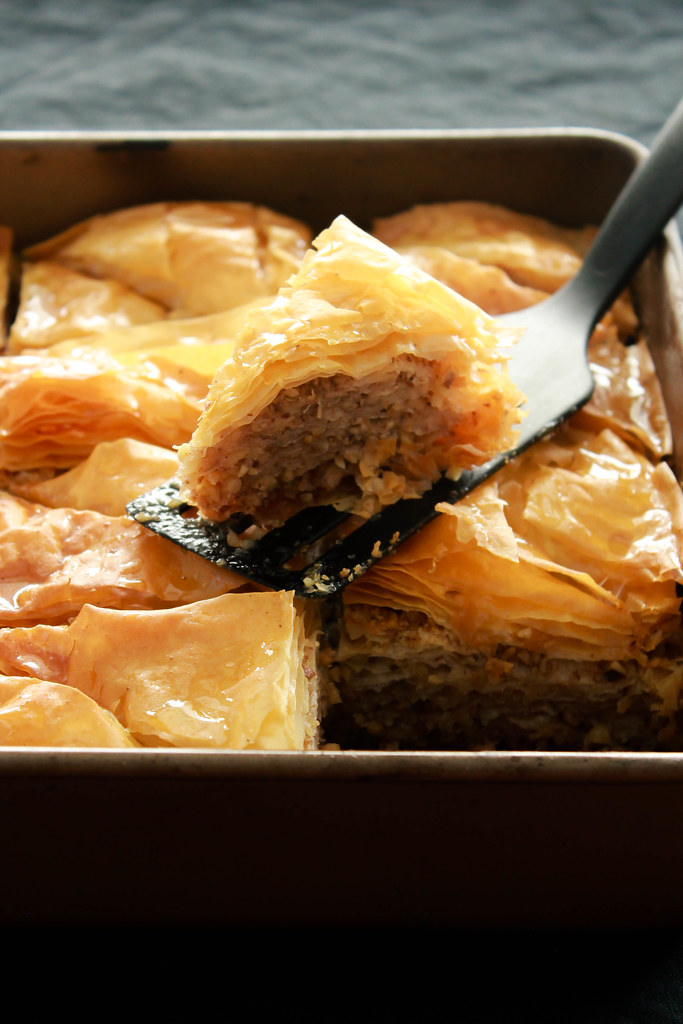
This was a total hit among my family. Also, I realised that it's one of the simplest complicated looking thing to make! Every bite was crisp on the top and it gets succulent as you go deep into the layers.It was simply delicious!

As you might have noticed, I've been very irregular here. Holidays are meant to be spent with family right? I try to stay away from all sorts of distractions but, I couldn't leave without wishing you all a Happy New Year! I sincerely hope you had a fabulous Christmas, just like how we did! So,see you all next year then!
 

Tuesday, October 28, 2014

THE CHICKEN TIKKA MASALA


CHICKEN TIKKA MASALA
Does this humble,yet hugely popular curry need an introduction? This is like the voice of India.Whichever restaurant you go to here, this is on their menu for sure! I even like the way it sounds.This was never a curry we had at home while growing up. A good Butter Chicken would appear once in a while on the dinner table when Amma was in a mood for a change. But,never a Chicken Tikka Masala.

I like all curries with a thick smooth sauce made with onions and tomatoes. And to go with that, I'd love some Garlic Naan,with some butter slathered over it.
CHICKEN TIKKA MASALA
I made this curry a month or two back and this post was in my drafts for the longest time. I don't know why,but,everytime I saw it, I did not feel like posting it here.I am trying my best to stop procrastinating things these days because,once I do that,it never gets done later on. It's a bit difficult at times but,when I am done with it,it feels awesome! There are days when I don't feel like doing anything, but,just sit and watch some movies or catch up on some idiotic reality shows.
CHICKEN TIKKA MASALA
Back to the curry.This is really an awesome one! Once you make it,you will feel like a kitchen goddess. Trust me, you will! Your kitchen will smell amazing while it's cooking and your tastebuds will feel pampered when you taste it! None of Mr. Raghavan Iyer's recipes, that I've tried so far, have failed to impress.It's not just me. It's been impressing a lot of our friends too! I paired it with a simple Peas Pulao, that I love making with some red onions, cumin & cilantro. It would pair well with just steamed Basmati rice too! This curry is bursting with flavours and you will wonder why you didn't make it earlier!

CHICKEN TIKKA MASALA
CHICKEN TIKKA MASALAServes 4-6

Ingredients:
You will need some bamboo skewers

For the marinade:
1/2 cup yogurt
2 tablespoons ginger paste
2 tablespoons garlic paste
2 tablespoons finely chopped cilantro leaves
2 teaspoons coriander seeds,ground
1 teaspoon cumin seeds,ground
1 1/2 teaspoon paprika
1/2 teaspoon cayenne
1 teaspoon salt
1/2 teaspoon garam masala
1/2 teaspoon turmeric
1 1/2 pound boneless,skinless chicken breasts,cut lengthwise into 1 inch wide strips

For the sauce:
2 tablespoon ghee
1 small red onion,coarsely chopped
1 small red bell pepper,seeded and cut into 1/2 inch pieces
1/4 cup slivered almonds
1/4 cup golden raisins
1 cup diced tomatoes
1/4 heavy cream
1/2 teaspoon salt
1/4 teaspoon cayenne
1/4 teaspoon garam masala

2 tablespoon finely chopped cilantro

Method:Soak the bamboo skewers in water for an hour.
Whisk all the ingredients given under the marinade,stir in the chicken and toss thoroughly. Refrigerate covered, for atleast 30 minutes or up to 6 hours.

When you are ready to cook the chicken,make the sauce: Heat the ghee in a small saucepan* over medium -high heat. Add the onion, bell pepper, almonds and raisins, and cook, stirring frequently,until the vegetables soften and then acquire honey -brown patches,10-12 minutes.Stir in the tomatoes and scrape the bottom to deglaze it.Pour this chunky sauce into the blender and add the cream,salt,cayenne and garam masala. Puree,scraping the jar as needed,to make a thick,nutty-gritty sauce.Pour the sauce into a medium size saucepan and simmer it over low heat while you grill the chicken.

Grill or broil (on the shelf closest to the heating element) the chicken for 6-8 minutes,turning occassionally,until they juices run clear.Slide the chicken off the skewers into the sauce.Stir to coat well and serve garnished with cilantro!

*Forcing the vegetables into a small pan allows them to sweat a little,creating moisture that prevents burning.

This curry is a bomb! That's all that I have to say :) We enjoyed it to the last bite. The sauce will thicken up as it cools,so feel free to adjust the consistency with some cream,if need be.

Wednesday, October 8, 2014

PORK & SHRIMP POTSTICKERS

PORK & SHRIMP POTSTICKERS
Potstickers. Can I have a plate of Potstickers? Cheta, Dumplings? These are our usual requests when we eat out. I am a die hard fan of potstickers and I can live on it for the rest of my life. Ian is another one. The minute the server comes by,he would say,'Cheta,Dumplings?'. He doesn't know the difference between a Potsticker & a Dumpling,so prefers to call them Dumplings. A Potsticker is first pan fried on it's flat side and then steam cooked in either chicken broth or water. Whereas a Dumpling is cooked by steaming alone. Simple,right?
PORK & SHRIMP POTSTICKERS
We used to buy Pork & Vegetable Potstickers from Trader Joes, Whole Foods etc all this while. Everytime we buy it, I make a mental note to try my hand at it soon. It never happened until we ate some Momos at our local Indian restaurant. Momos are a Tibetian / Nepali version of Dumplings. I've made them many years ago when I was in Kannur and they were my favourite things to eat out in Bangalore.We would go to the Taste Of Tibet on Brigade Road and order so many plates of Momos because we could never get enough of it!
PORK & SHRIMP POTSTICKERS
When I researched about the kinds of fillings,I was pleasantly surprised to see that most of them were the same. Some used different sauces to flavour the pork while some stuck to the basics. I preferred sticking to the basic recipe because I knew the ones we've been eating so far didn't taste like it had a blend of sauces. I was right. These potstickers proved to be the best!This recipe called for 64 Wonton wrappers but,if you are using Potsticker wrappers,which is thicker than the Wonton wrappers,you will have to buy an extra packet. There are only 48 Potsticker wrappers in one packet.
PORK & SHRIMP POTSTICKERS
This is such an easy thing to make and must be made ahead of time,if you are planning.They are best when frozen,just like how it is when we buy. When I tried cooking them as soon as I made it, it became a bit too soft. I mean,it was good but,it was not the way I had wanted.You need to lay them on a cookie sheet and leave it in the freezer till they are frozen,rock solid. After that, transfer them to a ziptop bag and leave it in the freezer till needed. This works as the best appetizer when you have some visitors at the last minute or,in my case,when me and Ian need something to munch on during tea time.
PORK & SHRIMP POTSTICKERS
PORK & SHRIMP POTSTICKERS Makes 64

Ingredients:
2 cups green / napa cabbage,chopped very fine
1 teaspoon salt

1/2 pound shrimp,cleaned and finely chopped
1 pound ground pork
2 tablespoons soy sauce
2 tablespoons rice wine /sherry
1 tablespoon chopped green onions
1 tablespoon sesame oil
2 teaspoons chopped ginger
2 garlic cloves, minced
64 Potsticker / Wonton wrappers

1/4 cup vegetable oil
1 cup chicken stock / water

Dipping sauce:
2 tablespoon soy sauce
1 tablespoon rice vinegar
a small slice of ginger

Method: In a large bowl,toss the cabbage with salt and set aside for 20 mins. Transfer the cabbage to a cheesecloth and squeeze out all the water. You will be amazed to see the amount that will ooze out. Make sure you squeeze the daylights out of it ;)

Mix together all the ingredients from cabbage through garlic,well. You can refrigerate the mixture,covered,at this point,for upto 6 hours. When you are ready,put one teaspoon filling on each wrapper,shape and seal with some water brushed on the edges of the wrapper. You can use a cornstarch slurry too,if you'd like it that way. Place all the shaped dumplings on a cookie sheet and freeze till rock hard. Transfer to a ziptop bag and freeze until needed.

How to cook: In a large saute pan, heat the oil on medium high heat. When it is hot, add the dumplings,flat side down and let it get golden brown on that side,1-2 minutes.Then,lower the heat to medium, add the chicken broth,cover the pan and let it cook for 3-5 minutes or until most of the liquid has been absorbed. Serve hot with the dipping sauce.

For the dipping sauce: Mix all the ingredients together in a small bowl and serve alongside potstickers.
This was seriously, out of this world good! If you have the patience,make a bigger batch and stash it away in the freezer and you can thank yourself,later,when you enjoy them! Ian was sleeping when I made these and when he woke up and saw them,he went crazy for it! I have made another batch already and they are sitting very pretty in the freezer :) You should try it too!


Friday, September 26, 2014

SICHUAN PRAWNS

SICHUAN PRAWNS
Ienjoy making Chinese food at home. It's so simple,easy to make and totally delicious!Whenever we are confused about where to eat out,we end up at a Chinese or Thai restaurant. The aroma that wafts around in the restaurant as you walk in, is just enough for me to build up an appetite. I ate a LOT of amazing Chinese food growing up. Mamma and Amma are so good at it. Not a week passes by without having Chinese food for dinner. It's the same even now, in my home in Kannur.
TIGER SHRIMP
Every time I make it, I tell myself I should do more,atleast once a week. But, with the usual drama with Ian,my cooking is always last minute. I rarely plan. I cannot plan,that's the fact. Everytime I come across a good cookbook, I tell myself that I should create a plan for the coming week and shop accordingly. Instead, I always find myself digging into my freezer,fridge and pantry to see what I have on had, and cook with it. Luckily, most of them have been a success ! :)
Why is it that I can never plan ahead for future meals? Are you like that too? Well, that isn't the case when we call people over to share our meals with. That takes a lot of planning from my side,to make sure that I execute everything properly in time.The menu will be decided atleast a week earlier and then shopping lists are made,plans are made (including the timings) as to when to start with what!
SICHUAN PRAWNS

Recently,we bought a beautiful red wok. I have so many memories regarding a wok!Mamma always made her Chinese food in a wok she brought back from Malaysia, many many moons ago.Mamma had given Amma one, but,since our lovely little Kannur is a seaside town and the fact that we live almost in the beach didn't help it. It rusted. Amma tried her best to save it by soldering the metal but eventually,we bid goodbye to it.
When we went shopping for a wok, I was torn between two things I saw there. It was another beautiful multifunctional blue pot and this shining red wok.When I told Jobin the affinity towards the wok because of all the memories I have attached with it, he gave me a thumbs up to pick that shiny red thing! Then, I waited. I waited for that perfect day to inaugurate the wok and that perfect dish that I wanted to make in it.

SICHUAN PRAWNS
So,when we went to our seafood market,I bought some Tiger Shrimp because I am totally in love with shrimp and selected seafood.Then,I bought some rice noodles too,thinking about pairing the two together. Jobin's mom loves rice noodles and I try to make it whenever I can when she visits us.So,as you would have guessed by now, the combination was Sichuan Prawns with Sesame Garlic Noodles. I waited for Jobin's mom to get here to inaugrate the wok and I made one of my favourite seafood in it.The recipe for this fabulous shrimp is from our family favourite Chinese cookbook by Mrs. Bhanu Ravindran.
SICHUAN PRAWNS
Serves 4

Ingredients:
500 grams tiger shrimp,cleaned
1 teaspoon salt
1/2 teaspoon black pepper

1 1/2 tablespoon tomato ketchup
2 teaspoon soy sauce
1/4 teaspoon black pepper
1 teaspoon roasted white sesame seeds,ground
1 tablespoon cayenne
1 tablespoon white vinegar

6 tablespoon oil
5 green serrano chilies, chopped
5 red serrano chilies,chopped
1/2 tablespoon chopped garlic
2 tablespoon chopped ginger
1 large red onion,sliced

1 teaspoon cornstarch + 3 tablespoon water
3 spring onions,chopped

Method: Marinate the shrimp with salt and pepper,refrigerate while you prepare the remaining ingredients.
In a small bowl, mix together tomato ketchup,soy sauce,black pepper, ground sesame seeds, cayenne & vinegar.
In a wok or in a large frying pan, heat 3 tablespoon oil on high heat and fry the shrimp for 2 minutes,per side, Keep them aside. Add the remaining 3 tablespoons oil into the same wok and let it heat up. Add the chopped chilies,garlic,ginger and onions. Let them cook for 2 minutes.Lower the heat to medium and then, add the sauces and fried shrimp.Stir well to mix. Add the cornflour mixed with water and cook for a minute. Garnish with chopped spring onions and serve hot!

This is one fiery hot super delicious curry! I can tolerate heat from chilies quite a bit and still, this curry was like very hot for me. Don't even think of giving it to your little ones,as is. Sichuan stuff is meant to be spicy hot! If you want to decrease the heat,cut down on the chilies and the cayenne. If you feel that the heat is not upto your mark,after making the adjustments,adjust it with black pepper. in the end.Ian didn't get a share of this :)

Wednesday, September 24, 2014

SAAG MURGHI

SAAG MURGHI
T he only reason for  trying out this curry was because, I do not like to eat greens in it's pure form. No matter what it is, I cannot. I like to combine it with some protein and that way, I just forget about the green goodness that's hidden in the sauce. My Spinach & Coriander Chicken Curry, one of my most popular recipes,is a good example. So, when I came across this recipe in 660 Curries by Mr.Raghavan Iyer, I made a mental note to try it as soon as I could.
SAAG MURGHI
I've never cooked with mustard greens so far. I've heard thats it's bitter. So, when we went to our Farmers Market last weekend, I bought a bunch of  mustard greens having this recipe in mind. Only after I came home did I realise that it also called for some Spinach. So, naturally, the curry didn't happen that day. It had to wait until we went and bought some spinach. Jobin's mom is visiting us now and she loves to eat greens,like most other people. When I told her I am planning on making this curry,she was equally excited.
SAAG MURGHI
Jobin loves dosa with chicken curry,of any kind.So, that was the combination we had,last night. This curry pairs well with pretty much anything...rice,rotis etc., I am not a fan of Palak Paneer and I did have a fear in my mind if it would taste like it.My fears vanished when I took a small bite once the curry was simmering away. It did taste different. It could be because there's chicken in it. The juices from the chicken can flavour the sauce like no other! The original recipe calls for a whole chicken cut into 8 portions. Even though I planned on making this curry for over a week, it never occured to me that I should be using a bone-in chicken. Instead, I went ahead with a different cut.So, if you are planning to sneak in more greens into your diet,try this curry. This is delicious and doesn't taste green,just the way I like it!
SAAG MURGHI

SAAG MURGHI
Whenever I am making a boneless chicken curry,I try to use boneless,skinless chicken thighs. Dark meat of a chicken is amazing and so full of flavour when compared to white meat,the breast of the chicken. I use chicken breast only for certain purposes,like kebabs,cutlets etc.Since I used a boneless cut of chicken, I had to alter the recipe as I went along.It was just a few shortcuts because the cooking time is much less than bone-in chicken.

SAAG MURGHI
SAAG MURGHI Serves 6

Ingredients
1/2 cup plain yogurt
2 tablespoon finely chopped fresh cilantro leaves and tender stems
1 tablespoon coriander seeds,ground
1 teaspoon cumin seeds , ground
1 teaspoon cayenne
1 teaspoon salt
1/4 teaspoon ground turmeric
1 chicken ( 3 1/2 pounds),skin removed,cut into 8 pieces
4 tablespoon vegetable oil
1 medium sized red onion,finely chopped
5 cloves of garlic,finely chopped
8 ounces fresh spinach,coarsely chopped
8 ounces fresh mustard greens,coarsely chopped
1 teaspoon rock salt, pounded

Method:
In a medium bowl, whisk together ingredients from yogurt through turmeric. Add the chicken to it, toss well to coat,cover and marinate in the refrigerator for a minimum of 1 hour.
Heat 2 tablespoons of oil in a large pan on medium high heat.Add the chicken pieces,reserving any marinade in the dish, Cook the chicken until light brown on both sides,about 5 minutes per side. Transfer the pieces to a plate.
Pour the remaining 2 tablespoon oil into the pan and when hot,add the onions and garlic. Reduce the heat to medium- low,cover the skillet and cook, stirring occasionally until the onions and garlic turn caramel brown,about 15-20 minutes. Add the chopped greens by the handful,cover the skillet and let it wilt. Repeat till the greens are over. Stir in the reserved marinade and 1/2 cup water. Cook, uncovered, stirring occasionally,to allow the greens to soften and the marinade to cook , 3-7 minutes.
Return the chicken to the pan and let it cook,covered for another 15-20 minutes. Carefully transfer the greens and any liquid in the skillet to a food processor and process to create a smooth sauce. Spoon this sauce over the chicken,sprinkle the rock salt and serve!

This curry was very well recieved by all of us.Ian proved to be a better eater than me! He loved the sauce and mopped it up with dosa,chapathi and even rice! The sauce is very mild,unlike our usual chicken curries. There's no cream in it, yet, it creates a beautiful silky sauce.It must be yogurt in the marinade! If you feel the sauce is thickening when it cools, feel free to thin it out using some chicken broth or even water!
I hope you enjoy this healthy & delicious curry !
 

Thursday, September 18, 2014

TOOR DAL KHICHDI

TOOR DAL KHICHDI
The weather is getting cooler here by the day and that's when I feel like eating things which are mushy,warm & comforting like a khichdi,soup,risotto etc. I usually like my rice to be perfectly cooked,each grain separate from the other. But,for this dish, I let go of my usual expectations and embrace the warm,flavourful,mushy, healthy & delicious rice. It doesn't take that long prepare a big batch of comforting Toor Dal Khichdi.
TOOR DAL KHICHDI
This is a perfect way to sneak veggies into your diet. Even into your child's diet. No one will know what's gone into it because you are pressure cooking everything till they are really really soft,which means,they almost disappear and melt and become one with rice and dal. The best way to eat it is with a big helping of ghee,which will almost immediately melt into a pool and a serving of spicy mango pickle. Atleast,that's the way I think it should be eaten.
TOOR DAL KHICHDI
I love one pot meals and this one fits the bill! You just throw all the ingredients into the pot one by one and that's pretty much it! I've used just carrots,peas and green beans for the veggies but you can switch and use whatever combo you would like. Maybe,you could hold back on that beetroot. It is going to turn your rice into some other colour! Unless, your child or the child in you wants a pinkish Khichdi! This recipe is from Sia and this is the first one I've tried from her blog. It's just awesome and I am looking forward to trying more!

TOOR DAL KHICHDI
TOOR DAL KHICHDI Serves 6

Ingredients:
1 1/2 cups Basmati Rice
3/4 cup Toor Dal

2 tablespoon ghee
1 inch piece of Cinnamon
3 green Cardamoms
3 Cloves

1 teaspoon Mustard seeds
1 teaspoon Cumin seeds
1 dried red chili
1/4 teaspoon Asafoetida

1 teaspoon Turmeric powder
1 heaped teaspoon ground Coriander
1 1/2 cups of mixed vegetables
1/4 cup cilantro,chopped
3 serrano chilies, split
1 inch piece of ginger,peeled and crushed
Salt

Method:
Wash and soak the rice and dal in water for 15 minutes as you prep the rest of the ingredients.
Heat the ghee in a pressure cooker on medium-high heat and add the cinnamon,cardamom and cloves. Let it sizzle and infuse the oil for 30 seconds. Then, add the mustard seeds and once they pop,add the cumin ,red chili and asafoetida. Stir well for 30 seconds. Then, add the drained rice and dal followed by turmeric and ground coriander. Mix well. Add in the mixed veggies,cilantro, chilies,ginger and salt. Stir well. Pour 8 cups of water, mix it in,check for salt and let it come to a boil.
Put the lid on with the weight and cook on medium heat for 5 whistles. Turn off the heat and let the pressure go down on it's own. Open the lid,stir well,adjust the consistency if needed. Check for seasonings and serve hot with ghee and pickle. You can garnish it with some more cilantro,if you'd like it that way!

If you want to cook this Khichdi without a pressure cooker, you can do the same in a heavy bottomed vessel. Cook down till the rice and dal turns mushy. Adjust water as needed.


I am very happy whenever I make this. It's mostly because we 3 love it equally. It is a well balanced meal and very filling. A little goes a long way.It also reheats well which is an added bonus! That way, I don't have to worry about what we have to eat the next day!

Monday, September 15, 2014

CLASSIC BANANA BREAD

CLASSIC BANANA BREAD
Did you have a situation at the grocery store when you saw a banana and it was called a Plantain? I have had such days here. Back in Kerala, a Cherupazham was always called a Plantain and an Ethakka, a Banana. It is just the opposite here. I didn't get a hint about it till I moved to Bangalore. There, everything was a banana. There was no distinction between Cherupazham and an Ethakka. And, I hated the Bananas they gave us in our hostel. There were rumors that our warden would go to the fruit market late in the evening to buy the leftover fruits,which would be bananas,so ripe that they would fall off of the bunch. I think it was true.The discoloured bananas would welcome us every morning by the food counter in the hostel and I never ate it. It was never a yellow one, it was always the over ripe black skinned banana.
My Daisy Mummy's husband Jose, to this date, will not eat a banana if it has a black spot on it!
CLASSIC BANANA BREAD
We used to have monthly Birthday celebrations at the hostel and that was the single night where the person serving rice would use the most flattest spoon they can find. It's because, they are serving Pulao instead of the regular white rice! We would ask for a second helping and you should really see their faces then! And, while we were enjoying the 'spread', our warden would come by and place a banana by our plates. Yes, those same bananas. We would all take it with us as we exit the dining hall to wash our plates and leave it by the table they have kept for keeping our water bottles as we wash our plates! Yes, all the bananas will find it's way back into the kitchen, not to our stomachs! I am pretty sure many girls ate them,but, I didn't.
CLASSIC BANANA BREAD
Once I reached here, all the bananas were very pretty. So spotless, so yellow! But,after the terrific experience from the hostel, I wouldn't touch one. Jobin would eat his share but not me. The only way I would eat bananas were in the form of cakes,breads and muffins. I really enjoyed that form of bananas,for sure. Now, Ian loves bananas and enjoys eating it with Avilose Podi, Puttu, Cakes and even as is. So,we always have bananas at home. The other day, for some reason, there were quite a few sitting not so very pretty on top of the fridge.It was very spotted. But,that's exactly what you need for a Banana bread. More the spots,the better it is.
CLASSIC BANANA BREAD
So,all those were put into good use and Ian helped me mash up the bananas.I've been using Elise's recipe for years now and it has never let me down. Perfectly balanced and deliciously moist recipe for the most perfect Banana Bread. You can skip the nuts if you want to but I added some cashewnut for a bit of bite.

CLASSIC BANANA BREAD
Ingredients:
2-3 very ripe bananas *,peeled
1/3 cup melted unsalted butter
1 teaspoon baking soda
Pinch of salt
3/4 cup granulated white sugar
1 egg,beaten
1 teaspoon vanilla
1/3 cup cashewnuts,broken tossed with 2 teaspoon flour
1 1/2 cups all purpose flour

Method: Pre heat the oven to 350 F / 180 C and butter a 4 X 8 inch loaf tin.
In a medium bowl,mash the bananas with a fork. Stir in the melted butter followed by baking soda & salt. Add in sugar,beaten egg & vanilla. Stir to mix.  Add in the flour and nuts and stir carefully till just mixed.Transfer the batter into the prepared tin and bake for 1 hour to 1 hour 10 minutes or until the skewer inserted comes out clean.Remove from the oven and cool completely in the pan. Slice and serve.

* If you cannot find bananas (robesta variety),you can substitute by using 8 Poovan Pazham.


He loves helping me with my work around the house. He helps me put stuff away when we get back from a grocery store. He helps me unload the dishwasher. He is our little server when friends come over...just that he would make a stop in between to take a few quick bites! He knows what goes into his milk everyday and reminds us what we should be putting into it. He loves helping me mix a batch of cupcakes and lines the muffin tin all by himself. He helps us vaccum the house. He helps us in sorting trash...he even knows what goes into the recycle bin! He has grown a lot! Even though I enjoy every little help he does for me, I do miss the times where he was much smaller!

All 3 of us enjoyed this classic bread immensely!
 

Wednesday, September 10, 2014

STRAWBERRY BLENDER SHERBET

STRAWBERRY SHERBET
The weather was perfect when I made this Sherbet. Not anymore. It is getting cooler here and this is not the kind of weather where one would want to eat a Sherbet. Well, I can eat a DQ Oreo Blizzard even in peak winter, but,not a Sherbet in Fall! Let's just face it. Oreo Blizzard is just plain awesome! I don't know what goes into it and I really don't want to know about it too...why spoil the fun?! Every time we go through a Drive-through, Ian senses it very quickly and says 'Mam' by the time we stop by the menu board!

STRAWBERRY SHERBET
Jennifer's recipes are fun and simple to make. The fresh Simple Strawberry Pie I made a few weeks ago was my first attempt with her recipes. It was simple yet totally delicious. I liked the fact that it uses fresh strawberries in a small amount. We rarely buy berries in bulk. It's always a small box,a pint or so. Whenever we buy berries,it is usually used up in cakes or as a filling for cakes. Off late, I've been trying things differently and made an amazing Blueberry Lemonade with fresh blueberries. I must say that was a very smart move from my side! It was just so,so refreshing and tasty!
STRAWBERRY SHERBET
This one is no different. A very small portion of ingredients are blended together (yes, blended!) to make a very refreshing Sherbet. A Sherbet has a small portion of dairy in it and that makes it different from Sorbet.The first one I ever ate was an Orange Sherbet a few years ago ,and I was bowled over by it. When I came across this recipe in her cookbook,I decided to give it a try just to see if I could make a decent Sherbet at home. I think, I did!
STRAWBERRY SHERBET

The recipe calls for frozen fruit,which,is the most simplest thing to make. Just clean your fruits,lay them in one layer on a cookie sheet and pop them into the freezer. Once frozen, transfer them into a ziptop bag,seal and freeze for future use. Also,simple syrup is just equal parts of water and sugar boiled together for a minute and cooled.You can save the remains for future cocktails,lemonades,iced teas etc.,
STRAWBERRY SHERBET
STRAWBERRY BLENDER SHERBET
STRAWBERRY SHERBET Makes 2 cups

Ingredients:
2 cups frozen strawberries
1/4 cup simple syrup
1/2 cup milk

Method: Blend all the ingredients together,2-3 minutes until smooth. Transfer into a tight lidded freezer friendly container and freeze until firm,4 to 6 hours,stirring every 1 to 2 hours.


I want to tell you something. This recipe would taste just like it's ingredients. So, if you are not a fan of strawberries alone,do a half and half with another frozen fruit. We love frozen desserts,for that matter any dessert,so it was a hit with Ian. He knows where the frozen desserts are kept from the time he started to walk. Our freezer is in the bottom half of the refrigerator which makes it even easier for him to reach for all the ice creams, sorbets and sherbets!
  

Wednesday, September 3, 2014

GINGER & MANGO PANNACOTTA

GINGER & MANGO PANNACOTTA
We were at Napa Valley a few years back and that was the first time I ever tasted a Pannacotta. It was a Buttermilk Pannacotta with Berry Coulis which was totally delish! I came back home and recreated something close to that,with a twist. It was my Vanilla Pannacotta with Pomegranate Sauce. Ever since,Pannacotta ranks high on my list of favourite desserts!
GINGER & MANGO PANNACOTTA
A long time blog reader of mine,C,had invited us over for dinner last year and she carefully remembered my love for it and made the same from my blog. I was so touched! Everytime we go out, I scan the dessert menu to see if a pannacotta is on the menu. There's something about a cold creamy pudding.

A very close family to ours was moving from Minnesota and we had gone to their house to help pack up some of their stuff . I had volunteered to bring in the dinner because that's the last thing they should be worrying about when they have a whole house to pack up! So, along with a Veggie Pulao & Chicken Tikka Masala,I took some Ginger & Mango Pannacotta along with us.
GINGER & MANGO PANNACOTTA
This recipe is spiced with ground ginger and a pinch of nutmeg. For those of you who think they might not their desserts spiced up, feel free to leave it out. I made one batch and set it in small bowls so that everyone gets their share and helps in controlling portion sizes. You can of course, set it in one container and cut them out into desired shapes. Serve it with a drizzle of mango pulp and a few pieces of fresh mango along with a sprig of mint!

GINGER & MANGO PANNACOTTA
GINGER & MANGO PANNACOTTA Serves 6-8

Ingredients:
1 pouch /7 grams unflavoured gelatin
1/2 cup milk
1 1/2 cups heavy cream
1/2 cup packed brown sugar *
1/4 teaspoon ground cinnamon
1/4 teaspoon ground ginger
1 cup sweetened canned mango pulp

Method: In a small bowl, sprinkle gelatin over milk;let stand for 5 minutes to soften.Meanwhile, in a saucepan over medium heat,gently whisk together cream, sugar,cinnamon & ginger; heat just until bubbles form around the edge. Remove from heat.

Stir in gelatin mixture, stirring to dissolve gelatin. Whisk in mango puree. Pour into six to eight ramekins,cover with plastic wrap and chill until set.

*Adjust the sugar as needed depending on the sweetness from the mango pulp. The original recipe called for just 2 tablespoons of sugar but I added more to suit our taste.
I promise you, this would be the last of the mango related things you would get to see here for this year! I make sweet somethings with mangoes throughout the year because I used tinned mango pulp.I am a not a fan of the fresh mangoes we get here even during peak Summer.

It's getting a bit cooler in the evenings which kind of makes me happy because I will get to eat some Pumpkin Pies and Pecan Pies very soon!

Many of you tell me that a post without mentioning how Ian liked the food,is incomplete! :) Ian literally ran towards me when I brought the Pannacotta out of our fridge to photograph them. He stood beside me and I had a tough time pushing his eager hands away from grabbing my little bowls. He couldn't wait to taste it and from the way he behaved after that, I think he really really liked it. He's got his Amma's sweet tooth,for sure!

Related Posts Plugin for WordPress, Blogger...