Ria's Collection: October 2016

Friday, October 28, 2016

A VERY BIG DAY!

Ria Mathew
There was a time in my life where I dreamt about being a Chef, a Pastry Chef to be precise. I LOVED making & eating desserts so I dreamt about turning that into a career. Along the way, things happened and I ended up being a Textile Merchandiser. No matter how many years skipped by, that dream was still alive deep down inside me. I collected (still collecting) many recipes thinking about a future in that direction. If any of you get hold of my navy blue diary,where I started writing down my first set of recipes,you will immediately notice that it contains more sweet recipes than savoury. That diary of mine is falling apart now as it had been used well not just by me but my family as well. A cousin of mine took a photocopy of the entire book! :-)
Ria Mathew Le Cordon Bleu
So, coming back to the point. Along the way, I realised that I should just chase my dream,make it a reality and live it or else I might just think and dream about it till the day I die. Seriously, none of this would have happened without Jobin's mental, physical and financial (of course!!) support. I was chosen as the Student Speaker for the commencement ceremony from the entire Baking & Patisserie batch,which I think was really really cool and the red and yellow cords around my neck in the photographs indicates that I have a 4.0 GPA and that I am on the President's list. I am so thrilled that Appan & Amma were here with me for my very first day & for my very last day at Le Cordon Bleu.

I am on a break right now and will be spending a lot of quality time with Ian & Zara and we will be travelling to Kannur in the coming week. We will be home for quite a bit and won't be back to Minneapolis until Spring.So, keep an eye out on this space. I will be hosting baking classes,like every other time when I am in Kannur. Details will be posted here once it has been finalised. The classes will be held in my home in Kannur (Kerala).

Thursday, October 13, 2016

BAKED HOT & SPICY CHICKEN TACOS


Baked Hot & Spicy Chicken Tacos
The very first time I ever ate a Taco was during my Mount Carmel days in Bangalore. My department conducted a 2 day food sale every year for the final year students which was a part of the final practical examination. So when our seniors hosted the sale, one of their menu items were a vegetarian taco and that was filled with a super delicious saucy kidney bean filling which was on my mind for weeks even after the event.
Baked Hot & Spicy Chicken Tacos
My very good friend from college Vasu came to my rescue with her sister's recipe notes for homemade taco shells and filling.All those recipes contained some ingredients that I could never ever find in Kannur. So those recipes went underground and never saw daylight again!
Baked Hot & Spicy Chicken Tacos
After coming to the US, my Taco craze was satified. There are so many different and easy ways that you can make or even assemble them. Readymade shells from Old El Paso are a life saver! You just have to pretty much bring all the filling ingredients together and simply assemble the Tacos. Tacos are perfect for parties, game days or even a simple dinner! I love how easy it is to have a Taco Bar at our parties,where the guests can assemble their own Tacos with the fillings of their choice.

Baked Hot & Spicy Chicken Tacos
Today, I have a different take on a regular Taco...a baked version. It uses Old El Paso Refried Beans, Old El Paso Taco Shells, Old El Paso Hot & Spicy Taco seasonings along with some cooked chicken thighs, Mexican cheese and other toppings . I found this recipe on Becky's site and decided to make it right away! The ease was the main deciding factor,not to mention the flavour combinations!
Baked Hot & Spicy Chicken Tacos

BAKED HOT & SPICY CHICKEN TACOS
Baked Hot & Spicy Chicken Tacos Serves 8-10

Ingredients:
1 tablespoon olive oil
8 ounces cooked chicken, shredded
1/2 yellow onion, diced
One 16 ounce can diced fire roasted tomatoes,drained well
One 4.5 ounce canned green chilies
One 1 ounce packet Hot & Spicy Taco seasoning
Half 16 ounce can refried beans
10 Stand & Stuff Taco shells
Mexican cheese
Lettuce
Sour Cream
Cilantro

Method: In a medium saute pan, heat olive oil over medium high heat and once it is hot, add the onions and saute till transparent, 3-4 minutes. Add the diced tomatoes, green chilies, Taco seasoning & shredded chicken. Mix well and simmer for 8 minutes.

Preheat oven to 400 F. Grease a 9 X 13 inch baking pan. Place the Taco shells in it and fill them with a tablespoon each of refried beans. Top them with the chicken mixture and then with cheese. Bake for 13-15 minutes or until the cheese is melted and the shells are a bit brown around the edges. Top with your favourite toppings and serve right away!

BAKED HOT & SPICY CHICKEN TACOS
These Tacos were really flavourful and so easy to make! The filling can be made ahead of time,so it's just the last minute assembly that you need to do. Go ahead and make these for your next get together / game day / parties!  You can thank me later! :-)

Monday, October 10, 2016

HOMEMADE MEALS ON THE GO!


untitled-3742
These Reynolds Disposable Heat & Eat containers have come into our lives at the right time. They work perfectly for us now since we have a teeny tiny baby girl along with her big brother at home. It makes meal planning easier with less dishes to wash. . All we need to do is just heat and eat the meal when it's time!
Untitled Export3-011
untitled-3741

I usually never send lunch boxes with a full fledged Indian meal since it's a task to heat them up and we like our Indian meals nice and hot! These containers eliminates all of those and makes life a little bit easier. These containers are a made with plant fibers,can be heated up in a microwave and are a great alternative to plastic.

You can find these awesome Reynolds Disposable Heat & Eat containers at your local Walmart store in the food storage aisle.

Tuesday, October 4, 2016

STRAWBERRY BUTTERMILK CUPCAKES with STRAWBERRY BUTTERCREAM FROSTING


Strawberry Cupcakes with Strawberry Buttercream Frosting
I know Summer is almost a year away (sadly!) but that doesn't stop me from baking with berries as long as I can get hold of some good ripe ones. I've been eyeing these Fresh Strawberry Cupcakes from Jaclyn's blog for the longest time now and there's no other perfect time to bake them than October as it's the breast cancer awareness month.It reminds me of all the pink goodies I used to see back in the day,when my blog was little during October. Now, I honestly get zero time to blog hop which in a way is good,since all those posts would make me want to recreate them all at home and everything eventually will find it's way to my hips!

Strawberry Cupcakes with Strawberry Buttercream Frosting
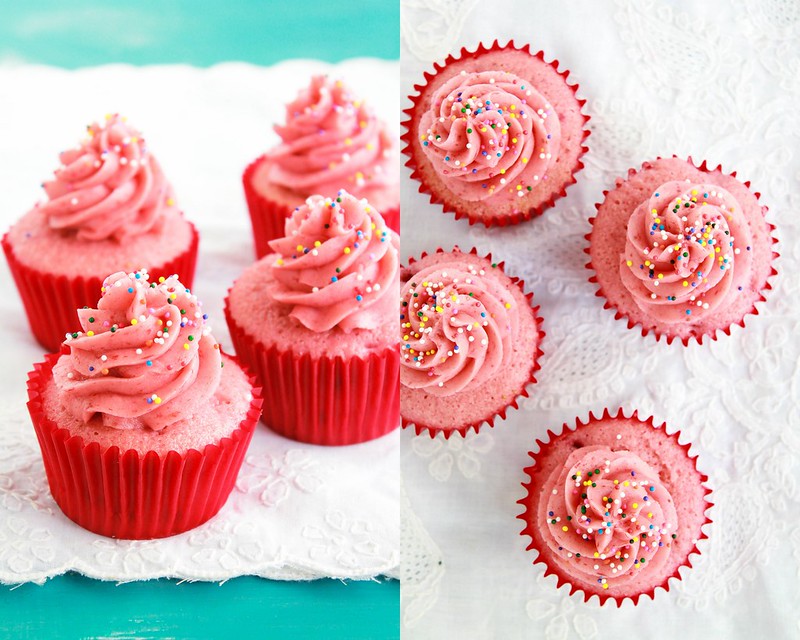
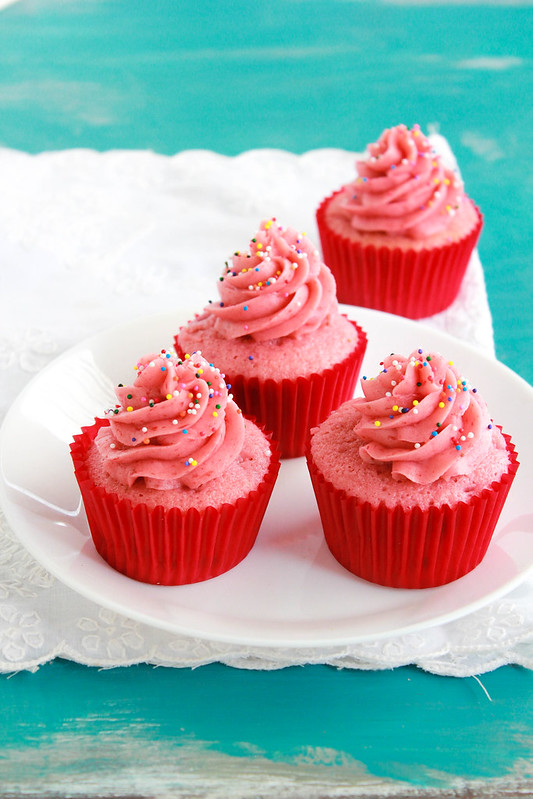
These cupcakes are very moist and so full of fresh strawberry flavour,both in the cake and frosting. They are light and uses two egg whites along with a whole egg in the cupcake batter,which I think is a smart move to make some very light cupcakes. I tried them straight out of the oven,literally burning my hands as I held them...they were so good! Light and fluffy like clouds! Recipe testing with Amma is always fun as we hold our breath together while tasting what we made, to see and feel if it has turned out the way it described itself to be. These cupcakes were worth it's time and effort.

Strawberry Cupcakes with Strawberry Buttercream Frosting
Many of you must have already heard about Susan.G.Komen and her initiatives.This October, you can make a difference just by baking and sharing cupcakes.Join KitchenAid to support Susan.G.Komen. Learn more here!

STRAWBERRY BUTTERMILK CUPCAKES with STRAWBERRY BUTTERCREAM FROSTING
Strawberry Cupcakes with Strawberry Buttercream Frosting Makes 16 cupcakes

Ingredients:
Cupcakes
1 2/3 cup cake flour
3/4 teaspoon baking powder
1/4 teaspoon baking soda
1/4 teaspoon salt
1/2 cup unsalted butter, softened
3/4 cup + 2 tablespoon granulated sugar
1 large egg
2 large egg whites
1/3 cup fresh strawberry puree
1/4 cup buttermilk
1/2 teaspoon vanilla
5 drops red food colour (optional)
1/2 cup diced fresh strawberries

Buttercream
1/2 cup + 2 tablespoon strawberry puree
3/4 cup unsalted butter
a pinch of salt
2 1/2 - 2 3/4 cups powdered sugar
1/4 teaspoon vanilla
4 drops red food colour (optional)

Method:Preheat oven to 350F and prepare a muffin tin.

Cupcakes:In a small bowl, whisk together flour, baking powder, baking soda and salt. Mix together buttermilk, colour and puree in a another bowl.In a large bowl, beat butter and sugar on high speed using your KitchenAid hand mixer until creamy and pale. Add in the whole egg and mix well to combine. Add in the egg whites one at a time and beat in well. Add the flour and buttermilk mixture alternately and gently mix it in. Fold in the diced strawberries and divide the batter among the lined muffin tin (about 1/3 cup full) and bake for 18 - 20 minutes.Let the cupcakes cool in the tin for several minutes, then transfer them onto a wire rack to cool completely.

Frosting: Cook the strawberry puree in a small sauce pan over medium low heat until it reduces to 3 tablespoons, about 15 minutes. Chill it well.
Cream butter and salt until almost white. Add the strawberry puree, 1 cup of powdered sugar and vanilla. Beat well to mix. Add in the remaining sugar and beat well.If your buttercream is stiff, adjust the consistency with heavy cream. Frost the cupcakes as desired.
Ian has his favourite flavour picked out for a cake,which by the way is Chocolate. He asks for the same old chocolate cake and chocolate brownies,so I rarely make any other flavour these days . If it's a Marble Cake,it's okay with him but other than that, if I were to give him a choice, he would always go with his most favourite flavour. So when I baked these, I made a separate batch of chocolate cupcakes for him. Even then, when he saw these pink cupcakes, he grabbed one and then he ate another one before bed. Today, as soon as he was back home from his Montessori, he casually walked past by the cake box and picked out one for himself.

I think that can only mean one thing, these turned out pretty good!
Related Posts Plugin for WordPress, Blogger...