If you are here just for the recipe, please scroll down. If not,let me tell you how much I hated eating a salad before 2010. The very idea about eating a salad would turn me off and that was even before I tasted a real salad. When I say a 'real' salad, I mean the ones which are purely good for you, not loaded with mayo types. I mean, the ones where you have lots of greens that have been tossed with some fruit/nuts, protein & a straightforward dressing.
I remember Jobin trying to convince me to eat them but I would just refuse to do so until I tasted some fantastic salad made by our good friends Mike & Becky here in Minneapolis. Then slowly, I started enjoying them and now, I even make it at home! We Indians are so focused about cooking our greens that eating them raw can be...umm...not that pleasant to even think of. All I can say is that I am a convert now and I am sure most of you who enjoy salads can kind of agree with me that it's all about trying!
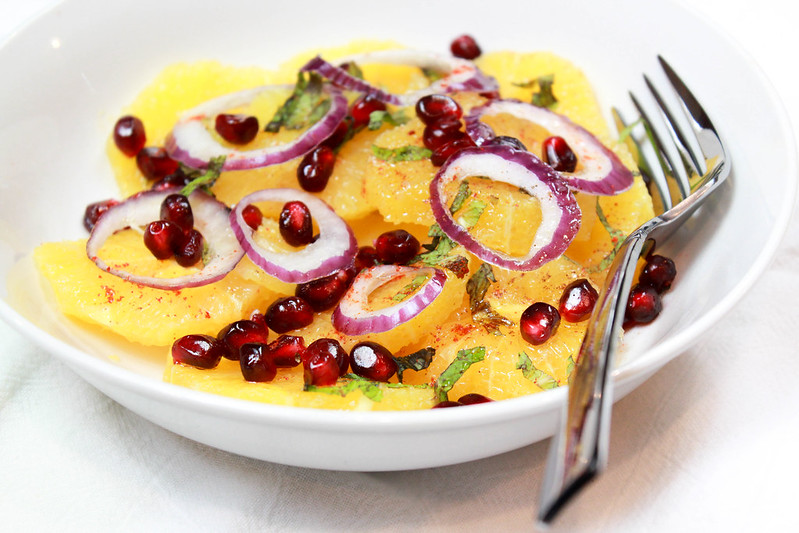
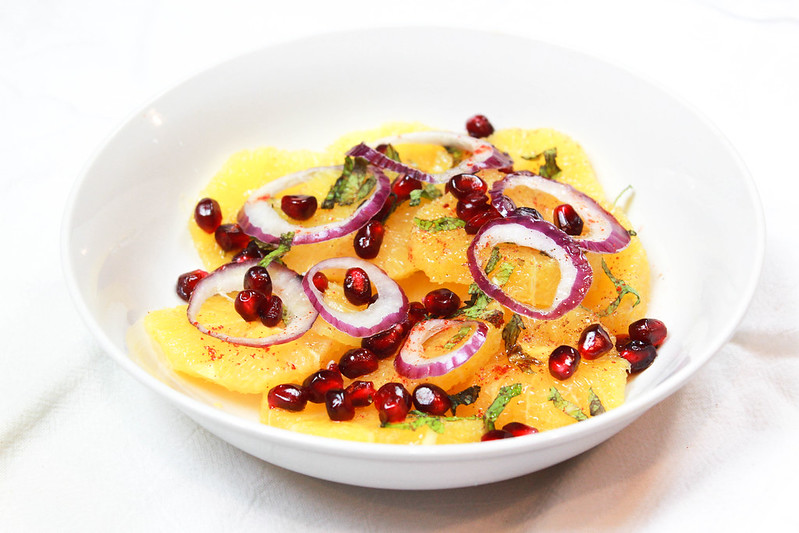
This salad is very good for you. It's filled to the brim with fruits and is topped with the most amazing salad dressing ever! It's one of the best and refreshing things that I've ever eaten. Every time I've made the salad using this recipe,our serving plate literally would be licked clean! You should really give this a shot at home. If you don't have access to orange blossom water,leave it out. It just adds that beautiful Mediterranean edible fragrance to your salad, just like rose water does.
MEDITERRANEAN ORANGE SALAD
Serves 6-8
Ingredients:
1/2 cup thinly sliced red onions
15 mint leaves,chopped
6 Navel oranges, peeled, sliced into rounds
Pinch salt
Pinch paprika
Pinch ground cinnamon
Seeds (Arils) of 1 pomegranate
Dressing:
Juice of 1 lime
1 tablespoon olive oil
1 tablespoon honey
1 1/2 teaspoon orange blossom water,optional but highly recommended Method: Please see the video for the full instructions.
As always, thanks for supporting our Youtube channel like never before! I am thoroughly enjoying looking at all the photographs you've been sending me of the beautiful things you've been making with the recipes from my blog/videos! Keep them coming!
This is the most wonderful time of the year and I hope you all are planning out a great spread for your Christmas party!
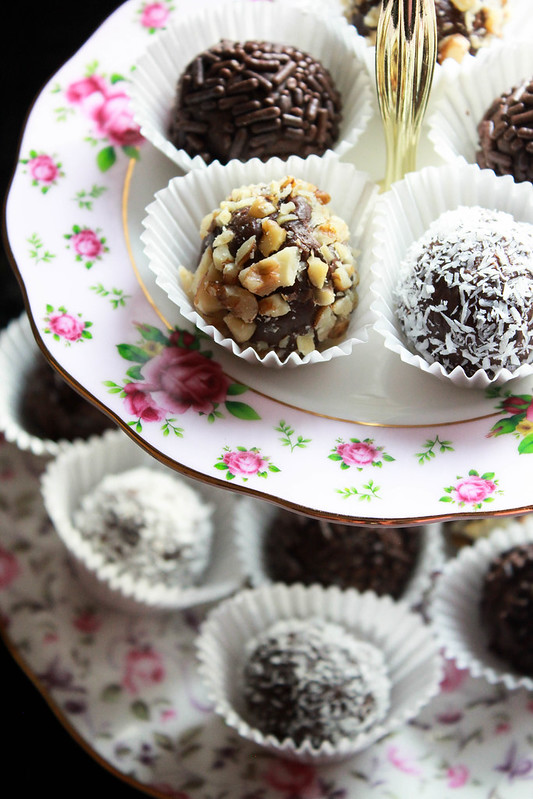
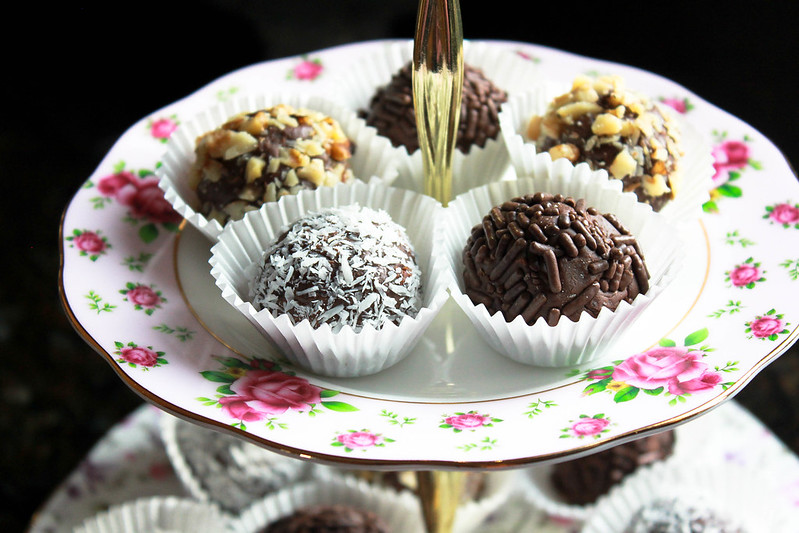
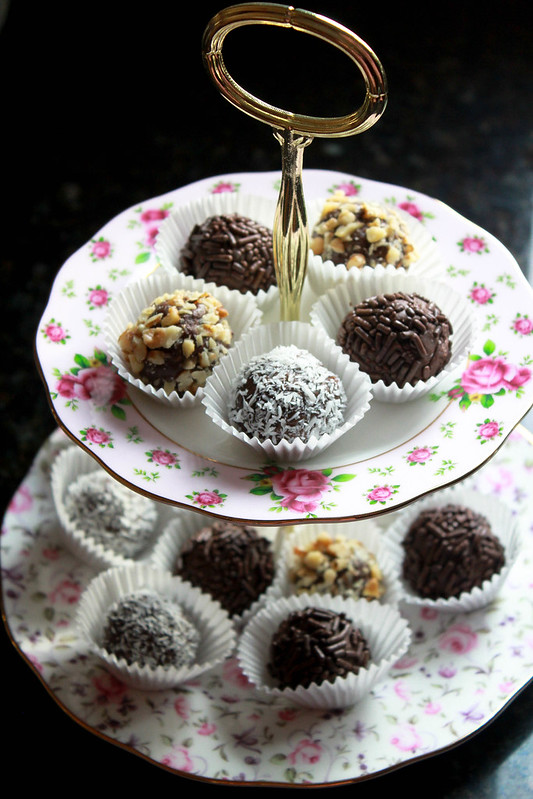
These are the famous Brazilian Chocolate Fudge Balls. They are incredibly easy to make and very very tasty to eat! They barely take 2 minutes to cook so it's perfect for that last minute chocolate craving,just like my Best Chocolate Mug Cake. I often make these for small celebrations we have at home,like birthdays. They look super pretty when they are displayed on a tiered pastry stand.
Like how I've mentioned in the video, you could use any topping of your choice. Crushed cookie crumbs, chocolate strands, sprinkles, nuts, dessicated coconut,sweetened coconut, praline, cocoa powder...the list is endless!
Ever since we moved to our new home, we have friends and family visiting almost every weekend. So naturally I've been cooking a lot and these fudge balls have come to the rescue almost every single time. I have a pastry case in our kitchen and I love filling it up with sweet things. These fudge balls look terribly pretty in them which is another reason why I love making them! That actually says a lot because I love trying new things so if something is made on a repeat mode here, it must be that good!
Ian and Zara loves these little fudge balls. They are perfect to pop one into the mouth and walk away! They are usually made bite sized so they are displayed in mini muffin cups /liners. Now that the Holiday season is fast approaching, these Brigadeiros would make the perfect gift! They don't have to be refrigerated and stays fresh for about a week in an airtight container. I've been making these for over a year now after I saw them on a YouTube channel that I am unable to pull up. It was a Grandmother demo-ing how to make her special recipe.The measurements were so easy that I memorized them right away!
Method: Please refer to the video above.
Store them in airtight containers at room temperature.
I really hope you give these a try at home. I am sure you will enjoy them as much as we did. Dessicated coconut is my current favourite to roll these Brigadeiros. So tropical and so tasty! If you make them, please let me know how you liked it!
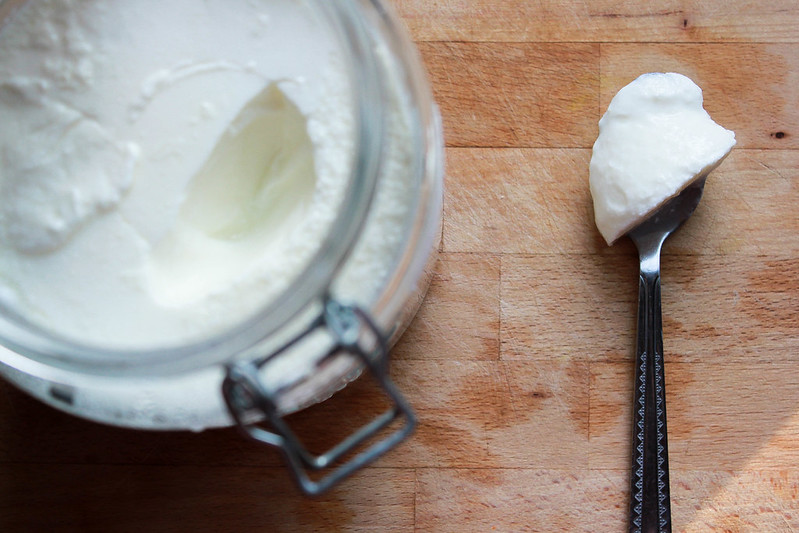
Eevery single time I've shared my yogurt photos and videos on my Instagram account,my inbox would get jammed with recipe requests. As much as I would love to send each one of you my method for it, it's literally not possible to reply to individual recipe queries these days. Only after reading all of those messages did I realize that a lot us have struggled or have been struggling with making such a healthy,easy and favourite recipe of ours at home.
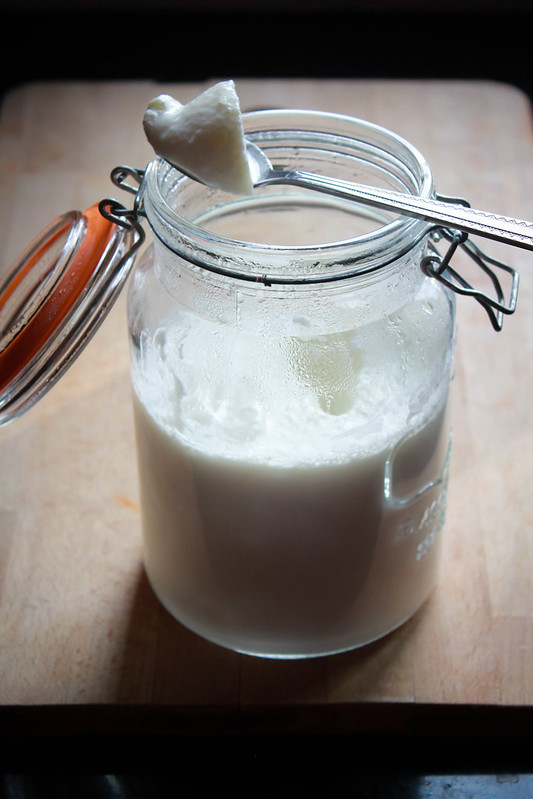
This method is super simple and it has give me consistent results every single time. I also use another method to make it but that's for another post,maybe. Currently, this method is the one I am totally obsessed with! It gives you that picture perfect, upside down-able yogurt!
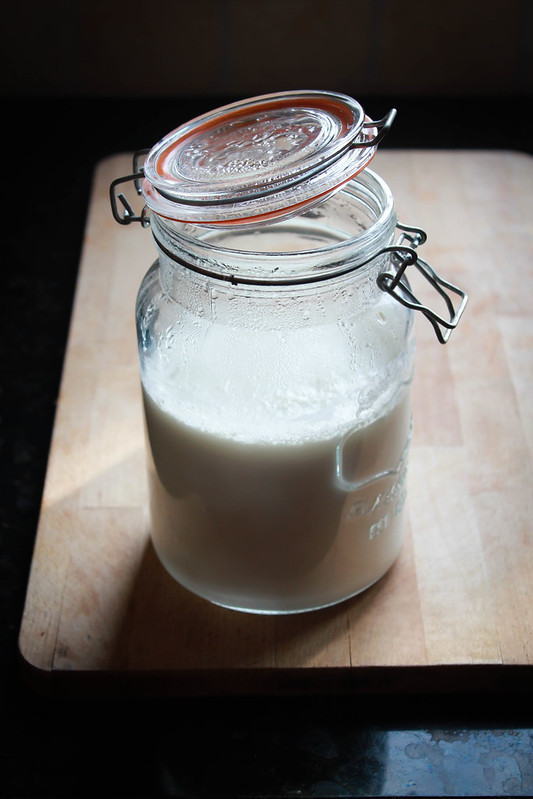
The only point where you could go wrong is with the milk temperature before adding the in the starter. The milk should be just barely warm,like a baby's bath water. You might think it's too cool for the starter to work but it will. It should be that temperature where you would like to soak your feet in after a long day at work,warm but barely so. If you have a thermometer, it should be between 40-50F. Stay on the higher end because when you add the starter,it will bring the temperature down.
Talking about starters. If you are like me, just buy a tub of yogurt which has 'Active Live Cultures' written on it.Just use that. But if you are like those lucky ones who can get hold of some homemade yogurt,use that. Both works... the same way! Thanks Biana for sharing your method with the rest of us!
FAIL - PROOF HOMEMADE YOGURT
Makes 4 cups
Ingredients:
1 litre whole milk
50 grams yogurt
Method: You can watch the video to see the process I have explained in detail. Preheat the oven to 100 F and turn it off. Place the wrapped yogurt container in it and let it set. It can take anywhere between 6-8 hours. If you do not have an oven, you can leave it outside the oven in a warm spot.
Ian and Zara love yogurt! It's one of their snack. Ian gets super excited every time I tell him I made some at home. This is a very easy way to make extremely creamy and thick yogurt at home. I hope you give it a try and if you do, don't forget to report back! :-)
Did you know that I have a Malaysian connection? Appa and his siblings grew up in Malaysia till he was about 8 years old. My Grandfather was working there before they moved and settled in Kannur. Mamma,my paternal Grandmother who was an awesome cook learnt a lot of dishes from her cook there and Mamma would cook those dishes for us every now and then. Nasi Lemak was a staple in our home. She would try out so many Asian recipes from her cookbook and would call us over for dinner. I fondly remember how Mamma would make ' Vella chorum Kozhiyum' / Steamed Rice & Chicken for us (which everybody adored!) and I would refuse to eat it because there would a lot of vegetables in the chicken dish. I was never up for eating vegetables as a child.
I would then go and lay down on her bed,with the bedroom door wide open and look at everyone sitting by that big 12 seater dining table enjoy the meal Mamma lovingly made for us. I must mention that I was laying down on her bed and sulking! I can still picturize that dining room and those dim lantern lights hanging low over the table giving it such a cozy feel serving the food I never enjoyed and couldn't ever enjoy as a child.
Things have changed so much! I wholeheartedly enjoy vegetables now and that 'Vella Chorum Kozhiyum' is one of my most favourite things to eat!
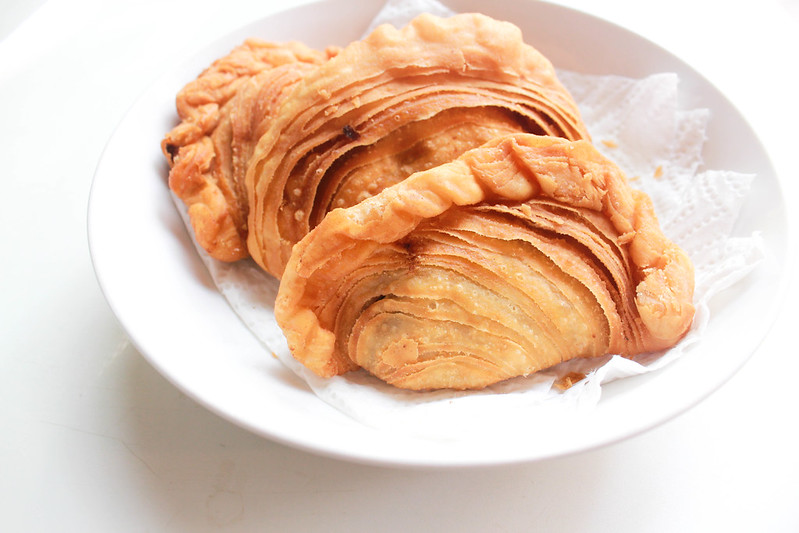
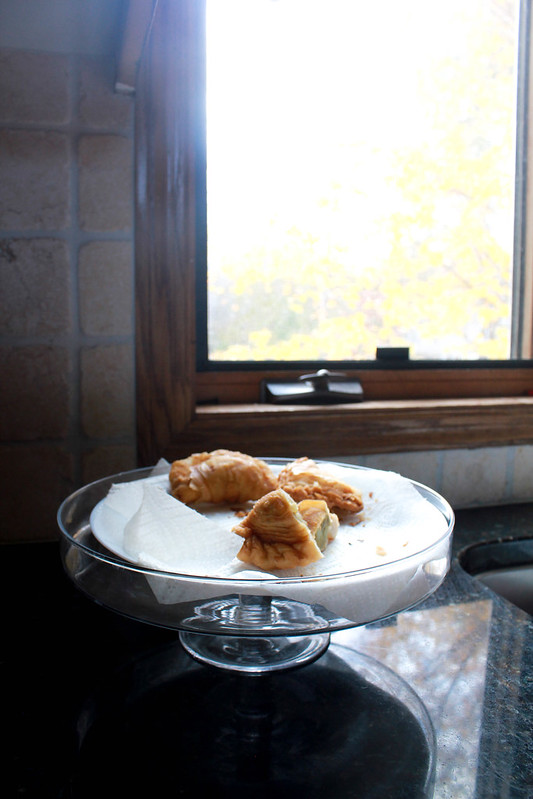
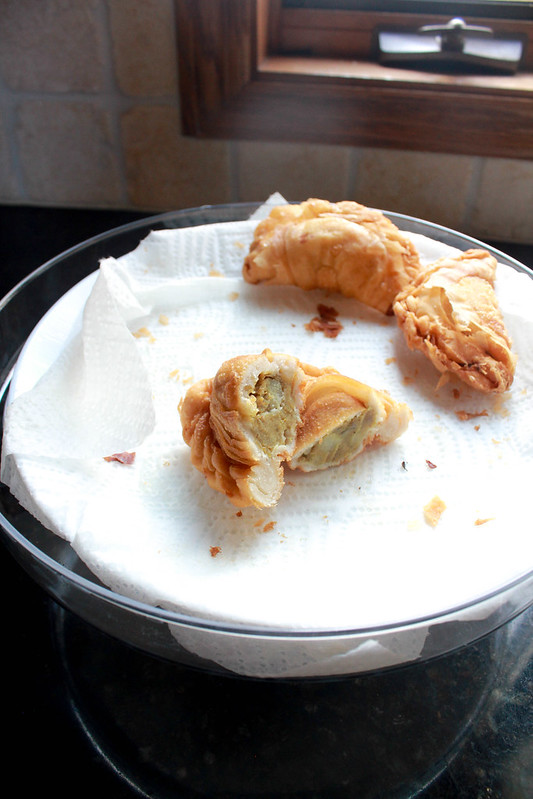
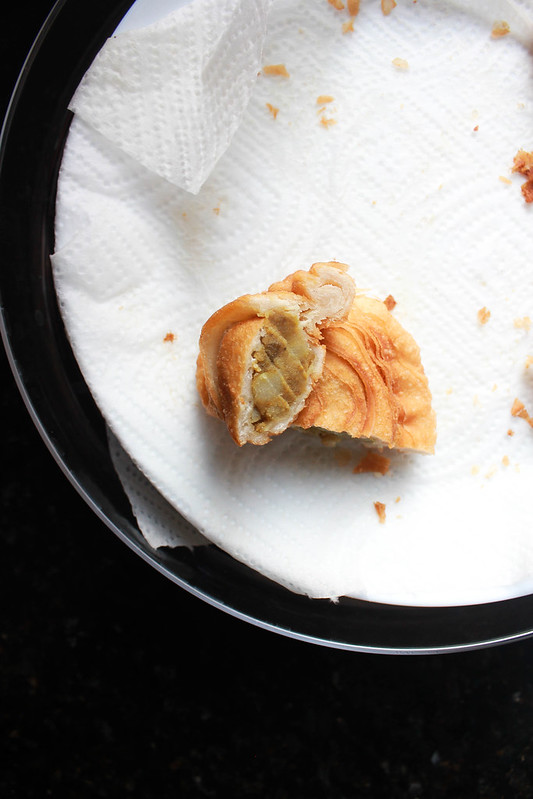
Whenever we bought puffs from a bakery, Appan would mention about a 'Curry Puffs' that they relished in Malaysia. I remember Mamma calling the usual bakery puffs as Curry Puffs,maybe with her fond memories from her past. I also remember Appan telling me that it looked different and was flaky with a delicious filling inside. Those were the days when there was no internet. But that name stuck with me for all these years.
One day, I just decided to do a quick search online and came across so many beautiful photograhs of it! They were so easy to make but looked intricate. I used this recipe for the shell and came up with a filling on my own. I decided to give the puffs a try and there was no looking back. They are phenomenal! It is honestly one of the best things I've made in the recent times and something that I don't mind making over and over again!
MALAYSIAN CURRY PUFFS
Makes 18-20 pieces
Ingredients: Pastry shell Oil dough
300 grams flour
1/2 teaspoon salt
1 tablespoon oil
3/4 cup plus 1 teaspoon warm water
Butter dough
150 grams flour
70 grams butter,room temperature
Filling
2 cups potatoes,diced (I used 2 large potatoes)
1/2 cup onions,diced
3 cloves garlic,grated
1 1/2 tablespoons Curry Powder ( You can use any storebought chicken/meat masala)
2 tablespoons Oyster sauce,optional ( I use Pantai brand)
3 tablespoons oil
Salt as needed
Method:
Please refer the video for the pastry shell directions. Once the dough is made,cover and let it rest for 30 mins. This helps in relaxing the gluten in the flour .While rolling out, don't roll them too thin,the layers will become one and you will not get the flakiness.
Filling: Heat oil in a saute pan on medium-high heat and saute onions until translucent,about 2 minutes.Add the grated garlic and cook for 30 seconds. Reduce the heat and add the curry powder. The mix might look dry,it's okay. Add the potatoes and toss well to coat with the spices. Add about a cup of water and cook it covered until the potatoes are soft. Add more water if needed. Once it's cooked, add the oyster sauce and cook for another minute. Mash it gently while it's cooking. Check for salt. Some brands of sauces are very salty, so don't add too much salt in the beginning. Wait for the filling to cool completely before you fill the shells.
When I shared it on Instagram, Appan commented saying they looked much better than the ones he remember from Malaysia. Jobin LOVES it and so does the kids! Ian eats 4 at a time and Zara almost 2. I am not even going to tell you how many I ate! :-) They are wonderful and I hope you give them a try.
Thank you all so much for the encouragement and support with regards to my YouTube Channelthat we started a week ago. Like I said, we both are learning on how to do this whole thing! It might seem easy to some of you but trust me, it isn't. Especially when you have small kids who have no idea what it is to keep quiet for more than one second! :-) The Lazy Daisy Cake video was shot around 11 pm after the kids were put to bed and after the house was set back to normal. I even managed to sneak in a nap before that because we knew the shoot could go long if it got interrupted. Nevermind. It was worth the trouble in the end! :-)
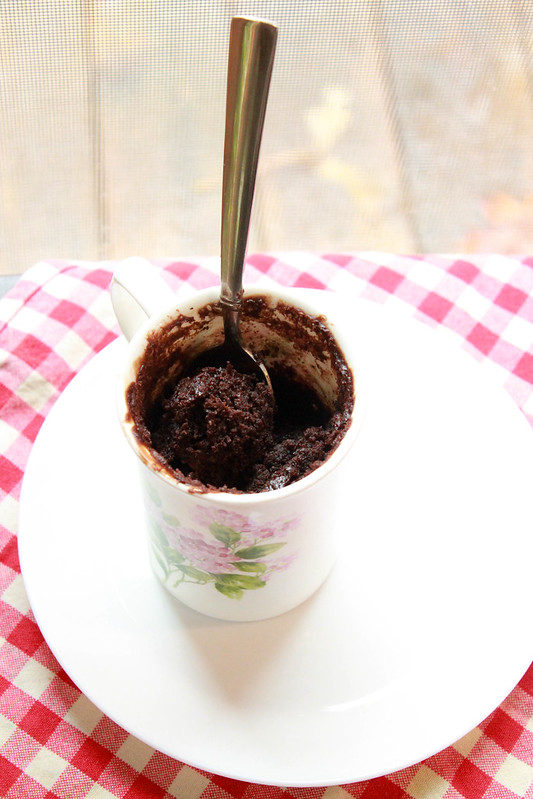
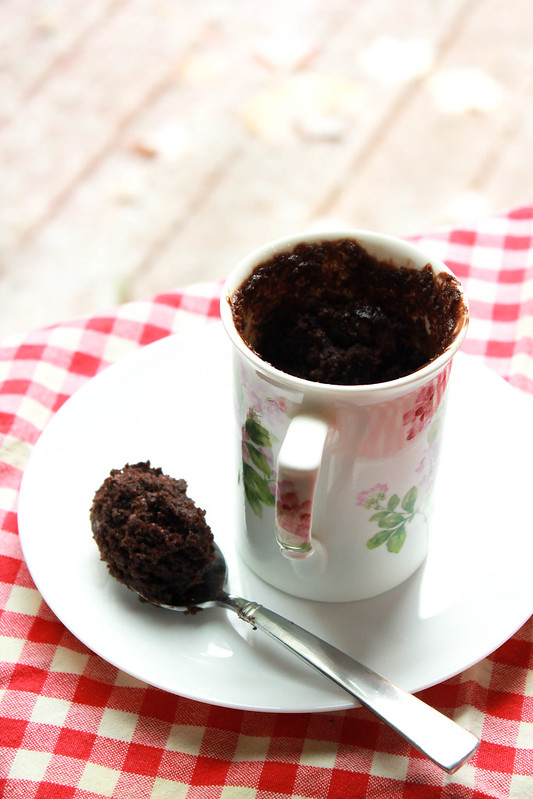
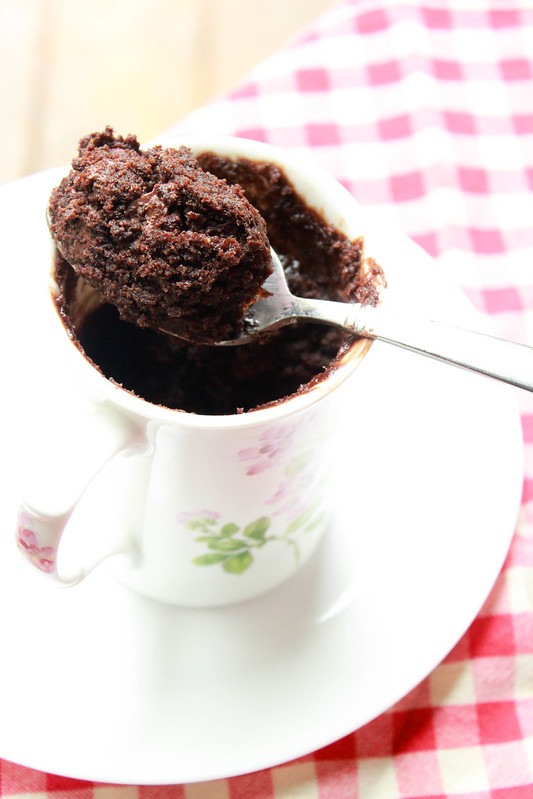
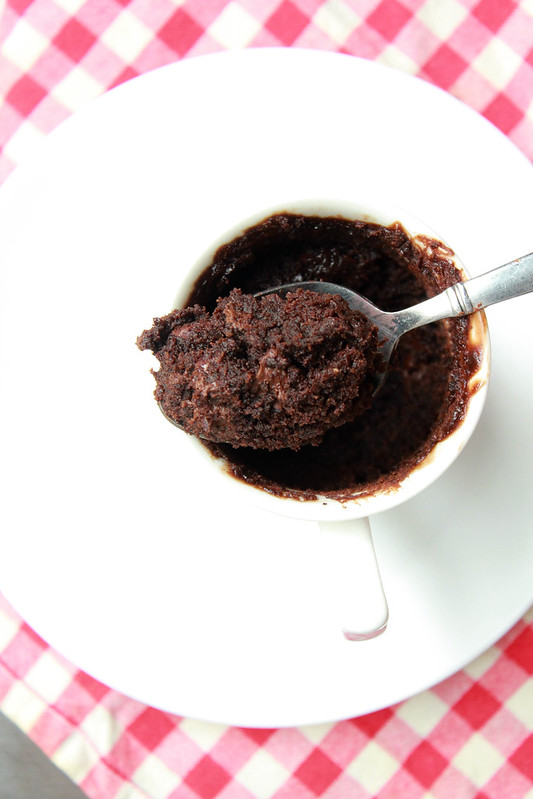
I have lost count of the number of times I've made this cake for us in the last couple of months. We enjoy it the same way we did,the very first time I made it. There's a WOW factor attached to it because 1) It gets done in 90 seconds 2) It's perfect as a single serving 3)You can never predict when that 'I need a chocolate cake right now' feeling kicks in 4) It is absolutely tasty!
Jobin was seriously in awe when I asked him if he wanted some chocolate cake and gave him a warm cup filled with deliciousness like in no time at all! I mean, 90 seconds literally is no time! I get frequent requests for it now that baking a real deal chocolate cake has kind of taken a back seat. Mug cakes were a rage a few years ago and when I tried out a recipe back then, I was utterly disappointed. I promised to myself that I will never ever make another one because I was literally disgusted by how dry it was.
Everything changed when I saw Ree's recipe for it. I love all the recipes that I've tried so far from her blog and this one is no different. So don't wait a minute longer, go and make it! I am sure you will enjoy this perfectly moist,tender chocolate cake!
THE BEST CHOCOLATE MUG CAKE
Makes 1 mug (12 oz) cake Ingredients:
3 tablespoons flour
3 tablespoons sugar
2 tablespoons cocoa powder
1/4 teaspoon baking powder
pinch of salt
3 tablespoons milk
3 tablespoons oil
3 tablespoons chocolate chips (optional but I highly recommend it!)
Splash of vanilla
Method: In a 12 oz mug,add the dry ingredients and mix well with fork. Add in the wet ingredients and chocolate chips and mix well to combine.Cook it in a microwave oven for 90 seconds and enjoy! It will be extremely hot inside the cake as soon as you take it out,so just be careful about that.
If you happen to try this cake at home, don't forget to tell me about it! I want to know if you enjoyed it as much we did. When I made it for my cousins in Boston,they went ga-ga over it! It is really good!
I hope you all had a fun Halloween. We sure did. Ian was a Pirate and Zara was a Bumble Bee!
Please note that all rights for the photographs and texts on this blog, unless otherwise mentioned, rests with the author.Please do not use without permission.