Ria's Collection

Saturday, May 16, 2020

MOCHA - WALNUT MARBLED BUNDT CAKE

MOCHA - WALNUT MARBLED BUNDT CAKE

I
haven't come across anyone who doesn't enjoy a slice of Marble Cake. It has a universal appeal. I've grown up eating many Marble Cakes that Amma made for us and I've shared the recipe with you all over a decade ago. It makes for a tender, moist cake and it goes so well with a cuppa. These days you might not find me very active here but if you are following me on Instagram, you will get all the updates and snippets of our day to day life. I've been sharing so much on my Instagram account and every now and then I do a Q & A session where I get to answer my followers more specifically.

MOCHA - WALNUT MARBLED BUNDT CAKE

One of the many requests this time was for more cake recipes. I have been doing cake tutorials on my IG page and my Double Orange Cake has literally been baked by over 60 people in the last couple weeks. It's such a heartwarming experience to see what you all been baking and cooking for my food blog. It's something that I really cherish.Now that everyone is at home and the need for homemade treats are on the rise, I thought I should share a recipe for a lovely marble cake from none other than Dorie Greenspan.

MOCHA - WALNUT MARBLED BUNDT CAKE

Her cookbook Baking From My Home To Yours was a wedding gift from my cousin Roshini. It's a cookbook that I cherish for the recipe as well as the nostalgia it evokes. When this food blog had just begun, everyone was busy baking from this cookbook and it was Dorie's cakes and cookies everywhere! I used to follow almost all the food blogs, read their content, post comments, try and bake the same thing and share here. I cannot even think of doing that anymore because I am so pressed for time with children and other responsibilities. It was a lovely time back then so that cookbook is special to me!

MOCHA - WALNUT MARBLED BUNDT CAKE

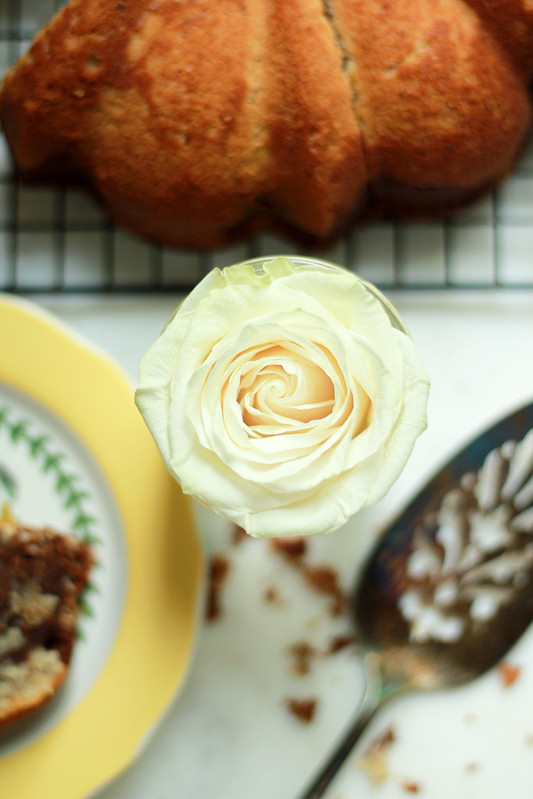
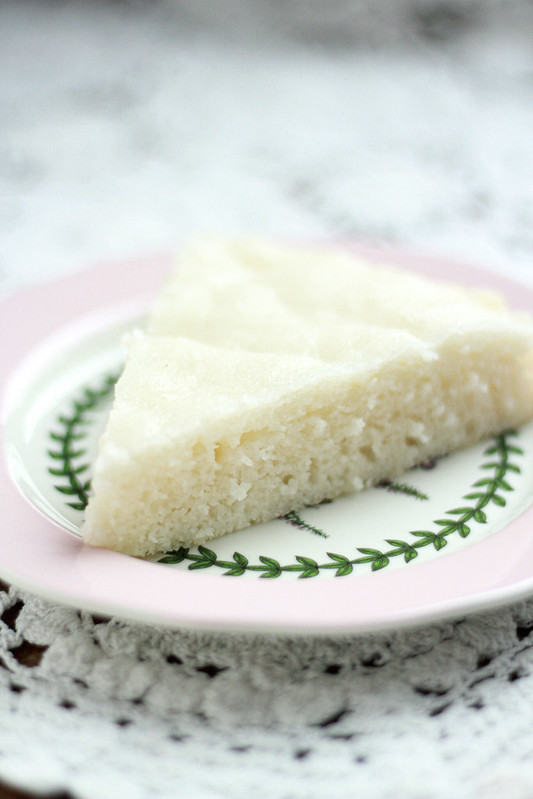
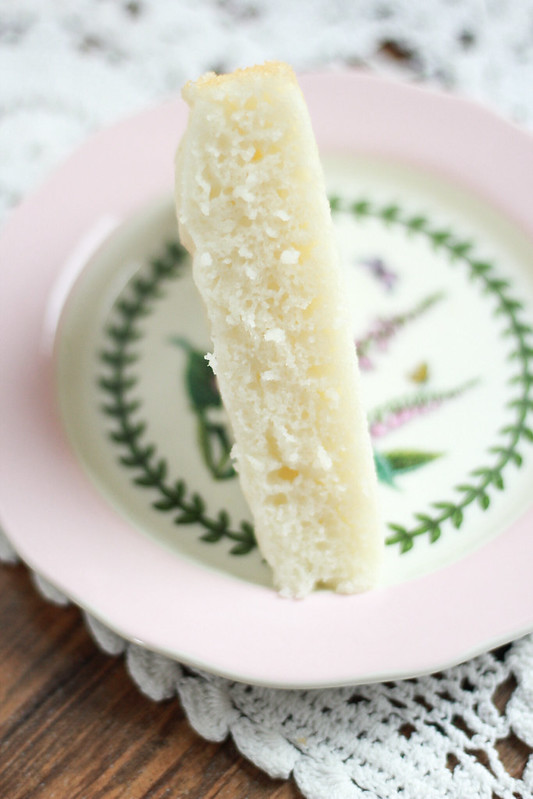
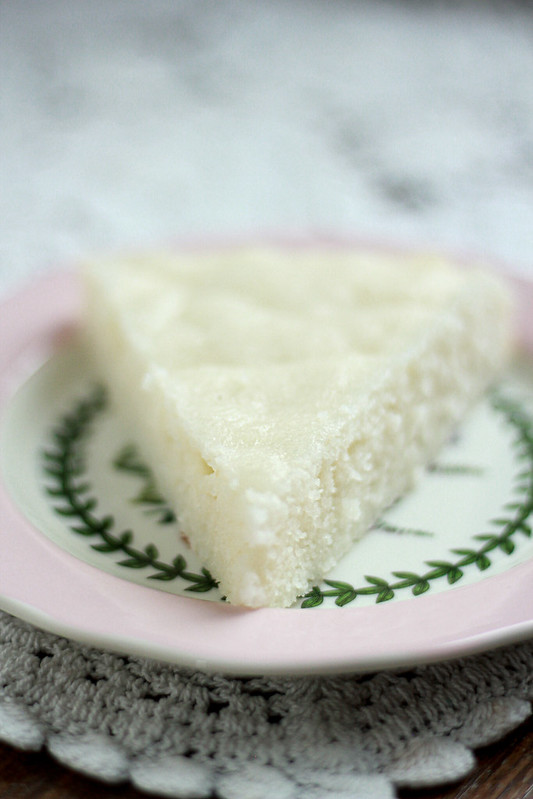
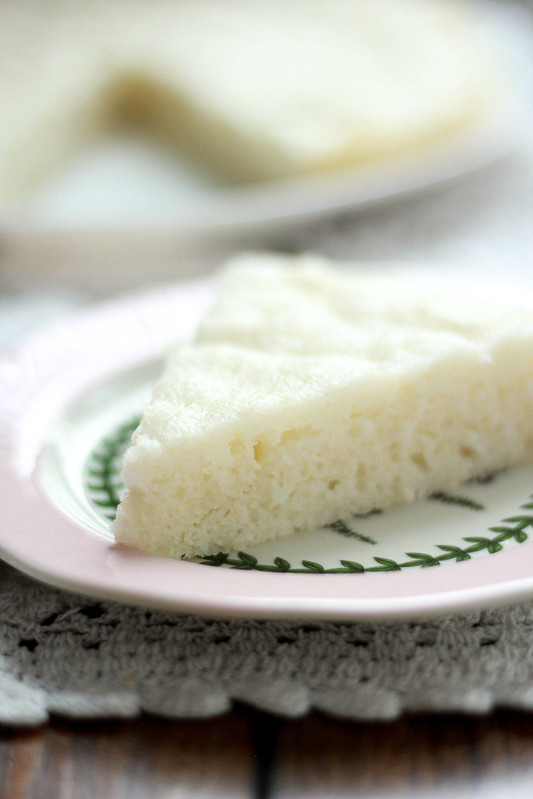
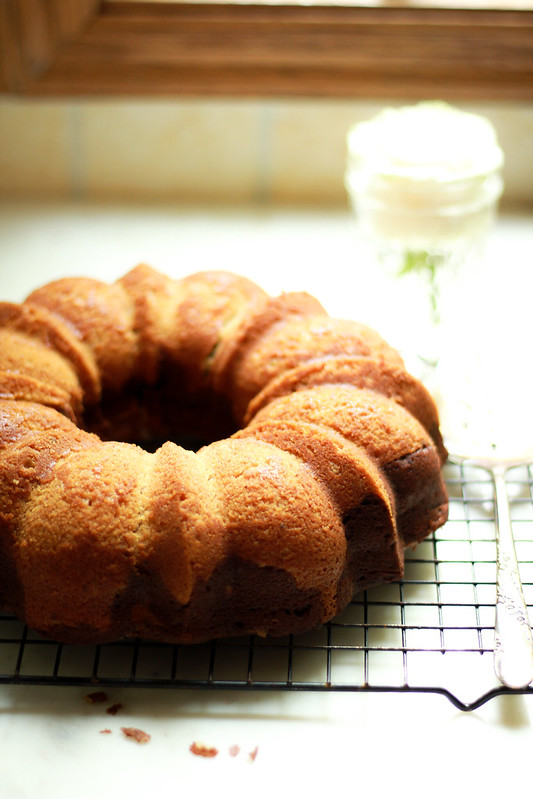
This cake is very moist and buttery that you can serve as is with tea or coffee. If you want to serve it as dessert, a scoop of ice cream would be a good addition. Maybe a drizzle of chocolate sauce as well. I think that's exactly what we are going to have as dinner tonight. I just made a batch of homemade vanilla bean ice cream this morning!
MOCHA - WALNUT MARBLED BUNDT CAKE
Serves 12-15
Ingredients:
2 1/4 cups all purpose flour
1/2 cup finely ground walnuts
1 teaspoon baking powder
1 teaspoon salt
2 sticks plus 2 tablespoons unsalted butter, room temperature
3 ounces bittersweet chocolate, coarsely chopped
1/4 cup plain coffee
1 teaspoon instant coffee powder
1 3/4 cups sugar
4 large eggs, room temperature
2 teaspoons vanilla
1 cup whole milk, room temperature

Method:
Preheat the oven to 350F and prepare a 9-10 inch Bundt pan.
Whisk together flour, ground walnuts, baking powder and salt.
Melt 2 tablespoons butter along with chocolate, plain coffee and instant coffee powder over barely simmering water. Set aside to cool.
In a large bowl, beat 2 sticks of butter with sugar on medium speed for 3 minutes. Add eggs one at a time and beat for 30 seconds after each addition. Add vanilla and mix it in. On low speed,add flour and milk alternately, adding the dry ingredients in 3 portions and milk in 2 portions. 
Scrape a little less than half the batter into the melted chocolate and stir to blend.
Pour both the batters alternately into the prepared cake tin and bake for 65-70 minutes or until the a thin skewer inserted into the center comes out clean. This can vary depending on your oven.
Cool in the tin for 10 minutes, then unmould and cool completely.


MOCHA - WALNUT MARBLED BUNDT CAKE

I sincerely hope you all are doing well and that your families are safe during this pandemic. If everything had been how it had been, we would have been packing our bags now for the big trip that we had been planning for over the last few years...10 to be precise! :-) I cannot wait to see my friends in person and have a meal together at ours. It's been just too long! The bright side to this whole situation is that we are safe and that is the biggest thing to happen right now. I truly believe that everything happens for a reason and I am sure we will see the light at the end of this tunnel as well. Until then, just hang in there!

Thursday, April 23, 2020

GRILLED FLATBREAD

Grilled Flatbread
I have been making this flatbread for a long time now and it always turns out good! Like soft, roll-able, perfectly chewy flatbread that goes with pretty much everything you want to wrap it with. We usually eat these with the Shawarma that  I make and we cannot think of replacing this bread with another. I love a good Pita bread but I love this one a little bit more. If you having been looking for a perfect vehicle for all your wrap needs, look no further! This is it!
Grilled Flatbread
This recipe comes from the brilliant Mark Bittman and you can never go wrong with his recipes. I recently found a copy of his extensive How To Cook Everything cookbook at our local thrift store for under a dollar! I can never pass on a deal like that. Thrift stores shelves have such hidden cookbook gems! Actually, I have found quite a few amazing books over there. Most of them are in near-perfect condition.
Grilled Flatbread
Flatbreads like these are so easy to pull off. You only need the basic ingredients on hand and it's done in under an hour and a half, including the rising time. I use it plain while making Shawarma but Mark suggests a sprinkle of za'taar over it. He calls it the Grilled Lebanese Flatbread. I am sure it tastes fabulous on it's own. I usually make Pita Chips with leftover Pita bread with za'taar on top. I love the flavor it imparts.
GRILLED FLATBREAD
Grilled Flatbread Makes 8

Ingredients:
2 teaspoons salt
1 teaspoon sugar
1 tablespoon yeast
3 cups all purpose flour
Extra virgin olive oil

Method: In a large bowl, combine salt, sugar, yeast and 1 cup warm water. Set it aside until it foams up,about 5 minutes. Add the flour and mix well until combined. Sprinkle warm water by the tablespoon and mix if you feel your dough is dry. Cover and let rise for about an hour or until doubled in size.
When the dough has puffed up, knead it for 5 minutes on a floured surface until smooth and silky. Divide into 8 pieces and roll out each one into an approximate 6 inches in diameter. Brush one side with olive oil and cook on a hot grill, oiled side down on medium high heat . Brush some more oil on the second side and flip when bubbles begin to appear. Cook the second side for an extra 30 seconds.
Serve it immediately or at room temperature.

* I rolled mine out thinner. If yours is a seasoned grill, you can make it without the oil as well. 
Our kids love this bread! They eat it plain as well as filled. I made these last night because Ian had been asking me to make Shawarma for a while. Now that we have all the time in the World, why not make use of it? You can get the kids to help you in the kitchen when you make bread. They will find it very exciting, especially when the yeast foams up and when the dough doubles in size. I hope you enjoy this recipe as much as we do!

Monday, April 13, 2020

VATTAYAPPAM

Vattayappam
Life has been extremely fulfilling over the last one month. We've been under lockdown since mid March and personally, I am so grateful that we got this time to ourselves.  Even though the routines have all been disrupted, we have found a new routine and a new normal and we have been enjoying it as much as we can.  A major chunk of our plans have been cancelled but I am the kind who focuses her energy to the next best thing. I cannot wait for the sun to come out (we are in the midst of a snowstorm as I type this and I can barely see our neighbour's house at this point!) and start gardening! I am not a gardener and I have no idea on how to create a visually appealing one but I am going to try it this Summer. I have also bookmarked a lot of grilling recipes that I have been planning to try for the longest time! Hopefully the gardening and yard work will take care of my waist!
Vattayappam
Now to the topic of the day...our good old Vattayappam! I have tried my hand at so many Vattayappam recipes before and while most of them were really good, they involved a lot of steps. It's either extracting coconut milk and then 'kappi kachuka' and then another round of grinding coconut & rice and what not! In the end, I would be left with 6-7 dishes to wash and one Vattayappam.Whereas this recipe, it's pretty much a one bowl recipe and very straightforward.
Vattayappam
This recipe comes from Bava aunty, the author of Suriani Pachakam. I have shared many recipes from her book already on my blog and all of them have been excellent! This recipe is no exception. It gives you two extra soft, tender Vattayappam. The kind you always wanted to make and never figured how to! I have been making this recipe for a few months now and it's given me consistent results. I hope you enjoy this as much as we do!

VATTAYAPPAM
Vattayappam Makes two 8 inch rounds

Ingredients:
250 grams Idiyappam / Pathiri podi
1/2 cup lukewarm water
1 1/2 teaspoon yeast
1 teaspoon sugar
2 cups grated coconut
1 1/4 cups sugar (original recipe called for 1.5 cups sugar)
2 egg whites
2 tablespoons ghee
Salt

Method: In a large bowl, whisk together warm water, yeast and 1 teaspoon sugar and set it aside for 5 minutes.
In the meantime, grind the coconut to a smooth paste using water.
Once the yeast has been activated, add the rice flour, ground coconut, sugar and mix well. Add just enough water to make a batter of flowing consistency. Cover and let it ferment for 4 hours.
In a medium bowl, whip the egg whites to stiff peaks. Fold it into the fermented batter along with ghee and salt.
Transfer the foamy batter into two greased 8inch round cake tins and steam on high heat for 20 minutes. Cool and use as needed.

*You can add a few pods of powdered cardamom as well as garnish the top with fried cashews and/ or raisins. It was not included in the recipe . Amma always made hers plain and that's how we like it too!
*You can store the extras wrapped well in the fridge and re-steam it or zap it in the microwave for a few seconds as needed.
Vattayappam

This is one of Ian's most requested things to eat. He calls it 'Vattamappam' and loves it dearly!  Every time I make this, I plan on serving one for breakfast the next day but it never lasts and I never learn! I usually make this for our teatime and somehow a bite of this Vattayappam immediately takes me back home. Our nadan palaharangal always ensures a trip down the memory lane for me.
Every time I share a picture of our Vattayappam on Instagram, I get so many requests for it's recipe. So this recipe is for all of you who have waited patiently for all these months!I sincerely hope you give this a try at home. It's a good recipe!

Tuesday, February 18, 2020

NO-BAKE 10 LAYER CAKE for our 10th!

10 layer cake
I knew one thing for sure this year... I wanted to make a 10 layered cake for our 10th wedding anniversary. I somehow didn't want to stand by the oven baking layers after layers this year since we were all going through a round of fever,cold and cough and cake baking,even if it was for our anniversary was the last thing on my mind at that time. Even though I tried to push the thought of making a 10 layer cake away as much as I could, it came back to me with double the force! So I knew, I would be disappointing myself big time if I didn't put my plan into action!
10 layer cake
This cake is a no-bake layered cake which you can customize to the number of layers you want it to be! I needed 10 and this particular measurement gives you 10 with enough frosting to cover it up. So if you need to build a bigger or a smaller cake, please scale the recipe accordingly. There's absolutely nothing to go wrong here,even a child can make it! It's super simple and extremely delicious!
10 layer cake
So you basically need graham crackers and a good frosting. I chose the chocolate graham cracker because our kids love chocolate cakes and I was pretty sure it would do down well with them as well. You can choose to use regular graham crackers or even honey flavoured. This recipe is inspired by the Russian Honey cake where you make a batter first and then make several layers of cake by baking them separately.I've made the original version quite a few times before when we had friend's over and it was a massive success!
10 layer cake
Given a choice, I would have gone for the longer route but with all what was going on at home, I just wanted to do the quick version and literally be done with it and have a cake for ourselves to enjoy the next day! So this cake barely needs 15 minutes of your time to be put together but it needs some good amount of chilling time so that the crackers get the the time to soften up and become cake like! It absorbs the moisture from the frosting and becomes really soft and a bit plump. No one can ever tell they were made using graham crackers!
NO-BAKE 10 LAYER CAKE
10 layer cake Serves 12-15

Ingredients:
4 sleeves of chocolate graham crackers (1 box + 1 sleeve from another box)
Frosting:
16 ounce / 2 cups heavy cream, chilled
One 8 ounce packet cream cheese, room temperature
4 ounce unsalted butter, room temperature
One 14 ounce can condensed milk
Topping:
1/3 cup chocolate chips
1/3 cup heavy cream
Crumb:
4 extra crackers

Method:
Frosting: In a large bowl, whip the heavy cream to stiff peaks and set aside.
In another large bowl, beat the butter along with softened cream cheese till it's smooth, about 2 minutes. Add the condensed milk and beat until it's well incorporated, about 1 minute.
Fold the whipped cream into the butter mixture carefully in 2-3 batches. Your frosting is ready!
Topping: Gently melt the chocolate and cream together in a microwave oven for about 1 minute. Stir until smooth. Set it aside.
Crumb: Crush the crackers into a fine powder using a rolling pin
Assembly : Take a large platter and dab a small amount of frosting in a rectangular shape. Place three chocolate crackers over it. Cover it with some frosting and repeat till all 10 layers are done. You will need 30 crackers in total for a 10 layered cake. Cover the top and sides with the frosting. Pour the ganache carefully just to cover the top. Gently press the crumb mixture to the sides of the cake. Let it chill for a minimum of 6 hours before serving.

This cake tastes absolutely delicious! Just look at that list of ingredients...how can it go wrong! :-)
It is a heavy, rich cake mostly because of the frosting, so serve them in small slices. Ian kept saying this is the best cake I've ever made and then he corrected himself saying...'Well, it's always like that!'

Friday, January 24, 2020

KASHMIRI CHICKEN CURRY

Kashmiri Chicken 5
Growing up, I always wondered how to make a curry with ease and without breaking a sweat. I remember making this particular curry for the very first time way back in 2010 and as a newly married then, it was even more exciting to try out the recipes I had been writing down in my recipe diary from a long time. Over the years, I've learnt the easy art of making curries without all the fuss, from scratch and you all have ben a part of that journey for the past 11 years!
Kashmiri Chicken 1

This particular curry has quite  a number of ingredients than my usual ones but the method of making it is a breeze. I am not the one to stand by the stove over a weekday, stirring and stirring for literally 20 minutes just to get  the oil to separate from the masala. I would rather save it for a day when I have nothing  else to do.

Kashmiri Chicken Curry is one of our family favourite curries and is a winner with our kids. So, when the folks at The Feedfeed & Muir Glen asked me if I could share a recipe using Muir Glen Organic Diced Tomatoes, this curry was the first one to come to my mind. Their tomatoes are perfectly balanced in taste and is a perfect substitute for recipes where you need fresh tomatoes. I always have a stock in my pantry for the same. It's a brand that I have been using for years now. I shopped for my Muir Glen tomatoes at Wedge Community Co-op. It's our favourite place to shop,especially for local products. On our recent visit two days ago, we found quite a few interesting fruits that we've never seen before... Buddha's Hand & Kishu Mandarins! Find out what co-op you should visit here!
Kashmiri Chicken

KASHMIRI CHICKEN CURRY
Kashmiri Chicken 8
Serves 8-10
Active cooking time - 10 minutes
Total cooking time - 30 minutes

Ingredients:
2 pounds bone-in chicken thighs
1 teaspoon ground turmeric
1/2 teaspoon salt
1/2 tablespoon cayenne
1/2 tablespoon paprika 
1/2 teaspoon black mustard seeds
1/2 teaspoon cumin seeds
1/4 teaspoon fenugreek seeds
1 tablespoon unsalted cashewnuts
1/4 cup water

1/4 cup vegetable oil
2 cups diced red onions
1 tablespoon grated fresh garlic
1 teaspoon grated fresh ginger
One 14 ounce can of Muir Glen Organic Diced Tomatoes
1 teaspoon garam masala

Method:
  • Remove the skin and excess fat from the chicken and cut each thigh into 4,using a cleaver or a sharp heavy knife.
  • In a large bowl, marinate the chicken pieces along with turmeric and 1/2 teaspoon salt for 15 minutes.
  • In the meantime, using a blender, grind together cayenne,paprika,mustard seeds, cumin seeds & fenugreek seeds together along with 1/2 cup water to a fine paste. Feel free to add a couple tablespoons more of water if needed. Set it aside.
  • Soak the cashewnuts in 1/4 cup water.
  • In a large pan, heat the oil on medium high heat and sauté the onions, ginger & garlic till the onions turn soft and translucent, about 4-5 minutes.
  • Add the ground spice paste along with 1/4 cup of water. Mix well and let it sauté for 1 minute. 
  • Add the 14 ounce  can of Muir Glen Organic Diced Tomatoes to it and mix well. Continue to sauté the mix, stirring often until you start seeing oil around the edges of the pan,about 2 minutes.
  • In the meantime, grind the soaked cashewnuts along with the soaking water to a smooth paste.
  • Add the cashew paste, along with chicken to the pot. Add 1/2 cup water, salt and mix well to combine. Cover and cook until chicken is done, 20 minutes.
  • Remove the lid, add the garam masala and stir. Do a taste test for salt and adjust if necessary.
  • Serve the curry hot with Naan, Parata's, Rice etc. Enjoy!
This post is sponsored by Muir Glen and The Feedfeed, but all opinions are my own.
Kashmiri Chicken  7
I have served it with Rice, Chapathi, Porota, Ghee Rice, Tomato Rice, Batura, Appam etc and it's all been well received with big smiles!
I shopped for my Muir Glen tomatoes at Wedge Community Co-op. It's our favourite place to shop since 2010,especially for local products like Honey, Poultry & Meat. Find out what co-op you should visit here! Also, Muir Glen have an awesome deal happening now. Get ten 14.5 oz cans of tomato products for $10 from Jan 22 until February 4! Make use of that and stock up! You can put them to use all year long!

Wednesday, January 15, 2020

CHEMMEEN VATTICHULARTHIYATHU

Chemmeen Pattichularthiyathu
That name was a mouthful, wasn't it? Everytime I have to share a Malayali recipe with you, I wonder if I should include a translated,simple version or just stick to the original name. It plays in my head for a while I type the post and eventually, I go with the original name for it's charm and authenticity that might get lost during translation. I have been guilty of doing that in the past and in my defence, I was much younger then! :-) As I grow older (and even a bit wiser!), I can certainly notice a change in me with regards to how I think and also in the way I do things. Have you been noticing such changes in yourself? I have even come to realize that I like the way I feel now a lot better than what I did in the past...I do things at my pace and I am totally living my life on my own terms now. I cannot wait to grow older! :-)

Chemmeen Pattichularthiyathu
This recipe,is a quick and easy one. It's from the book Suriani Pachakam by Mrs. Bava Lukose. Prawns or Shrimp as it's known in this part of the world, barely requires any time to cook. It's one of my most favourite seafood for it's taste and texture. Seafood can get rubbery if you overcook it. I have seen so many cookery shows in Malayalam where the seafood is cooked in a pressure cooker and it's given multiple whistles. I cannot even begin to imagine how terrible the texture might be! All you need for this particular recipe is a good old mannchatti if you have one and maybe another pan to fry. If you don't have a mannchatti, I highly recommend you to get one at the earliest! I don't know if there's an extra taste coming from it but I surely know it's a healthier way to cook and definitely has a rustic charm with a nostalgic tag attached to it.
Chemmeen Pattichularthiyathu
For this recipe or any seafood recipe for that matter, please take your time to find out the best source to get them. I had a hard time figuring out where to get good seafood here that actually tastes like the sea. I eventually found out that it's the best at co-ops, Whole Foods or wherever they sell wild caught seafood. It tastes the best and it does taste like the ocean. I mean, that's the best way I can describe how fresh the seafood is back in Kannur. Nowadays, even back home, we see a lot of seafood coming in from far away places and they just don't taste the same.

CHEMMEEN VATTICHULARTHIYATHU
Chemmeen Pattichularthiyathu Serves 6

Ingredients:
500 gram cleaned prawns
2 medium onions, thinly sliced
8 cloves garlic, crushed
1 inch piece ginger, crushed
1 teaspoon Kashmiri red chili powder
1/2 teaspoon turmeric powder
2-3 pieces Kudampuli soaked in 1/2 cup water
Salt
1/2 cup sliced pearl onions
4 dry red chilies, de-seeded and crushed
1/2 teaspoon crushed black pepper
3-4 tablespoons coconut oil
1 sprig curry leaves

Method: Into a mannchatti, add everything from prawns through salt along with 1/4 cup water. Mix well and cook over medium high heat till the prawns are just cooked. It will turn salmon-pink and will curl up,about 5-6 minutes.
Heat oil in a fairly large pan on medium high heat and add the pearl onions. Saute until they start to brown a bit, then add dry red chilies, black pepper and curry leaves. Mix well and add the cooked prawns and saute well till the masala is well coated, about 2-3 minutes. Serve hot!
Please adjust Kudampuli to your taste. I used 3 small pieces. This curry's success depends a lot on the 'erivum puliyum' balance. 

Chemmeen Pattichularthiyathu
This curry was honestly a huge hit at home! Jobin's mummy and Jobin couldn't stop raving about it . Jobin usually doesn't like Kachimoru but the recipe I shared with you last week, is his favourite.It's a little spicy for children,so I washed the pieces and served it to them along with Cabbage & Baby Kale thoran, Koorka Mezhukkupuratti and Matta rice. Hmmm...that combination is so nostalgic! I can never ever get enough of it!
Related Posts Plugin for WordPress, Blogger...