
 |
 |
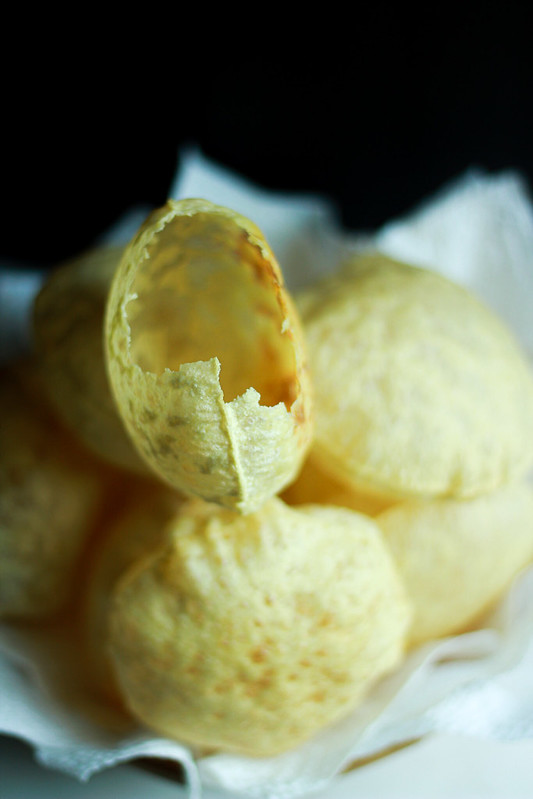
I don't like the Pappadam we get to buy here in stores. They just don't puff up, even the ones that's sold by the name Kerala Pappadam. They are like Pappadam polathe Poori, crisp flat discs with some bubbles here and there. I agree, it tastes the same, but to me a Pappadam should puff up dramatically, just like a Poori. Thin, a bit salty and crisp, shatteringly so. Our little ones and Jobin goes ga-ga over them,so I was on the lookout for a good recipe for a while now until I stumbled upon Jinesh's page. This is the very first time that I am making Pappadam and they couldn't be more perfect!
 |
 |
HOMEMADE PERFECT PAPPADAM
Makes 28-30 pieces
Ingredients:
1 cup whole skinned Urad dal
1 teaspoon salt
1/2 teaspoon baking soda
Approximately 1/4 cup plus 1 teaspoon water
2 teaspoons oil*
All-purpose flour, for dusting
Method:
Powder the urad dal very fine and sieve it into a large bowl. Add the salt, baking soda, water and 1 teaspoon oil. Mix to form a stiff, slightly sticky paste. Add one more teaspoon oil and mix well. By now, the dough would have come together and the sides of the bowl will be almost clean. This shouldn't take more than a minute.
Transfer the stiff dough onto a clean counter top and pound it down with a pestle, folding the dough and flattening it as you go for about 20 minutes. After 20 minutes, the stiff dough would have become pliable and soft, almost like a chapathi dough. Roll it out into a long log and divide them into 1 inch portions.
On a floured surface, roll out each portion into thin discs, just like storebought ones. Lay them flat on a baking tin, without overlapping and dry them under the sun for 10-15 minutes, flipping once in between. Store them in airtight containers and fry as needed in hot oil.
* The original recipe called for sesame oil, I used vegetable oil.
You can cut them into perfect rounds using a cookie cutter, if you wish to. I did that and fried up the scraps as well. I didn't bother rolling out the scraps.I flipped the pappadam half way through the drying process because I felt the underside was slightly wet. It should still be soft and pliable after sun drying. Do not make it stick like.
I am assuming that these will stay good for week in a covered container if stored in the fridge. I didn't get the chance to try that out.
 |
Try this with your kids but do keep an eye on them because you don't want the to pound their own tiny fingers!
Now that Onam is around the corner, I couldn't think of a better recipe to share with you all! I hope you give it a try because it is so worth it! I must warn you that the fruit of your hard work will vanish in mere minutes once they are fried!!


5 Comments:
This is awesome! Can I use store bought Urad flour ?
This is insanely awesome Ria!!!
Mam, does this indicate Whole urad dal with skin?? Or just whole white urad dal the round ones .??
Thanks.
Hi Kavitha, if it's unroasted I think you can. The measurements will vary because 1 cup whole urad ground will not be the same as 1 cup ground whole urad.
Thanks Magpie!
Nam, yes. It's the skinless white whole urad .
Hey Ria ! Have you had the chance to try making the dough in a kitchenaid ? Iam planning to try it . Fingers crossed !
Post a Comment