Ria's Collection

Monday, February 14, 2022

SOFT CINNAMON ROLLS

Cinnamon Rolls
I've baked a fair share of cinnamon rolls in my life so far. A lot of them were for others and some for our family. Our kids absolutely love them and request them every chance they get. I must admit that I don't bake them as much as they ask for even though it's very simple to bake. I've shared a recipe for these rolls a long time ago. They are really good but these ones are even better! I still remember those days when the aroma of cinnamon gave me a headache and now, it warms my heart! I must mention that even though I like the smell of cinnamon in food, I don't like candles that smell like cinnamon. I don't know why but that kind of makes me feel very dizzy.
Cinnamon Rolls

Making bread at home is simple as long as you know how to treat the star ingredient, yeast. A lot of you often write to me saying that your bread dough never rises. The only part where you could go wrong is with the temperature of your liquid. It should be warm and not hot. If you were to use a thermometer, which I highly recommend, it should measure between 100 degrees F & 110 degrees F. Otherwise, stick your finger into it and the liquid should feel warm and cozy, like bathwater. Any hotter, your yeast will die because it is a living organism. 
Cinnamon Rolls

Last week, Zara requested me to bake cinnamon rolls and I kept pushing it because of orders.
I made a promise to her that it will be ready when she gets back from school but it wasn't really done because my usual dough needs a slow rise in the fridge and I didn't have the time that day. So I did a quick search online and found this recipe with brilliant reviews. I love trying out new recipes even if I have a successful, tried & tested one in my back pocket at all times! It's the whole experience of experiencing new things, right?  So here you go!
SOFT CINNAMON ROLLS
Makes 12 large rolls
Ingredients:
Dough
1 cup warm milk
1 tablespoon instant dry yeast
2 tablespoons white granulated sugar
1 teaspoon salt
3 tablespoons salted butter, softened
1 large egg
3 cups all-purpose flour*
Filling*
1/2 cup unsalted butter, melted
1 cup brown sugar
2 tablespoons ground cinnamon

Glaze*
4 ounces cream cheese, softened
1/4 cup unsalted butter, softened
1 - 11/2 cups powdered sugar
1/2 teaspoon vanilla
1-2 tablespoons milk

Method:
 In the bowl of stand mixer, combine warm milk, yeast, sugar, salt, butter & eggs. Add in flour. Mix on low speed using a dough hook. Once the flour begins to incorporate into the dough, increase the speed to a medium and knead till the dough pulls away from the sides of the bowl. The final dough should feel tacky and soft. Cover the bowl with a lid/ plate/ towel and let rise until doubled in size, about an hour.
Lightly grease a 9X13 inch baking tin and keep it aside. Dust your counter top with some flour. Punch down the risen dough and roll it out into a 12 inch by 18 inch rectangle. 
Brush the melted butter all over and sprinkle brown sugar followed by cinnamon.Roll it up tightly from the longer side. Slice them into 12 pieces and place them onto the prepared tin. Cover and let rise for 30-35 minutes.
Pre-heat oven to 325F. Bake the rolls for 25-30 minutes or until lightly brown on top.
While the rolls are baking, cream together cream cheese & butter until light and fluffy. Add the powdered sugar & vanilla and beat well to mix. Add enough milk to get a drizzle -like consistency.
Frost the rolls while warm and enjoy!
* Don't pack the flour into your measuring cup. Spoon it and level the top . This way you will get the right consistency for the dough. If the bread dough is dry, your baked cinnamon roll will be dry. Like how it mentioned in the method, the dough should feel tacky. That is, if you touch it, you will notice that it's slightly sticky but when you pull you fingers away, nothing sticks to your fingers. 
* I used half the filling and frosting recipe. You can use white sugar for the filling if you are out of brown. I had only dark brown sugar on hand, so I've used that here.
* You can bake them at 350F but for a little lesser time.
These cinnamon rolls were super soft, like pillows! Since I used only half the amount of filling and glaze, it was really like a mildly sweet bread roll that's flavoured with cinnamon. We absolutely enjoyed them with our evening cup of tea! I hope you give this a try and enjoy these rolls as much as we did. Do keep in mind the tips I've shared for the recipe. 

Monday, February 7, 2022

TEA CAKE

Tea Cake
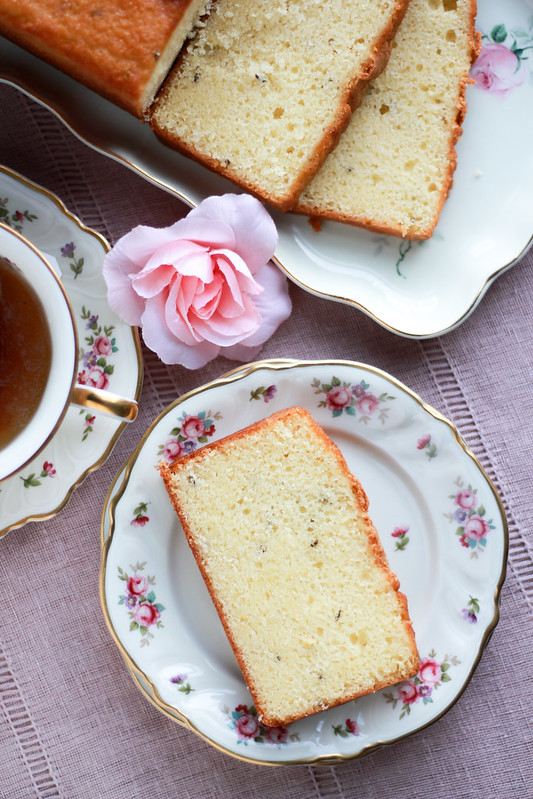
There was a time in my life when I enjoyed cakes with some kind of frosting on them. It's slowly changing now and I see myself baking more plain cakes than frosted ones. I end up making frosted cakes mostly for some kind of a celebration these days. When I say plain cakes, I don't mean that they are boring. Instead, they are simple cakes where the main ingredients shine through. A good butter cake is our favourite and whenever I bake them, I try to get the best possible butter that I can lay my hands on. I love using Irish butter for it because they are extremely high in fat content and their flavour truly makes the cake shine!

Tea Cake
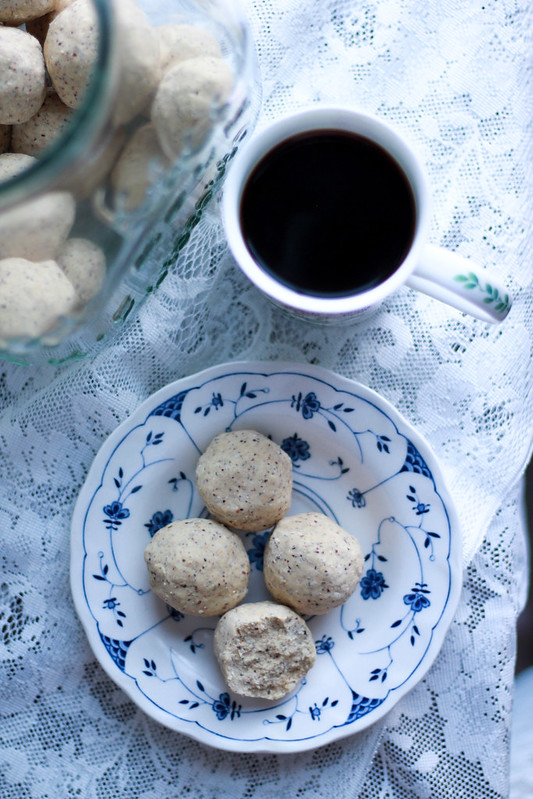
A tea cake can be made in three ways. The first one is where dried fruits are steeped in tea overnight and added to the cake batter while baking. The second one is the kind I've eaten the most in my life. It's a slightly dry cake when compared to a butter cake and is flavoured with caraway seeds. Both cakes are enjoyed with a cup of tea (or coffee!) and hence the name Tea Cake. The third one is like a cross between a cake and a cookie and is baked commonly in the Southern states. Oh, that reminds me of Snowball cookies which are also known as Mexican & Russian Tea Cakes! Do share if you know of any other tea cakes that I am not aware of! I love learning new things!

Tea Cake
I wasn't sure how Ian & Zara would enjoy this cake because it uses very little butter and they both are used to very buttery cakes. I was definitely surprised when they devoured the cake slices. They took to the taste of caraway seeds very well. Please know that caraway seeds are not the same as shah jeera. Caraway seeds are also known as cake jeerakam in Kerala. It has a very distinct flavour. It's widely available in most grocery stores here.

This recipe comes from Mrs Bava Lukose and is a keeper just like all the recipes I've tried from her book Suriani Pachakam. The cake keeps getting better by the day and it slices like a dream! She uses a different method for making the batter from what's done traditionally.  Try this recipe when you are looking for something simple & tasty to go along with your cuppa next time!

Tea Cake
Makes one 9 inch loaf
Ingredients:
2 cups all-purpose flour
2 teaspoons baking powder
4 eggs, room temperature
1 3/4 cups sugar
1/2 cup butter, room temperature
1 cup milk
1 teaspoon caraway seeds 
Method:
Preheat the oven to 350 F / 180 C and line a 9-inch loaf tin.
Sift the dry ingredients and keep them aside.
In a large bowl using a hand-held mixer beat the butter until pale and creamy, about 3 minutes. Add sugar and eggs alternately and mix well for 15 seconds after each addition. It will become a very fluffy and light coloured mixture.
Add flour & milk alternately and mix on low speed until just combined. Fold in the caraway seeds and pour the batter into the cake tin.
Bake for 50-55 minutes or a toothpick inserted into the centre comes out clean. Cool in the tin for 15 minutes and then turn it out onto a rack and cool completely. 
Slice them into thick slices and enjoy! Store the leftover cake in an airtight container for up to a week.
Like how I mentioned earlier, this is a very tasty basic cake. I wouldn't recommend any frosting for this, it's meant to be served plain. This will make a delicious cake to take with you for picnics. I cannot wait for it to be warmer here in Minnesota, just so that we can explore the outdoors as much as we can!

Monday, January 24, 2022

MAA LADDU

Maa Laddu


Ilove Besan Laddu's and it's all because of my best friend Vasu. Her mom would send large boxes of homemade Besan Laddu's all the way from Allahabad and by the time the courier reached Bangalore, it would have all melted into one big slab! Her sister's MIL would patiently reshape them and send them to Vasu's hostel. Then we would just devour them endlessly and it never showed on our waistline! How I wish my metabolism was still like those days! I remember pestering Vasu for her mom's recipe and like a lot of Mother's, Aunty didn't have a proportion as such. Then I chanced upon this recipe and have been making them for 13 years now! They are super good!

Maa Laddu
Having said all of that, this is not a Besan Laddu recipe post. What you see here are Maa Laddu's. A lot of people are confused about their difference. Besan Laddu is made using raw besan /chickpea flour, which gets roasted for a good while till the raw taste vanishes. Then all the good stuff like sugar and ghee goes in and there's quite a bit of stirring involved. Whereas, these Maa Laddu's are made with roasted bengal gram. The kind you snack on. It was a staple at Govind Ettan's shop right across our school in Kannur. It even leaves an after taste,which I kind of love!

Maa Laddu
Jobin's sister made these for me once when we were visiting her in Gwalior and she also sends it across whenever she can. The whole process is very quick and the end result is very tasty, almost like my favourite Besan Laddu's. Last evening, as I was grocery shopping at our Indian store nearby, I saw a few packets of roasted bengal gram and quickly grabbed a couple. I knew I would be in trouble if I left them as is because we love snacking on it and it would never make it into being the delicious laddu that I have been craving for! This is a very quick and easy sweet that you can make in no time at all! 
MAA LADDU    
Makes 30 
Ingredients:
4 1/4 cups (400 grams) powdered roasted bengal gram
1/2 cup ground almonds  (optional)
3 cups powdered sugar (or as needed)
Approximately 1 cup melted ghee

Method:
Powder 400 grams of roasted bengal gram using a mixie and then sieve it into a large bowl. It should measure between 4 cups to 41/4 cups. Add ground almonds and powdered sugar to it and stir to mix.
Pour in the melted ghee a little at a time and mix well with your hands. Stop adding ghee when you can form balls with the mixture. It will feel somewhat like damp sand, not a wet mixture at all.
Form laddu's and store them in airtight container.
Enjoy!

 
Maa Laddu
This is a very forgiving recipe. There's absolutely nothing to go wrong here. The amount of sugar I've mentioned here is what I thought was right for us. Taste the mixture and add more if you want. Otherwise,start with a lesser amount of sugar and adjust as needed. Jobin's sister mentioned that she adds almond flour when she makes them for us. So I added some today. This can be omitted or substituted with cashewnuts or even walnuts as well. It adds more nutrition. You can add cardamom too, if you want to. I omitted it because I wanted it to taste of pure ghee! As always, I used homemade ghee. It's far superior in taste and aroma when compared to storebought.

Maa Laddu

I know it's been extremely quiet here for the last one year. Life has been so busy on the personal front and we travelled a LOT in 2021. In November, I launched Malabar Bakehouse, my own company and it has literally taken over my life now! I've been doing a lot of bake sales lately so that kind of keeps me on my toes along with all the other local orders that I have been getting. It's good to be busy for sure but sometimes, it does a bit too busy! :)

Friday, December 4, 2020

FIVE WAYS

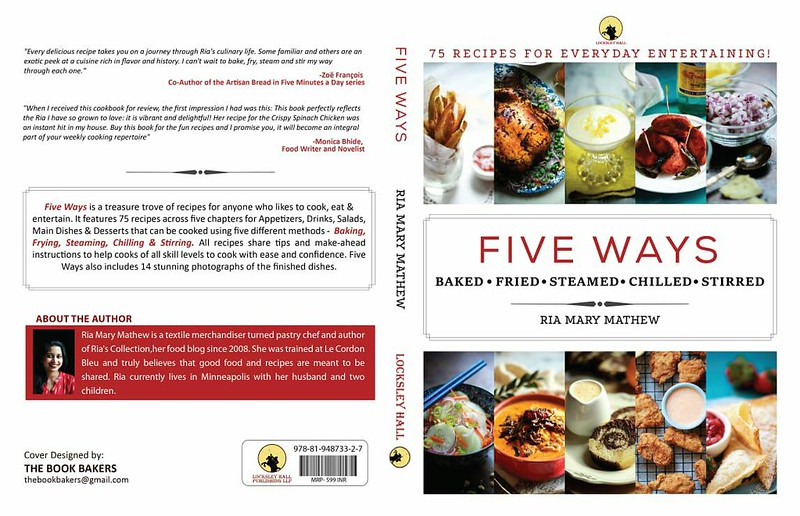
Five Ways This is a super special post for me as I am sharing with the World my hard work for the last two years. My cookbook, Five Ways is now available for purchase on Amazon*  (Amazon and the Amazon logo are trademarks of Amazon.com, Inc. or its affiliates) & Pustak Mandi. I had shared the news on my social media yesterday as soon as the book was released and the response I received has been overwhelming, to say the least! Five Ways topped the charts and have become #1 Best Seller on Amazon India* in under 12 hours! It is such a lovely feeling to see that you all have been encouraged to buy my cookbook and even share it among your friends and families. I truly appreciate your help in giving me this ray of sunshine in 2020.

Five Ways The book was due to be released originally on November 29,2020. It had to be postponed at the last minute because of the protests in Delhi. The borders were closed and my books were still at the printers in Haryana which needed to be at the publisher's warehouse in UP for the release. The printers somehow managed to do it and we could meet the release date of December 4,2020 that we had aimed for later. I must say I am on cloud 9 right now and this feeling is super new to me. 

Five Ways I am the first Author in my family. It all had to be done from scratch. It's been a learning curve and I truly hope you enjoy the fruit of my hard work. I will be receiving my set of copies in a couple of days time and until then, the butterflies will soar in my stomach! We, as a family are so thrilled to have experienced this wonderful journey, and I only pleased to share that journey with you all.
Here are the purchase links:

Amazon India  Amazon and the Amazon logo are trademarks of Amazon.com, Inc. or its affiliates

If you buy my cookbook, please leave a review on the seller's page once you go through it. I will be looking forward to reading it all!

Thanks,
Ria

Saturday, October 10, 2020

COOKBOOK!

It's Cookbook Time!
Hello everyone! I am waaaayyy beyond thrilled to finally let you all know that I have been working on my very FIRST COOKBOOK for the last two years. Yes, in between all the get-togethers, potlucks, birthday parties, tea parties, sleepovers, stitching, gardening, travelling and all that I have been sharing with you... I've been writing a cookbook! It's been a wonderful, yet crazy journey that kept me awake on many nights, kept me stuck in thoughts, kept me wondering if I can ever nail that recipe right, etc. It also gave us many delicious meals to enjoy and also very many, many dishes to wash.
The work is all done and submitted. Now, it's just a matter of a few weeks before I can share more details with you! I still cannot believe that I just shared the good news with you guys on the 12th anniversary of my food blog! Yes, today marks 12 years since I started Ria's Collection. Time flew by, right? 

Monday, September 7, 2020

SEMOLINA BREAD LOAF

Semolina Loaf

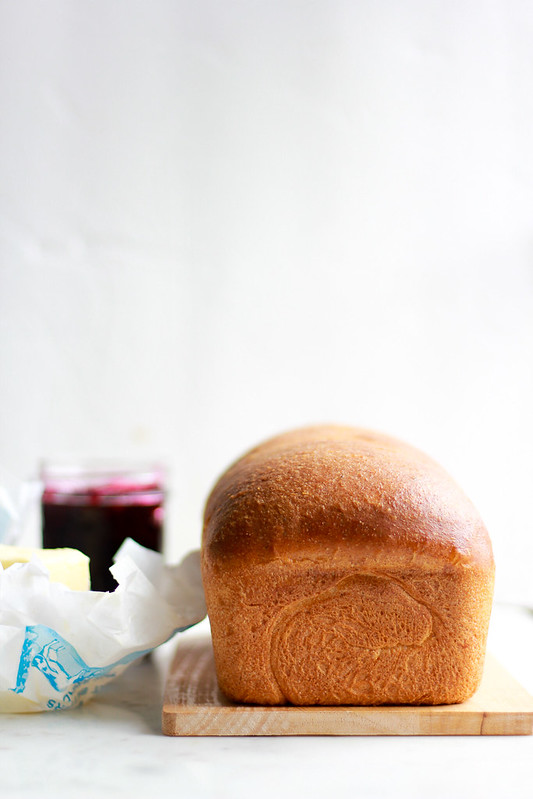
Iabsolutely love baking bread at home. More than quality control, it gives me so much joy to transform simple things like flour, water, yeast and salt into a soft dough which bakes up into this boxy heavenly cloud! If you have never baked bread before, I urge you to give it a try. You will be hooked for sure! It is pretty dangerous to be a bread baker who loves to bake (& eat!) bread because you will forever have a fresh stock at home and then it just find it's way into your belly, one slice at a time.

Semolina Loaf

When I came across this recipe, I wanted to try it to see if there was any difference between this bread and the one that I had been baking for years. My regular, go-to white bread is made fully out of all-purpose flour. But when I sliced into the freshly baked Semolina Bread Loaf, there was barely any difference in taste or texture. I wouldn't have known that it wasn't made out of all-purpose flour if I didn't bake it myself. It was that good! The crumb was exceptional as you can see in the photograph above. I loved every bite of it!


Semolina Loaf


If you are a newbie at bread baking, I have a few pointers for you to bake a successful loaf of bread. Yeast is a living organism, so when you add water, it should be just warm and never boiling hot. If you were to check the temperature, it should range somewhere between 100F -110 F. It should feel nice and cozy, like a warm bath water.  If the water is too hot, you will kill the yeast and you will have to start over. Dead yeast will not leaven your bread, it will be rock-like when baked. Also, baking is a science. So please be exact when you measure the required ingredients. Please don't eyeball anything, you will most likely be disappointed in the end.
Semolina Loaf

SEMOLINA BREAD LOAF
Makes one 9 X 5 inch loaf
Ingredients:
1 teaspoon instant yeast
2 tablespoons white sugar
315 ml milk & water 
500 grams fine semolina / rava / suji
1 teaspoon salt
2 tablespoons milk powder
1 tablespoon oil
Method: Oil a 9 X 5 inch loaf tin and set it aside.
In a large bowl, mix together all the ingredients except the oil and stir to form a soft shaggy mass. Cover and let it rest for 20-25 minutes. 
Add 1 tablespoon oil and knead the dough until you achieve the windowpane test. It will take about 15-20 minutes by hand and about 5-6 minutes in a stand mixer. If the dough is too sticky to work with, add another tablespoon oil while mixing. The final dough should be smooth and soft and shouldn't break when stretched (windowpane).
Let the dough rest in a large, covered and slightly oiled container until doubled in size. Knock back the dough and roll it out into a large rectangle on a lightly floured surface. Roll it up and place it into a prepared loaf tin. Cover and let it rise until doubled, about 30 minutes. Brush the top with ghee and bake at 200 C / 400 F for 30-35 minutes or until golden on top and sounds hollow when tapped.
If you'd like, brush some more ghee over the baked loaf. Transfer the hot loaf onto a cooling rack to cool completely. 
Enjoy!
* If your semolina is coarse, grind it for a few seconds in the mixie to make it fine.
Like I mentioned earlier, I couldn't notice any difference between a semolina bread loaf and the regular white bread. This recipe makes a very soft, delicious bread. You can use this bread for every recipe that calls for white bread. They make terrific sandwiches, french toasts, bread puddings, bread crumbs etc. I hope you try baking it at home and if you do, let me know your experience!

Thursday, August 27, 2020

CROISSANTS

Croissants

There was a time in my life when I didn't know what a Croissant was. Then there was a time in my life where I made Croissants for weeks together! I was a student at Le Cordon Blue at that time and Chef Paul taught us how to make the very best Croissants. We baked so many over the course of 6 weeks and even had an exam on it. It was so much fun learning how a small change in the process can change the outcome dramatically. I enjoy working with yeast because it's pure magic that's happening right in front of your eyes. 

Croissants

Making Croissants can come across as something that's hard to achieve at home, especially for a first-timer. In my opinion, it's not difficult if you pay close attention to details. And when I say that, I really mean it. There are no two ways about it. Every step matters if you want to have a consistent product each time, like how it's mentioned in the recipe. It's not a recipe where you can add or take away things during the process. When you read through the recipe, it might sound super length-y. It's actually the most easiest process but attention to detail, like how I mentioned before, if the key.

Croissants

So you begin the process two days prior to the actual baking and eating day. On day one, you make the dough and butter block. On day two, you bring the two together and do all the folding. On day three, you bake and eat it! The active time in making Croissants is very little. You just do a little each day and the dough is resting in the fridge for the most part of it. One of the important steps is to make sure that the dough and butter block that you make on day one, is of the same consistency / feel  when you are about to do the folding on day two. Butter should feel as pliable as the dough, thaw if need be.Why is it important? It's because if the butter block is hard and the dough is soft, it will break up while you fold. You don't want to take any chances of the having a butter leakage at any point. If you do, stop what you are doing and let the dough chill for a 10-15 minutes. You might get tested for patience, if you are doing this on a hot, humid day.

Croissants


Try to get the best possible butter that you can lay your hands on. The more fat content it has, the better is is! I used a block of unsalted butter from Hope Creamery, Minnesota. I love their butter! Croissants are best eaten warm but there's not harm in freezing fresh ones and warming it up in a toasty oven later. It will still be good. This recipe is from Weekend Bakery, a blog I came across on Pinterest a few months ago. I pinned it to try later and here I am! It will look lengthy but I promise you, it's not that long when you do it. Just be sure that you follow the instructions. , including the measurements!
Croissants


CROISSANTS
Makes 15
Ingredients:
500 grams all-purpose flour
140 milliliters water
140 milliliters milk (cold milk is ok)
55 grams sugar
40 grams unsalted butter
11 grams instant yeast
12 grams salt

280 grams unsalted butter, cold
1 egg yolk + 1 teaspoon water, for egg wash

Method:
Day 1 : Making the dough
Mix all the ingredients together from flour through salt on low to medium speed for 3 minutes until it all comes together to form a dough with a low stage of gluten development. You are not looking for windowpane here, the dough will fight back when you roll. Shape the dough into a disc, wrap and chill in the fridge overnight.

Day 2: Laminating the dough
Cut the cold butter into 1.25 cm thick slabs. Arrange the pieces on parchment paper to form a 15 x 15 cm square. Place another piece of parchment paper over it and pound the butter gently using a rolling pin to flatten it to a 19 x 19 cm square. Trim the sides to straighten it and place the trimmings on top of the square and flatten it again to form a 17 x 17 square. Wrap and chill until needed.
Roll out the chilled dough on a lightly floured surface to 26 x 26 cms square with straight sides and even thickness. Take the butter out of the fridge. Place the dough square with one side facing towards you. Place the butter block over it at a 45 degree angle so that a point of the butter is facing towards you.Fold a flap of the square dough over the butter, so that the point of the dough reaches the centre of the butter. Repeat with other three sides. The edges of the dough flap should slightly overlap to enclose the butter fully. With the palm of your hands, lightly press the edges to seal the seams.
On a lightly floured surface, roll the dough out from the center to form a rectangle of 20 x 60 cms. Aim at lengthening the dough and not widening it, keeping the sides straight. Fold the dough letter style, folding the top 1/3 portion towards the center and folding the lower 1/3 rd portion over it. Cover and let it chill for 30 minutes. Repeat the process two more time, rolling out the dough to 20 x 60 cms each time. After each turn, turn the dough 90 degrees before you roll again. After the 3rd turn, cover and chill the dough in the fridge till Day 3.
If the rolling gets tough at any point, let the dough relax in the fridge for 20-30 minutes.

Day 3: Dividing the dough
Take the chilled dough from the fridge and roll it out to 20 x 110 cms on a lightly floured surface. Do not stretch the dough, just roll it gently. If it fights back, fold it letter style, cover and chill for 20 minutes. It took three rounds for me to roll it out that long.
Once the dough is fully rolled out, gently lift from the sides to let it shrink naturally. Your strip of dough should be long enough to let you trim the sides and still be 100 cms long.

Shaping the dough
Take a tape measure and mark 12.5 cms intervals at the top of the dough ( 7 marks in total). At the bottom, make a mark at 6.25 cms. Then continue to mark at 12.5 cms intervals (8 marks in total). Top and bottom lines will not match and will form the base of the triangles. Make diagonal cuts using a pizza wheel from the top mark to the bottom mark. Continue this for the length of the dough. Change the direction and cut the opposite way for the length of the dough. You will have 15 triangles and a few odd shapes of dough.
Using your pizza wheel, gently make a 1.5 cms notch in the centre of the short side of the triangle. Now, gently elongate the triangle to 25 cms. You can use a rolling pin for the same.
After you cut the notch in the short end of the triangle,try and roll the two wings by moving the hands to the center, creating the desired shape with a thinner, longer point. Try and roll the dough very tight in the beginning and use just enough pressure to make the dough stick together (don't squish it!)
Proofing & baking
Place the shaped croissants on a baking sheet with enough space between them . Whisk together the egg yolk and water and brush a thin coat over the croissants. Let them proof in a draft-free space with an ideal temperature of 24 C -26 C. It will take about 2 hours. You should be able to tell if they are ready by carefully shaking the baking tin and see if the croissants slightly wiggle. You should be able to see the layers of the dough from the side.
Preheat the oven to 200 C / 390 F convection or 220 C/ 430 F convectional oven.
Right before baking, give the croissants a second thin coating of egg wash. Bake them for 18-20. It's best eaten warm. You can reheat frozen ones at 180 C/ 350F for 8 minutes straight from the freezer.
Enjoy!

I rolled the dough scraps with chocolate and baked them along with Croissants.
Try making Croissants on a relatively cooler day, it save you some trouble!

Did I scare you with the lengthy instructions? If I did, please take a deep breath and read it again. Write it down on a piece of paper, it can help. The first time can be intimidating with all those measurements thrown in. I promise you, it's not all that scary!
If I didn't scare you, what are you waiting for? Get baking! When I was working at Hyatt Regency, Minneapolis as a Pastry Assistant, we would fill our Croissants with Nutella just before serving. Just poke a hole in the bottom of the Croissant and fill Nutella with the help of a piping bag. Dust some icing sugar over the top and enjoy it with some hot coffee!


You can find the step-by-step instructions with photographs on my Instagram profile.

Tuesday, August 25, 2020

HOMEMADE PERFECT PAPPADAM

Homemade Pappadam

This is definitely not my family recipe. None of us make it at home. I mean, why take the extra effort in making it when you can buy some in less than half the time,right? I must admit that it's hard to find good Pappadam these days, even in Kannur. Nalla pole pollunna pappadam is a rare sight. They always reminds me of the sadya we ate during the Kerala State Youth Festivals when I was in school. Somehow, eating pappadam with rice on a hot, humid day brings in a lot of memories for me. Today was one such day here in Minneapolis. 

Homemade Pappadam

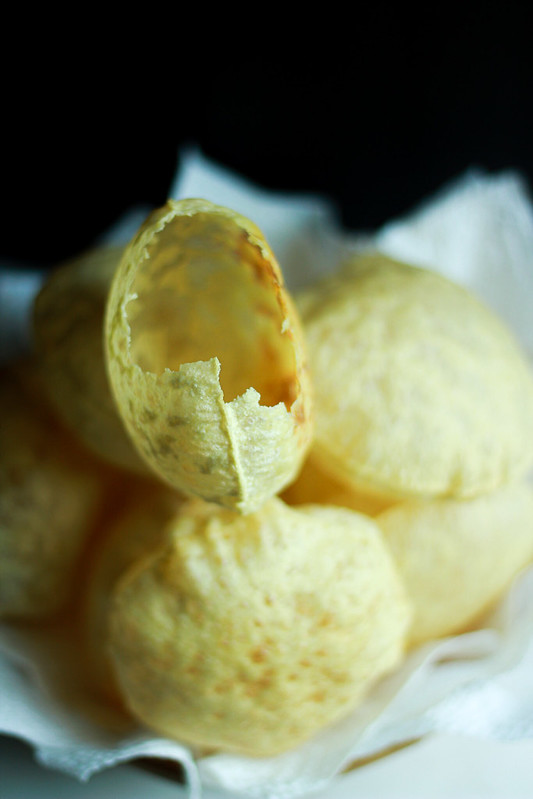
I don't like the Pappadam we get to buy here in stores. They just don't puff up, even the ones that's sold by the name Kerala Pappadam. They are like Pappadam polathe Poori, crisp flat discs with some bubbles here and there. I agree, it tastes the same, but to me a Pappadam should puff up dramatically, just like a Poori. Thin, a bit salty and crisp, shatteringly so. Our little ones and Jobin goes ga-ga over them,so I was on the lookout for a good recipe for a while now until I stumbled upon Jinesh's page. This is the very first time that I am making Pappadam and they couldn't be more perfect!

Homemade Pappadam


It is a breeze to make Pappadam at home. You will need some muscles to pound the dough to make it pliable. That's the only place where you might be wondering if it's really worth all the trouble. I would suggest that you hold on to that doubt and wait until you fry your first handrolled, homemade Pappadam. That feeling when you see them puff up, one after another is beyond comparison. I was literally jumping up and down and by the time I fried the second one, Jobin's Mummy was right next to me. That excitement was contagious to say the least! 
Homemade Pappadam


HOMEMADE PERFECT PAPPADAM
Makes 28-30 pieces
Ingredients:
1 cup whole skinned Urad dal 
1 teaspoon salt
1/2 teaspoon baking soda
Approximately 1/4 cup plus 1 teaspoon water
2 teaspoons oil*
All-purpose flour, for dusting

Method:
Powder the urad dal very fine and sieve it into a large bowl. Add the salt, baking soda, water and 1 teaspoon oil. Mix to form a stiff, slightly sticky paste. Add one more teaspoon oil and mix well. By now, the dough would have come together and the sides of the bowl will be almost clean. This shouldn't take more than a minute.
Transfer the stiff dough onto a clean counter top and pound it down with a pestle, folding the dough and flattening it as you go for about 20 minutes. After 20 minutes, the stiff dough would have become pliable and soft, almost like a chapathi dough. Roll it out into a long log and divide them into 1 inch portions.
On a floured surface, roll out each portion into thin discs, just like storebought ones. Lay them flat on a baking tin, without overlapping and dry them under the sun for 10-15 minutes, flipping once in between. Store them in airtight containers and fry as needed in hot oil.
* The original recipe called for sesame oil, I used vegetable oil.
You can cut them into perfect rounds using a cookie cutter, if you wish to. I did that and fried up the scraps as well. I didn't bother rolling out the scraps.I flipped the pappadam half way through the drying process because I felt the underside was slightly wet. It should still be soft and pliable after sun drying. Do not make it stick like.
I am assuming that these will stay good for week in a covered container if stored in the fridge. I didn't get the chance to try that out.
Homemade Pappadam

If you were to ask me if it's a time consuming process, I will have to agree to that. It took me close to a hour from start to finish. It will also depend on how fast you are at rolling them out because the time taken to make the dough would remain the same for all. Will I make it again? 100% yes! Next time, I will try if my Kitchen Aid can help. If it does, I am sure it will cut down on the pounding time. 
Try this with your kids but do keep an eye on them because you don't want the to pound their own tiny fingers! 
Now that Onam is around the corner, I couldn't think of  a better recipe to share with you all! I hope you give it a try because it is so worth it! I must warn you that the fruit of your hard work will vanish in mere minutes once they are fried!!

Monday, July 27, 2020

CHERRY JAM

IMG_7622

Cherries are without a doubt one of our favourite Summer fruits. No matter how many packs we buy, they get over in a couple of days time. I look forward to seeing them in stores by mid May and when I do, a pack is definitely coming home with us! This year, we take turns in doing grocery shopping and Jobin is the one who does most of our Target shopping. I often tell him how much I miss going there and walking around casually looking at all the wonderful fruits and produce! It's all done in a rush these days. Get into the store as quick as you can and get out even quicker. 

IMG_7631

Talking about doing things quickly reminded me of how I work in my kitchen. I love to cook but I do not believe in spending a lot of time in the kitchen just cooking and doing dishes. I want everything to be done quickly, without wasting time. I sometimes feel that I push our children also into doing things quickly, unknowingly. I try to slow down at times but then the itch to finish things begins quickly! :-)  Are you guys like me? I am sure, I am not alone in this race against time. I always feel that my biggest competition is myself. It's not just in the kitchen... I am always trying to better myself from what I was yesterday. I sometimes fail but I pick myself up and try again! It's a never ending process but a happy, satisfying one!
IMG_7628

I have been making jams and jellies for a while now and I love how quick the whole process is and in the end, you are rewarded with multiple bottles of goodness that you can use over the year and even gift to friends, especially around the Holidays. We go through quite a bit of jam yearly because we love our jammy treats. I use them on our toasts, plop some on my thumbprint cookies and also sandwich my cookies with them. I enjoy thinning it out with some fruit juice which complements the jam and sometimes even water and use it to serve alongside my cheesecake, pannacotta, cakes etc. It's very versatile and handy to have them with you throughout the year! This wonderful jam recipe comes from MJ.
CHERRY JAM
Makes 2 cups
Ingredients:
20 ounces pitted fresh cherries
10 ounces white granulated sugar
Juice of one lemon

Method: Roughly chop the cherries and add to a large pot with tall sides. Add the sugar and lemon juice and cook on medium heat until the sugar melts. Increase the heat so that the mixture comes to a full boil. Cook until the jam reaches 220F on a candy thermometer or when a drop of jam poured onto a cold plate, sets.
Ladle the hot jam into clear, sterilized bottles and let it cool completely. Put the caps on and refrigerate until its used up. If you are canning it, you don't have to refrigerate it.

* There are many ways to check if the jam is done. Using a candy thermometer makes the guess work much easier. You could also do a sheet test or a single string test. Some even draw a line in the hot mixture and if you can see the bottom of the jam pot, it's ready.
IMG_7638

The colour of this cherry jam is so lovely! Once I was done making it, I somehow just didn't feel like washing the pot. It was a lovely deep purple-pink. I don't know how else to describe the colour! :-) When you make the jam this way, the cherry pieces are still visible in the end product. If you don't like it that way, you can quickly blitz the cherries once you roughly chop them using an immersion blender. I have seen people do it once the jam is cooked and before it's bottled. I like to bite into fruit pieces so I've kept the cherries roughly chopped.
Some fruits have natural pectin in them and some not so much. Cherries do not have enough pectin to make the jam set, so lemon juice is used to help it reach the desired consistency. So do not skip it altogether. The jam does not taste of lemon. I hope you like it!

Thursday, July 16, 2020

BAKED CHEESECAKE

Baked Cheesecake

I enjoy trying new recipes because they keep boredom in the kitchen at bay. Ever since the lockdown began, I have been seeing a lot more people cook and bake on Instagram. It's so tempting to follow all of them but then again, I feel I might overlook the updates from people who I know in person because that's what happened to me on Facebook. So I just take a screenshot of the recipes and let them know once I've tried it. 

Baked Cheesecake

I absolutely enjoy when you tell me that you have tried something from here. It's not a sense of accomplishment but it's something that makes me feel that I've been helpful to someone. I get a lot of responses, more than what I can respond to in a day's time on Instagram these days. I enjoy every bit of it and sometimes I fight with the kids to get that extra five minutes to reply to all the queries and the beautiful pictures you all send. It is really heartwarming going through every single one of your messages.

Baked Cheesecake

Whenever I get similar questions, I do a Q & A session once in a while. It's even more fun because I get to interact more with my followers. I just finished doing one today and I am amazed at the variety of questions you had for me. I've heard that variety is the spice of life and it really is true, in this case for me. By doing so, I get to know you guys more. It's boring when it's a one-way interaction. Don't you think so? 

Baked Cheesecake

So when I was scrolling through my Instagram explore page, I came across Simi's page and found her recipe for this baked cheesecake. Even though I've baked many a cheesecake before, I felt that this one would be incredibly delicious because of the ingredients. Condensed milk is my forever favourite ingredient to add in a dessert. I have been caught multiple times by Ian while trying to scrape and lick the bottom of the tin. I don't know what it is but condensed milk just makes everything taste better!

Baked Cheesecake

I baked this cheesecake over the weekend because a friend of ours was coming over with her baby after what felt like ages. Now, meeting anyone outside the family feels like a celebration. So I felt I needed to bake something different yet something that she would enjoy. As I was scrolling through my screenshots on the phone I quickly thought of this recipe. I had everything on hand so didn't waste any minute and set out to baking this beautiful, delicious cheesecake.
BAKED CHEESECAKE
Make a 9 inch cake
Ingredients:
Base:
250 grams Marie biscuits, powdered fine
100 grams unsalted butter, melted
Filling:
500 grams cream cheese, room temperature
1 cup condensed milk
2 eggs
2 teaspoons vanilla
1 tablespoon cornstarch
Dulce de Leche, as needed

Method: Preheat the oven to 400 F / 200 C and wrap the outside of a 9 inch springform tin with foil.
Base:  Mix the two together and press into the tin.
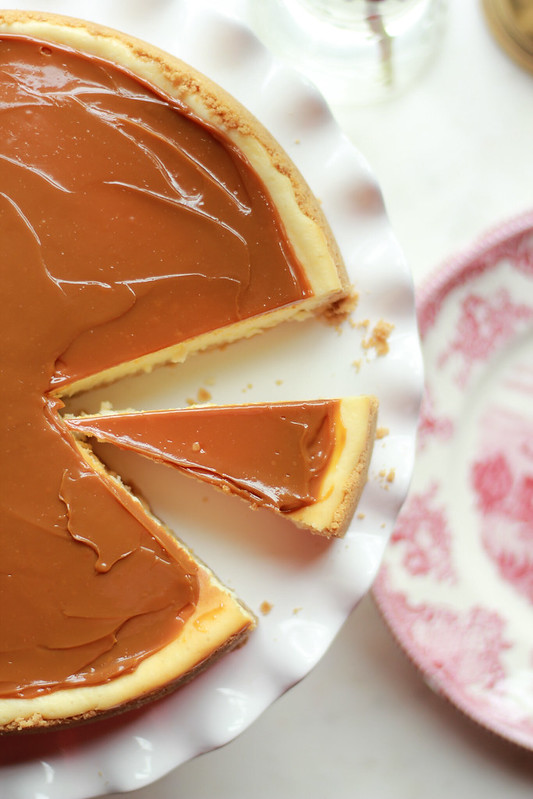
Filling: Using electric beaters on medium high speed, beat all the ingredients together in a large bowl until well combined, about 2 minutes. Pour over the base and bake in a water bath for about 40-45 minutes or until the cheesecake is almost set and still a bit jiggly, like jelly. Take it out and let it cool completely. Chill for 6-8 hours to set it further. Top it with a few dollops of Dulce de Leche before serving.
* You can add berries, chocolate, cookie crumbles etc to the batter before baking. Change the topping accordingly. You could also bake it plain and serve with fruit toppings.

Baked Cheesecake

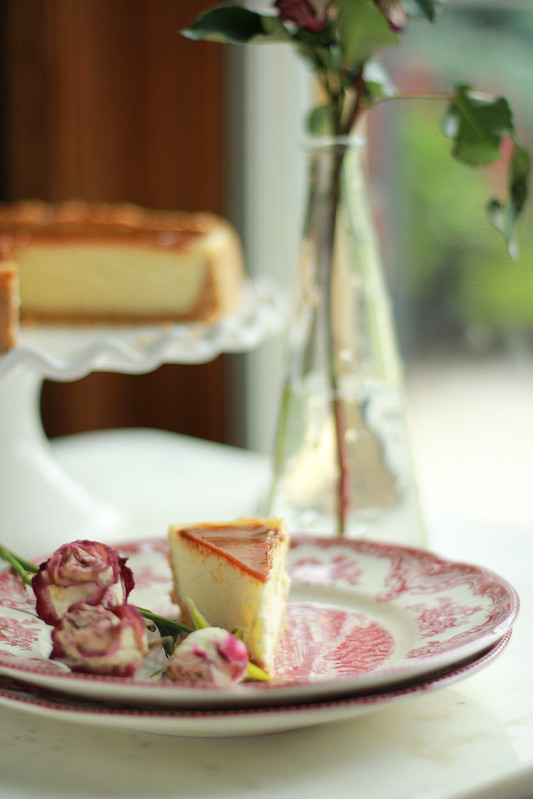
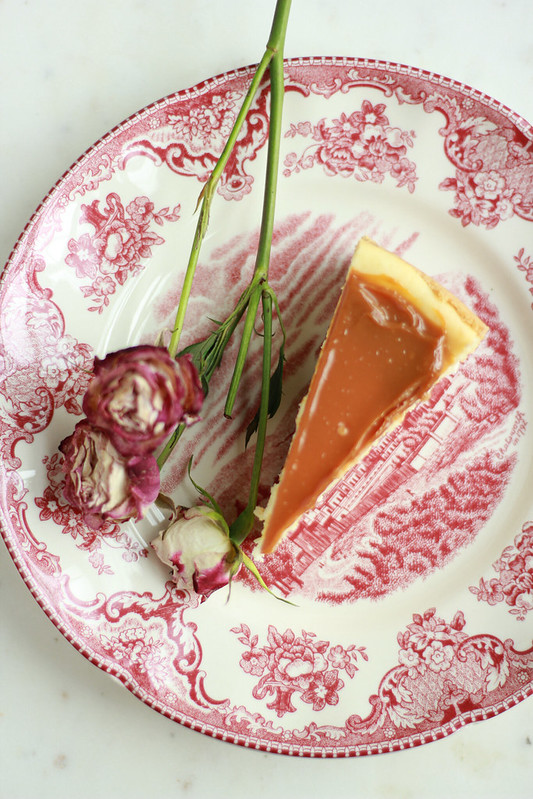
When our friend left, Jobin wasn't around and when he came down later I thought he looked serious when told me that it was the best cheesecake that I have ever made. He kept saying how perfect the slice looked and how soft the filling was and how perfect the base was. I didn't know how to react because I was trying to read his face at first that whatever he said didn't register quickly. I laughed out loud when the compliment finally sunk in. 
Baked Cheesecake

Our friend really enjoyed the dessert and I packed a few pieces for her to share with her family later. This is indeed a good recipe and I am sure there will be multiple repeats and requests for it from now on. The leftovers were happily polished off by Jobin & Zara! I urge you to try this sometime soon, you will really enjoy it! Just keep an eye on the baking time. It can vary from oven to oven. The final jiggle of the cheesecake as you pull it out of the oven should remind you of jelly-jiggle. It will continue to cook and firm up as you let it cool down and later chill in the fridge. To get clean slices, dip your knife into boiling hot water and wipe it. Repeat for each cut. Simple, right? 

Monday, July 6, 2020

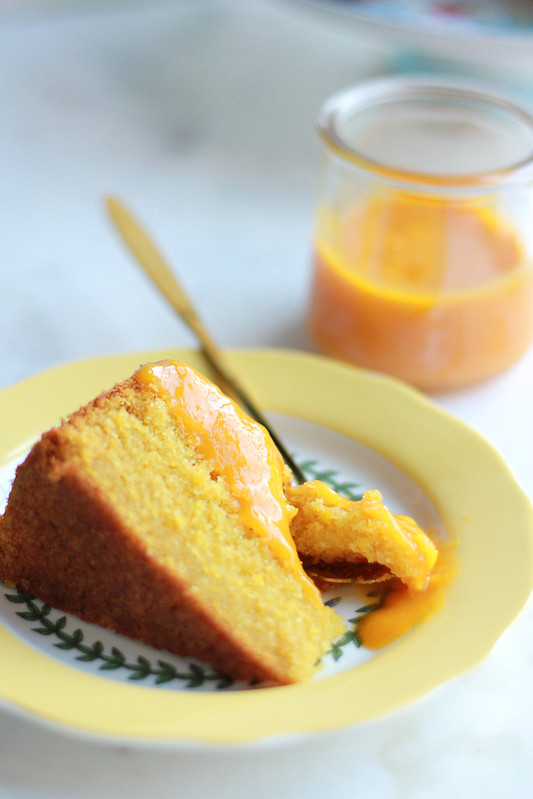
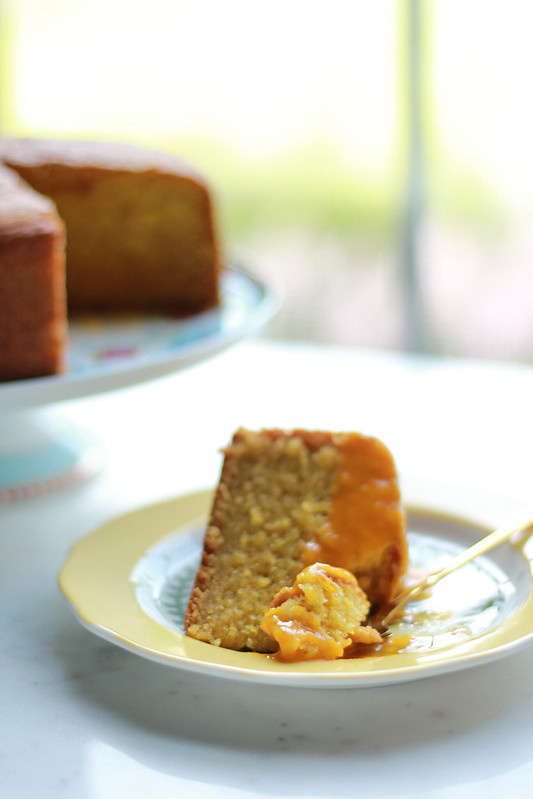
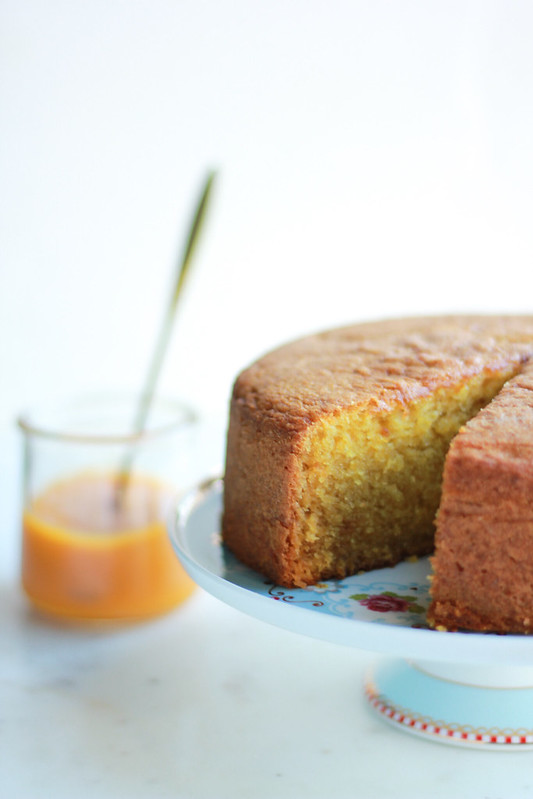
MANGO CAKE

MANGO CAKE

I
have been wanting to bake a Mango cake for the longest time and I also had a specific texture and taste in mind as well.Like how Porotta is an emotion in Kerala, the smell and taste of Mangoes evoke a lot of childhood memories in me. We used to spend quite a bit of our Summer vacations in Pallikuttumma every year. Our ancestral home was surrounded by a lot of trees and that included many,many Mango trees.

MANGO CAKE

There were two mango trees on either side of the main gate which were fibrous so we used to eat them raw with salt, chili powder & coconut oil. The ones on the sides of the house were the kind you could just squish and drink the juice (with the peel intact) and the ones behind the house which we all called  Perakka Manga were the best! Amma tells me that Velliammachi planted that mango tree when she was pregnant with Amma & Daisy Mummy. Those mangoes were sweet and the flesh was like butter.

MANGO CAKE

As kids, all of us would pick whole mangoes after lunch and go out to swing on the hammock tied in between the Guava tree and a Mango tree on the East side of the house. We would all squish ourselves, trying to wiggle & fit onto that old white Macramé hammock. We are 24 grandkids on Amma's side and it was usually the girls who were interested on being on the hammock. One such afternoon, the hammock decided to come crashing down when all of us were on it, literally piled up like bricks. I still clearly remember how that felt and every time I sit on our hammock in the backyard, I can't help but smile thinking about that incident which happened over 25-30 years ago.

MANGO CAKE

However, that house is no longer there. It was sold when my Uncle and family moved back to Goa a few years ago. It was demolished and converted into a beautiful restaurant named 'Memories' on Alappuzha - Changanaserry highway. Their food is amazing and we always go there everytime we go to Pallikuttumma. Another Uncle's family lives next door, so that makes it even more convenient. They named that restaurant perfectly because that home still holds so many memories for all of us. It's where my Amma was born and raised, where we celebrated many family functions and where all of us spent our childhood vacations. 
mango cake

MANGO CAKE
Serves 8-10
Ingredients:
3/4 cup unsalted butter, room temperature
3/4 cup sugar
2 eggs, room temperature
1 1/2 cups all purpose flour
1/2 teaspoon baking powder
1/2 teaspoon baking soda
1/4 teaspoon salt
1/4 cup milk, room temperature
2 tablespoons vegetable / canola oil
1 teaspoon vanilla extract
3/4 cup fresh mango puree, divided
Method:
Preheat oven to 325 F and prepare an 8 inch round cake tin. 
Sift the dry ingredients together and set aside.
In a large bowl, cream together butter and sugar until pale and fluffy, about 2 minutes. With mixer running on low, add the eggs one at a time and mix until it's incorporated. Add the milk, extract, oil and 1/2 cup mango puree. Mix on medium high speed for 4 minutes till it becomes fluffy and increases in volume by a bit. Add the dry ingredients in three additions and fold it in very gently with a spatula, just until the dry flour is incorporated. Fold in the remaining 1/4 cup of mango puree as well. Pour the batter into the tin and bake for 60-65 minutes or until a skewer comes out clean. Let it cool in the tin for 5 minutes and then unmold and cool completely.
Enjoy!


MANGO CAKE

I followed Savita's recipe and the cake came out just like how she had described it to be. Moist & fluffy. I personally prefer cakes made with butter over cakes made with oil. However, a cake made with mostly butter and a little bit of oil brings out a good product. It's like the best of both worlds! Butter adds flavor and oil lends moisture. This cake recipe is a good example of that.
We loved this cake! Use good quality mangoes. If not, the flavor will not shine through. I used frozen mango puree that we get in Indian stores here. It was unsweetened, just like how it would be if I were to puree fresh mangoes. If you are going to use the tinned sweetened mango pulp, you will have to make adjustments with respect to sugar in this recipe. I buy our fresh mangoes from Asian/ Mexican markets and they are available in plenty these days. Just like how we enjoy a Black Forest Cake made using fresh cherries every Summer, I am sure this particular cake will make it's appearance on our table every Summer from now on! You don't need anything over the top of this wonderful cake, not even a dusting of powdered sugar. It's a simple, delicious cake!

Thursday, July 2, 2020

EGG DROP CURRY

Egg Drop Curry

W
hen I've made the same curry about 5 times in the last three weeks, it might indicate that  it's a good one!I am usually not the one to make the same curry repeatedly, atleast not this frequently but the flavours of this egg curry are so basic yet so comforting. The method is extremely simply yet time saving. You get the drift, right? This is a curry that you can pull of in no time at all! Usually, when I make my Nadan Motta Curry where I  need to hard boil the eggs separately and peel them later. Here, it's all made in one pot and the results are fantastic!

Egg Drop Curry

The only thing I would suggest you to use would be a little spacious pan. You need to break open the eggs slightly apart from each other, so that they get their own space to cook. Also, if you feel like flipping them towards the end, you need that little room to wiggle your spatula around without breaking the eggs. Other than that little tip, I can only ask you to make this curry as soon as you can because you will love it! It pairs perfectly with Appam, Chapathi, Pathiri, Idiyappam,White Bread, Rolls etc. I found this lovely,quick recipe from here.

Egg Drop Curry

Talking about Appam reminded me of the recipe that I have been making for a few weeks now. It's such a quick one and doesn't need more than 30 minutes to make it...yes, from start to finish. Amma shared that recipe with me and it makes such soft, wonderful Appams. I am hoping to share it with you sometime. I have so much planned and photographed for the blog but when it comes to sitting down to write about it, it requires a little more time than before. It could be the age catching up on me or it could be that it's crazy right now with everyone being at home! :-)


EGG DROP CURRY
Serves 4
Ingredients:

4 large eggs
4 tomatoes, diced
1 large onion, diced
3 tablespoon oil
1 teaspoon fennel seeds
1/2 teaspoon ginger garlic paste
1/4 teaspoon turmeric powder
1/2 tablespoon Kashmiri red chili powder
1 tablespoon coriander powder
1/2 - 1 cup coconut milk*
Salt
Coriander leaves for garnish
Method: Heat oil in a wide saute pan on medium heat and once hot, add the fennel seeds and let it sizzle. Then add the onions and a pinch of salt and saute until the onions are translucent. Add the ginger garlic paste and stir for 30 seconds followed by the diced tomatoes. Cook until the tomatoes loses it's shape and becomes mushy.Add the spice powders and 1/3 cup water and cook stirring occasionally until the curry becomes little thick,about 2-3 minutes. Add the coconut milk and let it come to a boil. Reduce the heat to low,check for salt and then crack open the eggs directly onto the curry. Do so gently and open the cracked eggs close to the gravy. Cover the pan with a lid and let it simmer for 15 minutes or until the eggs are cooked. Serve the curry garnished with coriander leaves.

* The original recipe called for 1/2 cup coconut milk but I have been using 1 cup. I felt the gravy was too less with just 1/2 cup. Maybe my pan is wider or my coconut milk was thick. So use your own judgement here. This is a slightly thick gravy and not a watery one, so don't be tempted to add a lot of liquid.
If you feel the need to flip the eggs around 12 minutes, please do so. I flip ours because we like them set on both sides.


Egg Drop Curry

I must admit that whenever I've made this curry, it's as if I've haven't made enough. It just vanishes before I can even think of taking a photograph of it. Every time I've shared the photographs on my Instagram account, my inbox literally gets flooded with recipe requests from so many! I feel terrible to tell them that I will share it the next time I make it because that's what really happens in our home. Everything I make vanishes...unless I fight with them saying I need to click pictures first before they get a taste of it. It used to be like that long, long ago...like in 2008-2009 time frame but it's all coming back especially after having two little ones who absolutely love to eat! :-)
Anyway, I hope you enjoy making this as much as I do on a weekly basis! 
Related Posts Plugin for WordPress, Blogger...