Ria's Collection

Thursday, July 16, 2009

Kappa Kuzhachathu / Mashed & Seasoned Tapioca - A definite food on board!


As promised in my last post , this one is loaded with pics from my recent trip to Pallikuttumma :) We always have family get togethers! My family on the maternal side is HUGE with 72 members and is growing stronger!! :D We always seem to have some sort of a get together... weddings,baptisms,birthdays,anniversaries and even if there is nothing we create a reason to come together and have fun! I really din't think I would be able to make it with my 'swollen ankle' but I did and I have to say I'm GLAD that I did ( inspite of all the 'painful' moments of limping!! ;P)
The main attraction this time was the 'house boat' trip! It was my nephew Rohan's 1st birthday and it was celebrated 'on board'! :) Must apologise for not including any of the birthday celebration snaps as my cam was downstairs and I had no means of getting it upstairs with my ankle. But I managed to click some when I could :) One of the main/must have food on such a trip is 'Kappa Kuzhachathu' with a spicy Kerala Fish Curry!! It's usually the main food in 'kallu shap' ;D which means TODDY SHOPS and they are seen every 100 mts in my 'motherland':DWhen I got back from the trip Amma was making this dish at home! It's perfect during rains! It's been raining in Kannur since 3 weeks... continously!!

Kappa Kuzhachathu/Mashed & Seasoned Tapioca

Ingredients:
Tapioca -500g
Salt-to taste
Water for boiling tapioca

Grind together:
Coconut, grated -1 1/4 cup
Green chillies - 3-4 (depending upon your spice tolerance)
Turmeric powder-1/2 tsp

For seasoning:
Dry red chillies, torn - 4-5
Mustard seeds - 1 tsp
Coconut oil - 4-5 tbsp
Shallots -5-6, cut into rounds
Curry leaves- 1 sprig

Method:
  • Peel & wash tapioca. Chop them into bite sized chunks making sure the centre strand of root is removed and boil in plenty of salted water.
  • Drain the boiled tapioca.
  • Grind together grated coconut ,green chillies and turmeric powder.
  • Take a heavy bottomed vessel .Add the boiled tapioca & the ground ingredients. Mix well. Mash lightly ( Do not make it pasty)
  • Let it cook on medium flame for 3-4 mins so that the raw taste of the ground ingredients is no more present.
  • Check for salt.
For the seasoning:
  • Heat oil.Splutter the mustard seeds & add the remaining ingredients. Fry till the shallots turn light brown.
  • Pour this onto the mashed tapioca and mix well. Serve hot with any spicy fish curry or have it as is.
Now is the time for the much spoken trip pics! :) I stayed with my Amma's twin sis & family for a night in their estate bunglaow in Kothamangalam,Eranakulam Dist (Cochin). They have been running a homestay at their estate for about 7 years now. It's called the Mundacakal Plantation Homestay and they have been given 'Diamond' rating by Kerala Tourism Board and have been recieving rave reviews by many ! They appear in almost all international tourist guides.

Click on the pic or here to check their website! Make sure you book ahead incase you want to stay with them because they are usually booked completely 8-9 months ahead!! :D


Now starts the journey! :)


I know I know there weren't many pics... but something is better than nothing right?? :P

Hope y'all have a great day!!


Monday, July 13, 2009

Cheesy affair - Cheese Straws

Have you heard/seen a nut who travelled for almost 600 kms with her swollen ankle ?? No??You are reading her blog then!!! :P I actually cancelled my plans due to my heavily swollen ankle ( I just couldn't walk a step) BUT I'm crazy about travelling & so when my cousins came home on their way to Alleppy, I joined them!! :) Must admit it was very hectic!! 2 days and 600 kms car journey ( with 3 boys in a jam packed Mercedes!!) Nevertheless it was awesome...as it included a relaxing house boat trip!!! More of it in the next post!! :)

When I got back yesterday, I checked my mails and my blogger. Felt kinda lazy to get back into full swing blogging...not because of not having anything to blog about BUT because of my crazy keyboard!! The 'w' 's' & 'spacebar' does not work!! So everytime I need to copypaste the alphabets from a word document and almost kick my space bar to work!! PHEW!!! It's very tiring!!

But when Divya Kudua scrapped me on orkut saying "Hey Ria..I am having a big smile on my face after reading Jobin's testimonial for you.I guess you two are hopelessly in love isn't it..:)??Good good.Btw..how was your Ekm trip..??No updates in Blogger and Twitter..??You are missed baby..:) " I realised I really need to get my laziness outta me!! And here I am!!! :) Thanks Divya!! :)

Today I am going to a talk about a melt-in-mouth goodie!! Yes! Cheese straws!! :) It might not look like straws but that's the size the recipe called for! :) This recipe will give you an amazing highly guilt-loaded result!! :D It's soooo cheesy!! :) It's real crisp and can beat any store bought cheese straws!!

Cheese Straws
Recipe adapted from 'The Cookery Year' by Reader's Digest

4 oz cheese pastry* (recipe follows)

Roll out the prepared pastry as thin as possible to a rectangle. Trim the edges evenly and then cut into strips, 1/4 inch wide and 2 inch long using a floured knife blade. Set the straws on a greased baking tray and bake just above the centre of a pre-heated oven at 200 deg C for 12 minutes or until golden brown. Leave them to cool in another plate ( wire rack was suggested but because they are small it will fall down through the space in between the rack)

*Cheese pastry
Ingredients:
4 oz plain flour
Salt & cayenne pepper (I used Red Chilli powder)
2 oz butter or margarine(I used salted butter)
2 oz Cheddar cheese
1 egg yolk
2-3 tbsp cold water

Method:

  • Sift the flour, a pinch of salt and a shake of cayenne into a wide bowl. Cut the fat & rub it into the flour with fingertips until it resembles breadcrumbs.
  •  Blend in the grated cheese & stir in egg yolk mixed with 1 tbsp of water to ensure even distribution. Add more water to give a stiff dough.
  • Knead the dough lightly on a floured surface and chill for 20 minutes.
  • Dust your work surface with some flour and roll out the dough into 1/8" thickness. Cut them into 2" x 1" strips.
  •  Bake them on an ungreased cookie sheet for 8-10 mins or till golden brown. Store it in air-tight tins.

Verdict: Munching on a crunchy cheese straw is heavenly! :) It can be your perfect companion while you watch TV or as a snack for tea! :) I have been making every now and then! LOVE it!! :)

Hope you all have an awesome week ahead!!

Wednesday, July 8, 2009

Jam Filled Cookie - My type of cookie :)


I love jam treats!! I love jam centres! :) So when I ate this for the first time I was madly in love with it more because it had butter too!! I love the sweet and salty combo of jam + butter! :) even if its on bread ....yummmm!!!!
I was 'hit' by fever last week and so I couldn't be active enough in the kitchen :P So the minute fever left me this was what I made! It was so relaxing! Usually I don't like cut-out cookies much because they take forever to finish with BUT this was an exception &I loved every minute of it!! :) Especially when you need to fill the cookies with jam and sandwich them! Bliss!!! :)

Jam Filled Cookie
Recipe courtsey: Southern Living Cookie Cookbook

Ingredients:

1 cup butter, softened

½ cup sifted powdered sugar

2 ½ cup all purpose flour

1 tsp vanilla extract

½ cup raspberry/strawberry/mixed fruit preserve

Method:

  • Beat butter at medium speed of an electric mixer until creamy; gradually add powdered sugar, beating until light & fluffy. Add flour and vanilla, mixing well. Shape dough into a ball.
  • Roll out the dough and cut out rounds, equal in nos. (You need 2 types: one solid round, another round with a smaller round in the centre i.e.; doughnut shaped)
  • Your browser may not support display of this image.Pierce solid cookies with a fork. Bake at 300 deg for 20 mins on ungreased cookie sheets. Bake till very lightly browned.
  • Spread jam just before serving & sandwich one solid cookie with the doughnut shaped cookie.

Try this out & get addicted!!! I have seen these sometimes on the shelves of Ann's bakery BUT I prefer mine better!! :) More buttery,fresh & definately O-So-Moreish!! I usually sandwich them with store bought Mixed Fruit Jam... love it! :)

Monday, June 29, 2009

Thanks to all who attended my Birthday Party!! :) Round up for the event 'Let's Celebrate '

Whoa! I never expected to receive so many entries for my very first event Let's Celebrate! I hosted it as a part of my birthday celebrations :) I definately had a lovely birthday!! How can I not have when I was sent across so many goodies!!!! :)

Click on the picture to see the details! :)

So let's cut the cakes first!!

Cakes


Was that too sweet for you?? Lets go to the cookie section then...
Cookies & Doughnuts


Time for celebration!!!

Cocktails


Audax & Maria!! Thanks for trying and that meant a lot to me ! There's always a next time lovely people!!! :)

And here is my cake for y'all! :)


Thank you DivyaKudua,DivyaRao,Lori,Ivy,Rachel,Meghna,Priya,Swapna ,Pooja,Rahin,Ning,Yasmeen,Tina,Parita & Manju. It wouldn't have been a success without y'all :)

And if I have missed out any of your entries please leave in a message...will fix it! :)

Thank you so much Swapna for your mindblowing 8 entries, Yasmeen for your delicious 3 entries and Ivy for your beautiul 2 entries!!!
I din't get any entries from Cancerian's so this won't be continuing for the month of June BUT if any of you are interested to host please leave in a message :) Preference to the above mentioned lovely guests! :)

Thank you Cake
Hershey's 'Perfectly Chocolate' Chocolate Cake with Mocha Butter Icing. You can find the recipe for the cake here.

Mocha Butter Icing:

Powdered sugar -75 gms
Butter - 25 g
Coffee powder - 1-2 tsp
Water -2 tsp

  • Beat sugar and butter togther till light and fluffy.
  • Add the rest of the ingredients and mix well.
  • Ice the cake as desired :)

Sunday, June 28, 2009

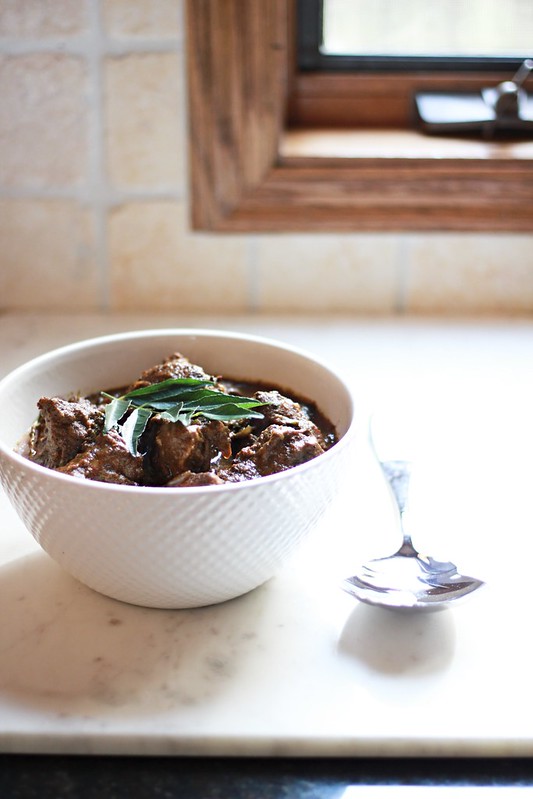
Chicken Chilli Fry - Mamma's signature dish :)

I was 'home alone' yesterday and I had to cook something for myself if I din't want to starve ( me and starving?????and the too on a Sunday???? no way!! :P ) So before my mom left she told me that there was half a chicken left in the freezer and I could do whatever I wanted to :)

My bro had gone to play and I knew he wouldn't be back home till lunch time...so I spent hours in front of the system hoping atleast one of my friends would come online on GTalk so that I could kill my time :P But no one came! :( So the only other option was to cook something and keep myself engaged :) I was not in a mood for experimenting since there was only 'half' a chicken left :D And therefore went ahead in making this aromatic, thick gravy-ied (is there a word like that?? ) chicken curry! :)

Don't get confused with the chinese chilli chicken! It's not that! Not even a wee bit! :P My grandparents were in Malaysia for quite a few years when my dad was young, and Mamma claims that she learnt it from the 'kokie' ( cook) there :) So here's another eazy breezy dish from Mamma :)
Chicken Chilli Fry
Recipe source My grandmom

Ingredients:
Chicken 1 kg ( can use pork, beef etc)
Ginger garlic paste -1 tbsp
Tomatoes -4 medium
Onions -6 medium
Salt-as required
Red chilli powder - 1 1/2 to 2 tbsp [depending on the type used i.e; Kashmiri chilli powder etc]
Turmeric powder- 1/4 tsp
Oil-5-6 tbsp ( we use coconut oil)
Water -as required ( if needed)

Method:
  • Puree tomatoes and onions together.
  • Heat oil in a pressure cooker, add ginger garlic paste and saute till you get a nice aroma.
  • Add the puree to it and fry for a good 8-10 mins on low flame. ( do not reduce the time because it will taste raw and the curry will taste BAD! ) Edited on 10 Feb 2012: After receiving a negative comment (the very first of it's kind here),I cannot stress enough on how you need to saute this puree for a good 8-10 mins...or make it more, saute till you can see the oil separate as I don't want your efforts to be wasted. This is really a good, mild curry but the only place you can go wrong is this step as I have gone wrong many times, whenever I took a shortcut :) If this curry wasn't good, it wouldn't have been on this blog or categorized as my family favourite! Also, if you are cooking on an electric stove, low heat is just a waste option, increase it to medium or medium high.
  • Add the powders and salt to taste. Fry for 3-4 mins.
  • Add the chicken. Stir well. Close the lid and cook till 1 whistle comes . If using beef or pork cooking time will vary accordingly. Pork is best cooked the normal way in a kadai or any other open vessel and not in a pressure cooker.
  • If you think you need more gravy add water accordingly and give it a boil.
  • Check for salt.
  • Serve hot with rice, chapathi ,porota .


This is another family favourite dish :) I'm sure all you 'tomato-onion combo' lovers would love it :)
I am suprised that I have some of the curry left... will have it for dinner tonight! My parents will be back home in the evening... they can have a share of it :) I know it will not be sufficient for the 4 of us... but still :)


Related Posts Plugin for WordPress, Blogger...