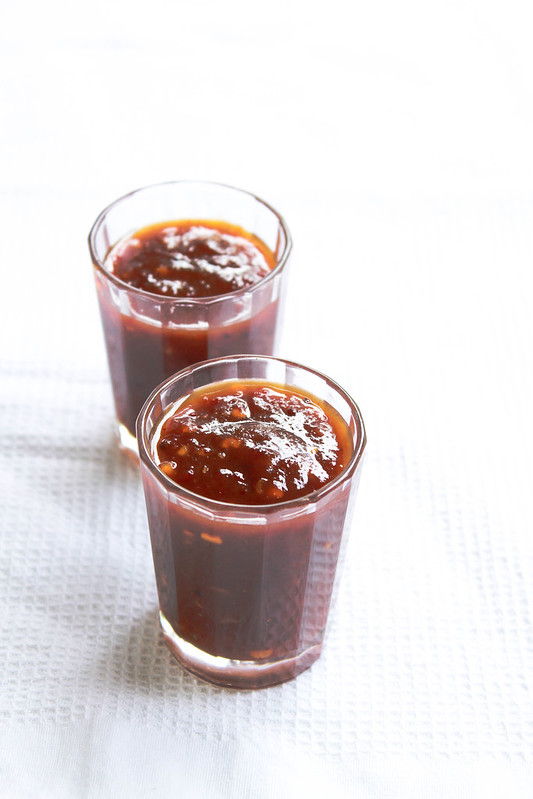
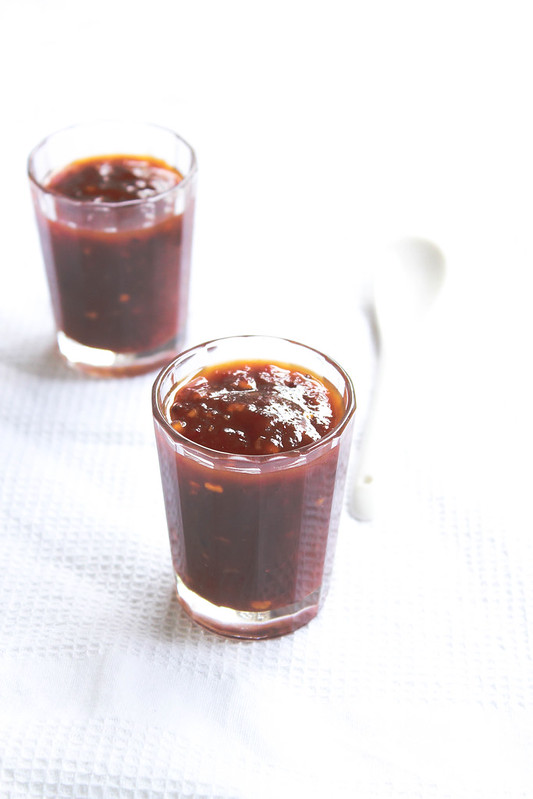
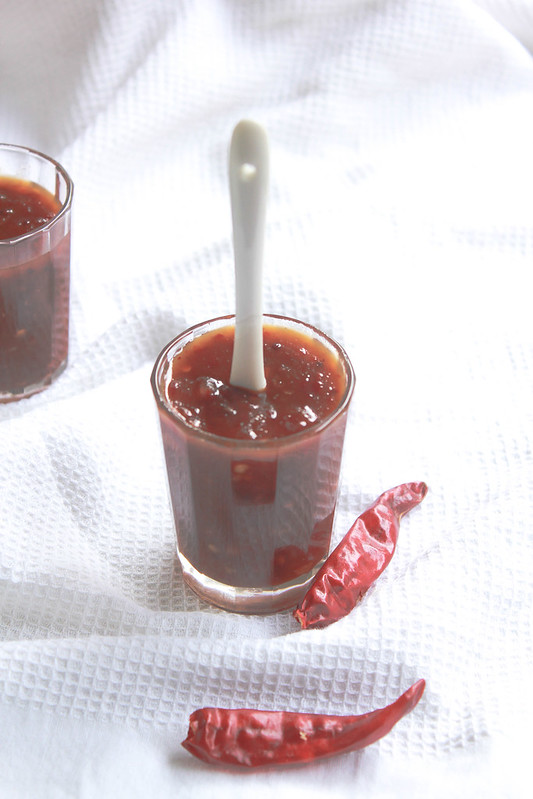
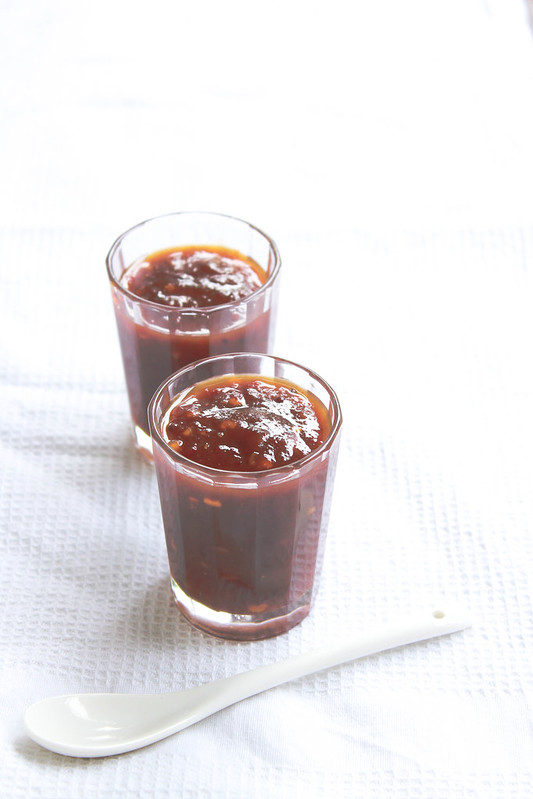
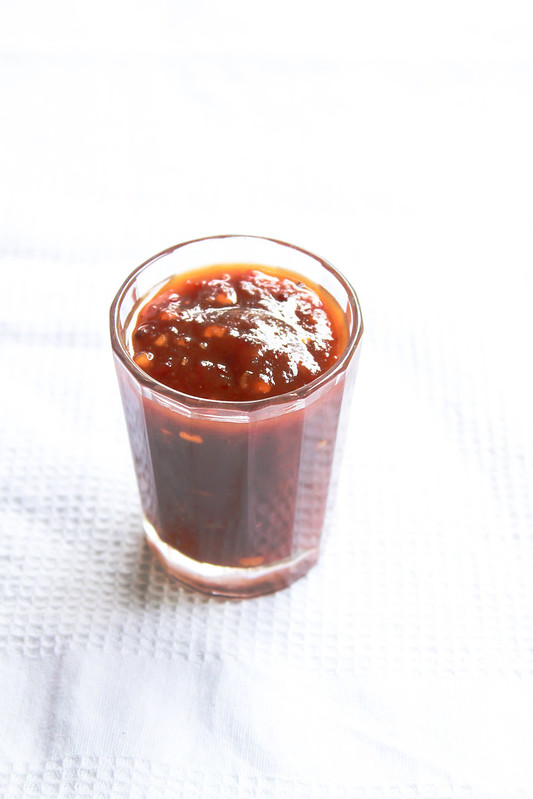
Ria's Collection: Kerala recipes
Showing posts with label Kerala recipes. Show all posts

Friday, March 17, 2017

CHAKKARAPULI

Chakkarapuli
This recipe comes from the cookbook Malabar Muslim Cookery that Appa gave Amma way back in 1995. That's the very first time I heard about Mrs. Ummi Abdulla. I also very quickly learnt that she is our family friend's mother! I met her for the first time sometime in the late 90's and I remember how exciting it was because I finally got to see that person who wrote one of Amma's favourite cookbooks for real! Little things, right? But those little things make up my life for the most part.
Chakkarapuli
Amma has been making this recipe for the longest time. She first served it with a 'Kadachakka Bajji' / Breadfruit Bajji and it was so so good! Even though I've made many other North Indian versions of this sauce, I think I still have a soft spot for this Malabari condiment. There's something about the tangy,sweet, spicy kick that the sauce gives you. It pairs very well with Chaats,Dahi Vada & it's extra tasty even just to lick it straight out of that shot glass. I did just that after I was done photographing them. It was just so good!
Chakkarapuli
Those glasses I've used in the photographs were the ones I used in 2011,when I won the title of Vanitha Pachakarani. I used them for making my dessert in the final round. When I am home, I find these little little things that reminds me of so many good things. It's like I am reliving my past. Hmm. I am not complaining one bit!
Chakkarapuli
We hosted a YWCA meeting at our home the other day and we served Crackers with Green Onion Topping as the appetizer and  an Orange & Watermelon soda as the welcome drink. The mains were Paneer Mousakka, Dahi Vada (on which we lavishly drizzled this wonderful Chakkarapuli), Vegetable Biriyani & a Cucumber-Mint Bread Salad. The desserts were Tiramisu (with homemade Mascarpone), Triple Chocolate Walnut Pie & Petite Boston Cream Doughnuts. By the way,have I told you guys already that I am on Instagram and I pretty much live there? Follow me on Instagram if you haven't already!

CHAKKARAPULI
Chakkarapuli Makes about 1 cup

Ingredients:
100 grams tamarind
150 grams jaggery,grated
10 dry red chilies
6 cloves garlic
salt
1 teaspoon mustard seeds
1 tablespoon oil

Method: Soak the tamarind in about a cup of water for 1 hour. Break it down with your fingers,knead and squish to take out the pulp. Strain it into another bowl. Grind together the red chilies, garlic and salt using about 1/4 cup of water.
In a medium saucepan, heat the oil and crackle the mustard seeds. When it begins to pop, add the tamarind pulp, jaggery and the ground paste. Bring it to a boil* and take it off the heat. Let it cool completely and use as needed. Leftovers can be refrigerated and should be consumed within 2 weeks.

*If you had to use more water to extract the tamarind pulp or to grind the paste, that's OK. You will have to boil the mixture just a little bit more to get it to a thick sauce like consistency.

So exactly a month ago, we celebrated our 7th wedding anniversary in Bangalore. So I didn't make a cake for us this year. Aaaaannd last year,for our 6th, we were in two different countries,so I didn't make a cake for us. So two years back to back with zero cakes! Too much,right? :-) We are still in Kannur and we are planning to head back after Easter. So maybe this year for our birthdays, we might go all out with cakes! :-) Aaaaand Zara turned 6 months old yesterday! She even uttered a first word about 5 days ago and that first word was....guess what? Cheta!! Ian was SO over the moon then! She is one fast learner, can hold and stand up for like 5 minutes and blabbers non stop already. Ian & Zara are going to be quite a talkative pair for sure! I wonder where they got that trait from? ;-)

To get updates like these along with food pictures, follow me on Instagram!

Wednesday, July 27, 2016

OLD FASHIONED KERALA DOUGHNUTS

Old Fashioned Kerala Doughnuts
Honestly, I don't know how many of you can relate to these doughnuts.These doughnuts played a huge role in my childhood days. Thankachi aunty, my Mamma's sister-in law would make these and send it across to us whenever Mamma visited her. Later, Amma got the recipe from Thankachi aunty and would make it for me once in a while. I don't remember Amma making it much after Ritchie was born. I was 8 1/2 years old when my brother was born,so I pretty much remember everything that happened then. It was my first hands-on experience with babies. Gosh, I do have a lot to tell you all!
Old Fashioned Kerala Doughnuts
So, till Ritchie was born, Mamma's grandkids were all girls. Anju chechy, Tinu, Neethu and I. We would spend our vacations together in Mamma's terrace,grinding up her bougainvillea flowers and then diluting it with water,pretending it to be wine! Mamma was totally against anyone plucking flowers from her plants. That's because her Headmistress,a foreign lady, in her school Balikamadom (Tiruvalla) was very strict about it . She (The Headmistress) would pull out two strands of hair from the head of anyone who dared pluck the flowers from her garden. Then when her birthday came, she would let everyone pluck the flowers to their heart's content. That was the story Mamma would tell us,even though she never pulled out her granddaughter's hair. So finally,when Ritchie was born,she got her first Grandson!Anyway, that has nothing to do with these doughnuts, well almost.
Old Fashioned Kerala Doughnuts
So when Anju chechy got married and was living in Bangalore, we visited her once and Neethu made these and brought it for her sister. Everyone made fun of her saying it's the Home Science effect,because of the subject she took for her undergrad! I was so thrilled to see my favourite thing and still remember eating them early in the morning as soon as we got to Anju chechy's apartment. I don't know if Neethu remembers it but I do!
Old Fashioned Kerala Doughnuts
So, if you are thinking these are the typical melt-in your mouth doughnuts,you are wrong. These are more of the 'Vettu Cake' kind, soft yet a bit like a cookie. I must say that these are super addictive. I wanted to take the pictures of the doughnut holes but I popped them one by one into my mouth while frying the rest. And do you know why I made these today? It was raining here! It was so dark outside and it was thundering and raining at the same time. Even if there is no dinner at home, we always have some kind of a thing to snack on and usually,it is deep fried if it rained like how it did today!

OLD FASHIONED KERALA DOUGHNUTS
Old Fashioned Kerala Doughnuts Makes 26-28 pieces

Ingredients:
3 cups all purpose flour
1 teaspoon baking powder
1/4 teaspoon salt
1 cup powdered sugar
3 tablespoons ghee
3 eggs, separated
Oil for deep frying

Method:
In a bowl, mix together ghee and powdered sugar. Add the egg yolks and mix well. Add the flour,baking powder, salt,lightly beaten egg whites to it and mix to for a soft dough. Set it aside covered with a cloth for 10 mins.
Roll the dough out into 1/4 inch thickness on a floured surface and cut them out like doughnuts. Deep fry in hot oil over medium heat* until golden brown.Drain on paper towels and store in an airtight container. They have an amazing shelf life!

*Don't heat up the oil too much, the doughnuts will brown very fast since there's sugar in the dough.
Well, now this is not Thankachi aunty's recipe.I didn't want to wake Amma up in the middle of the night asking for the recipe. Instead, I checked my favourite source for recipes of these kind, Swapna chechy's blog because I was 100% sure she would have it and she did! Her recipes are foolproof and delicious!
 

Monday, April 4, 2016

MURINGA ELA PARIPPU CURRY

MURINGAELA PARIPPU CURRY
Every year for Good Friday, Amma would make Parippu curry, Pappadam & Rice for lunch. Then we would eat it with a good dollop of ghee poured over it. Ho! Enthoru ruchi aayirunnu! That Parippu curry wouldn't make an everyday appearance on our dining table,maybe once for Onam and once for Good Friday. We always have something non-vegetarian for our meals at home,so making a full vegetarian meal was a challenge or so we'd like to think! We would atleast need a Meen Varuthathu to go along with our rice.

MURINGAELA PARIPPU CURRY
For the past one week, I've been on a non-veg cooking spree,expecially Pork. So I was feeling a wee bit guilty for not cooking anything veg for my food loving family. Jobin and Ian eats everything that is served to them,they are so easy to please! I am the choosy one in the family and I don't eat every vegetable that's been served. Ian is the one that surprises me always. From the time he was born, feeding him has only been a pleasure. He loves to eat and doesn't even ask me what is it that I am feeding him!

MURINGAELA PARIPPU CURRY
So, the other day, I bought some Muringa Ela from the Indian store. Having cooked nothing vegetarian the past few days, I decided on making our usual lavish Saturday lunch a proper vegetarian meal. So this parippu curry made it's first appearance in our house along with some yard long beans mezhukkupuratti. Moringa leaves/Muringaela is a highly nutritious ingredient and pairing it with some dal and rice makes it a complete meal.The recipe for parippu curry is from Aswathy Mathan's book and the addition of Muringaela was my choice.
MURINGA ELA PARIPPU CURRY
MURINGAELA PARIPPU CURRY
Serves 6
Ingredients:
1/2 cup Toor Dal
2 serrano chilies,slit
1 teaspoon oil
1 heaping cup Muringa ela

To grind:
1/4 teaspoon turmeric powder
2 pearl onions
2 small cloves garlic
1/4 teaspoon cumin seeds
1 cup grated coconut
3 dried bird's eye chilies / onakka kanthari (optional)

To temper:
1 tablespoon coconut oil
1/2 teaspoon mustard seeds
1 tablespoon sliced pearl onions
1 sprig curry leaves
2 dried red chilies

Method:
Pressure cook dal, serrano chilies,oil and muringa ela along with just enough water to reach an inch above it on medium heat for 3 whistles*.Once the pressure is released, open the cooker and mash the dal with the back of your spoon.
Meanwhile grind together the ingredients mentioned above. Add it to the cooked dal along with 1 cup of water**. Keep it on a slow flame and cook stirring continuously until it starts to steam gently. DO NOT let it boil. You just want a steady steam.
In a small pan, temper the ingredients mentioned above and pour over the hot dal. Check for salt & serve hot with Kerala Matta Rice.

*I did not soak the dal.
** This dal will thicken as it sits,so if you like to adjust the consistency,add some more water in step 2.


All of us relished this dal along with hot rice and ghee. I did not have any pappadam with me or else, it would have been the most perfect meal! Now that Vishu is just around the corner, I am planning for a mini sadya hoping that it will create some memories for Ian. I honestly don't know how much my new schedule is going to help me in prepping for it,but I will try to make the sadya happen. In the meantime, I hope you guys give this a try and let me know how it went!
 

Monday, September 16, 2013

CHERUPAYAR PARIPPU PRADHAMAN

Cherupayar Parippu Pradhaman


T
his is Ian's second Onam. Last year,Appan & Amma were here with us and our celebrations started and ended at the Malayali Association's sadya. But this year,it was an ongoing event starting from the Malayali Association's sadya. I even participated in a dance for the opening ceremony at the association.It was such a break from my routine and truck loads of fun. We ate 3 sadya's this year but I cooked only for one and that too, a potluck.


Cherupayar Parippu Pradhaman6

I've never cooked a complete Onam sadya yet. We usually have it in a potluck form, which I think is the best. Nobody has to cook up a storm,especially when it comes to a sadya! Also, everyone gets to tastes different versions of every item. Once the date is set, a group email is sent out as to what everyone is supposed to bring or would like to bring and then the excitement builds in me!

Cherupayar Parippu Pradhaman

After every sadya,I feel so stuffed mostly because I overate even though I knew what my situation would be at the end. This time, it was no different. I was so full that I couldn't even put Ian Vaava to sleep after that. I couldn't hold him close enough because I felt my stomach would burst! So Jobin came to the rescue...ahh!

Cherupayar Parippu Pradhaman

The colour of this pradhaman totally depends on how light or dark your jaggery is.Mine was very pale and so it reflected in the final product. So,I've made up my mind to hunt for darker ones the next time I am making it.So here's my trusted recipe.

CHERUPAYAR PARIPPU PRADHAMAN
Cherupayar Parippu Pradhaman My own recipe

Ingredients:
100g split,skinless moong dal
200g jaggery,melted
300 ml water
600 ml thin coconut milk
250 ml thick coconut milk
1/2 teaspoon ground ginger
1/2 teaspoon ground roasted cumin
1/2 teaspoon ground cardamom seeds
1/4 cup fresh coconut slices
1/4 cup whole cashews
3 tablespoon ghee

Method: In a heavy bottomed pan, roast the moong dal until it turns pale brown/reddish in colour.It will get fragrant at this point.Add  water and cook until soft.Mash it with the back of a spoon and add the melted & strained jaggery and 1 tablespoon ghee.Cook stirring until it starts to bubble up, thicken & leaves behind a line if you draw one with a spoon. Add the thin coconut milk and the spices and continue cooking,stirring occasionally until it thickens up.Switch off the heat and add the thick coconut milk. Stir to combine.Fry the coconut slices & cashews in the remaining ghee until golden brown and pour over the hot pradhaman. Serve hot,warm or even chilled.

You most likely will have to adjust the consistency once the pradhaman is chilled,if so, thin it out using cow's milk.
This is my first trial at making a pradhaman. Mini aunty makes good parippu pradhaman and I've watched her making it once,a long time ago. It seemed simple enough but when I had to make it for the potluck, I was blank.I remembered her roasting the dal but other than that, nothing! So I set out to make my own,which is what you saw above.We really liked it. The colour, like I mentioned before was pale due to the light coloured jaggery that I got from the Indian store here.
Vaava is a big time pradhaman/ payasam lover! So he definately did get a good share of this.Hope you all had a great Onam...we sure did!
 

Wednesday, June 6, 2012

KADUMANGA ACHAR / KERALAN MANGO PICKLE

Kadumanga

Last Saturday, we were at our friends house for an early Onam Sadya. It was a potluck so we took some Pavakka Theeyal,Beetroot Kichadi,Puli Inji & Pal Payasam. There were a variety of other curries and the early Sadya was a big hit!The main thing that caught my attention was the Kadumanga achar that our friend made. It's so hard to find them in stores here so I thought I'd make some at home.

Kadumaanga

It's very easy to make and the only thing you would need to buy from the store just for this would be some green mangoes. I had 2 in my fridge so everything came together quite fast for me. This recipe makes a good amount of pickle so if you think you will not need so much, just halve the ingredients and continue with the method.

Kadumaanga

I usually recycle glass jars/bottles with or without lids for future use. Those jars without lids become my flower vases and the ones with lids gets used up in various form for storing things.Just make sure the bottles are very clean and dry,especially the lids. Don't ever use a wet spoon in getting the pickle out unless you like seeing white mouldy stuff in your pickle jar when you open them next. I love surprises but not like these :-)

Kadumanga
KADUMANGA ACHAR
Recipe from Honey Sarah

Ingredients:
2 large green mangoes, chopped fine with skin on
1 tbsp salt
1/3 c oil (vegetable/canola/gingelly)
1 tsp mustard seeds
1 pod garlic, sliced
1 large piece of ginger,sliced
6 green chilies,chopped fine
2 sprigs curry leaves
4 heaped tsp red chili powder
1/2 tsp turmeric powder
Salt to taste
1 c water
1/2 tsp fenugreek powder
1/2-1 tsp asafoetida
1 1/2 tbsp vinegar (adjust to your taste, esp if the mangoes are sour)

Method: Chop the mangoes,mix with salt and leave it aside for 5-6 hours.In a deep pan, heat oil and crackle the mustard seeds. Once the seeds pop, add garlic, ginger, green chilies & curry leaves. Saute them for 1-2 mins. Reduce the flame to a medium low,add red chili powder & turmeric powder. Saute for 1 minute. Add salt and water and bring it to a boil. Add asafoetida and fenugreek powder. Mix well. Let the masala boil till it is fairly thick.Add the chopped mangoes and mix well to coat. Switch of the heat and taste test for salt. Add vingear if needed. Let it cool. Transfer to a clean dry bottle and store in the fridge till it's used up.

I usually don't bottle the pickles till a day or two after I make it so that if any adjustments needs to be made, I can do it easily. Once again, use clean jars and spoons when it comes to any pickle. This pickle is yummy and  is best served with kanji and curd.

Tuesday, January 10, 2012

PARIPPU VADA / SPLIT PIGEON PEA CROQUETTES...it's time to snack!

Parippu Vada

Back while I was working, every evening we would have some snack sponsored by someone in our office. I used to wait for that time of the day because it always used to be something hot like a Pazhampori/ Ethakkappam/Banana Fritters,Potato Bondas or Parippu Vadas. Babu Chetan was the one who brought us these snacks and Shyja Chechy would bring in the tea. Ah! Those were the days! :-)
Parippu Vada

A few days ago, I was thinking about those tiny parippu vadas I used to have at work. Babu Chetan bought it from a tea stall which is very popular for their parippu vadas. They were really small but very crisp and tasty. There's a widespread talk among people that parippu vada is shaped in armpits! I am sure people were kidding when they told me that but while I was shaping the vadas today, I was smiling over that. Whatever! I shaped them in my palm and made sure they don't look alike as I wanted them to look rustic !
Parippu VadaPARIPPU VADA
My own recipe

Ingredients:
2 c Toor dal, washed and soaked for 2 hours
4 green chilies, chopped fine
5-6 pearl onions/shallots, chopped fine
1 sprig of curry leaves, torn up
Salt to taste
Oil for deep frying

Method: Drain the dal completely.Keep aside 1/2 cup of the soaked dal and grind the remaining soaked dal to a coarse paste without adding any water.Add the remaining ingredients and form small patties. Deep fry in hot oil.


It was crisp on the outside and soft inside, a perfect accompaniment for your chai! If you'd like, have a baby banana too, along with these...that's the way a lot of people prefer to eat.

Thursday, November 10, 2011

ULLI THEEYAL / PEARL ONIONS IN TANGY ROASTED COCONUT SAUCE

Ulli Theeyal

Till I was in 5th standard, Perappan  & Peramma (Amma's elder sister)used to live just 100 m away from our school which in simple words meant, I get to eat piping hot lunch everyday! Their youngest daughter, Prinu ,who was in 10th then would wait for me with her friend, Fairooz by the school gate, after the lunch bell. We three would walk together talking , actually they would be talking and I would be listening to the big girl's talks. As we approached their house,I could tell what we were having for lunch because it used to smell so good! If it was fish fry then it's easy to tell :-)

Peramma makes the most awesome sauce fish fry (esp.Sardines/Mathi/Chala)! She had this little pan, maybe a 6 inch fry pan which had some dents and no handle. She used that only for fish fry and I used to tell her I wanted that pan when she was planning to throw it away because I believed that that pan gave the fish fry some extra taste. I think and still thinks, it did!
Cheryulli

So fish fry was a regular at their house and another thing was a regular too! A Theeyal! It could be a 'pavakka'/bittergourd theeyal or someother theeyal. If that was there, I wouldn't even need a fish fry because the theeyal was delicious on it's own! I would finish up my rice and curry very soon and lick my fingers and every last bit of the curry left on the plate.Then I would go wash my hands (without soap!) and wait for Prinu to wash her's so that we can go to her room and tie our plaits once again :-) Peramma used to tie our plaits after lunch. I had just shoulder length hair (even now!) and Prinu had a little more longer hair. So,the two things I envied in her then, was the length of her hair and height. I used to stand on my toes to reach her height and I used to bend my head back so that my hair touched my waist! :-)
On our way back to school, I would cover my nose with my right palm and smell it, so that I could get the 'Theeyal' smell, till it lasted! Now you know why I didn't wash my hands with soap :-)
Ulli Theeyal

Now, when I look back, it feel so funny to realise that I am 5'10" tall...3 " more than Prinu but my hair is still shorter than hers. She lives in Kenya and the last time I saw her was before our wedding. Peramma still makes the best theeyal and fish fry. When I was home this time, I asked Amma to make a Theeyal for me and she said she will but ,Peramma's is still the best :-) Yesterday,when I spoke to Amma, I asked her for the recipe because for the last 2 days I so badly wanted to have Theeyal and therefore thought of trying it at home and compare the taste of mine with Peramma's. The method of cooking was exchanged and I made a mental note of it. After we hung up, I went straight to the kicthen and started cooking.I knew it's a simple recipe and all I wanted was that exact taste,like the original.

Ulli TheeyalULLI THEEYAL
My own recipe

Ingredients:
1c pearl onions/kunjulli/chommanulli
5 green chilies/serrano
11/2 c freshly grated coconut
1 tsp coriander powder
1 tsp red chili powder
1/4 tsp turmeric powder
Salt
Tamarind, lime size soaked in 1/2 c water.
Water

Method:
Cook the pearl onions, green chilies & salt in 1 cup water till the onions are soft .I don't chop the onions, I use them as whole.
In another wide pan, on medium heat, fry the grated coconut till they turn dark brown in colour. This decides the colour of the curry. Make sure you don't burn it but it should be dark brown. Take it off the flame and add the spices. Keep mixing for a minute or two so that the spices don't burn from the heat of the coconut and the pan.Let it cool.
Grind the roasted coconut to a smooth paste with just enough water to aid in the process.
Add the ground coconut to the pearl onions and cook till it boils.
Extract the pulp from the tamarind and add it to the curry.Check for salt.
Let the curry boil to a consistency you like. I like it thick.This curry will thicken as it cools. You will see a thin layer of oil floating on top, which comes from the coconut that was used.I would say, that's the way a perfect Theeyal would look like :-)

* We don't temper anything to pour over this curry but if you want you can temper some mustard, dry red chillies and onions in coconut oil and pour over.

I'm so happy that it tasted just like the original. When I say original here,I am not saying it's the original recipe for a theeyal but it's the taste I grew up with. Do try this with Pavakka but when you do that you will have to add more tamarind to compensate for the bitterness of the gourd.This is just too perfect with a bowl of hot Kanji/Gruel and Motta porichathu/Indian Omlette.This is my comfort meal :-)

I just hung up my daily call home and when we were talking Amma asked me,'So did you make the Theeyal?' and I said,'Yes! Nallathayirunnu!' . How can I say otherwise when I'm gobbling up a childhood favourite curry of mine like soup! :-)

We are back to our regular routine now, so you should be seeing some activity here, more often! :-)

Wednesday, August 17, 2011

COFFEE CREAM WHEEL

Coffee Cream Wheel
We are on a roll these days.Rolling from one part of the country to another.It's just the beginning of our journey. When we booked the tickets, Amma & I insisted that we go in a train so that we get to rest atleast for that many hours!To be at home, is the best thing to ever happen to many of us and that's even more awesome if you can lose some weight, even though you are gorging on endless yummy Amma-made food!

IMG_3136
This recipe is sensational. It is such an easy one and something you just cannot go wrong with! Did it seem that easy to you? If you just look at it, you wouldn't think so but when you actually make it, you would wonder how something so simple to make can turn out to be so tasty! Amma got this recipe from Amma's twin sister, Daisy.
IMG_3140
Yes,my Amma,Susy, has a twin.They are identical twins, in almost everything.Sharing recipes is one of their favourite hobbies which is also passed down to me.I recently started writing another diary with just homemade recipes...mostly passed down from my aunt's and cousins. I hope to fill it by the time this vacation of mine, is over.
IMG_3146
I have been itching to put this recipe here for a long time while I was in Minneapolis but it never happened. Today, finally it is here for you all. This is an excellent make-ahead snack/dessert and it freezes very very well! The only thing that you need to remember here is that, you have to refrigerate it. Don't leave it outside for too long or else the filling will become soft yet the taste won't be compromised :-)
IMG_3130
You can make these really small, like a candy or big like a summer sausage. It's totally upto you as to how big or small you want these to be. Whatever size it maybe, make sure you wrap it well so that once you store it in the fridge, it doesn't get any 'fridge' taste. I always feel if desserts are not covered when left in the fridge,it get's a fridge taste and I don't like it. So whatever you keep in the fridge, cover it well. You don't want all the flavours to be mixed up or do you? ;-)
IMG_3137
So are you all ready to make this easy peasy snack/dessert with some biscuits, butter and sugar? Say YES! please! :-)

IMG_3126COFFEE CREAM WHEEL
Recipe source: Amma via Daisy Mummy

Ingredients:
250 g Marie biscuits/ Graham crackers, powdered superfine
150 Sugar, powdered fine
1/2 c Warm water plus 1 or 2 (if needed)
1 tbsp Instant coffee granules
100g Salted butter,softened
1/4 tsp Vanilla extract

Method:
In a large bowl, dump in the powdered biscuits.Dissolve the coffee powder in warm water and add it to the biscuits and knead to form a smooth dough. It should not be too dry nor too wet. You should be able to kind of knead it. It will be smooth and soft, almost like a Chapathi dough.Divide it into 4.
Cream the butter and sugar. Add vanilla and beat to mix. Reserve.
Take a rectangular sheet of foil and roll out one ball of dough. It should be about 1/4" thick,as seen in the photographs above.
Spread some buttercream over it making sure it's spread all over. It need not be very thick,just a good coating would do.
Now, start rolling from the shorter side. You should roll it away from you, with out the foil. Take the help of the foil to lift the dough and to aid in rolling.
The dough will crack at the first roll but it's OK, it won't be seen in the end. Keep rolling and  it will come off the foil easily.
With the seam side down, wrap the assembly in the same foil and secure the ends tight. Refrigerate till firm.
Cut into thin circles with a serrated knife, carefully with the seam side down.
Enjoy!!

Verdict: Dee-li-cious! If you like, you can serve it with an ice cream of your choice. This is something I've grown up eating and it's still one of my favourites!

Monday, April 18, 2011

PAVAKKA MEZHUKKUPURATTI/ BITTER MELON STIR FRY

Pavakka Mezhukkupuratti
If it wasn't for Appan telling me that my blog has become boring because I haven't updated for a few days now, I would have really enjoyed being in my cocoon. Once something comes up between me and blogging it takes a big effort for me to get back to it. I like to be lazy and not type so many words and arrange pictures in between each paragraph and then 'publish' the post only to realise that there's a mistake in the recipe that I need to correct and so I 'edit' the post and 'publish' again. Sometimes after that I realise that my favourite picture of the dish is not even there in the final post!  Anyway, that pretty much sums up my day when I get back to blogging after a few days :-)
Pavakka

Pavakka/ Bittergourd is one of my favourite nutritious veggie (very good source of Iron). I love it's bitterness balanced with other ingredients that we add to it. This is a very simple dish that you can make, but you will need some time as it takes a good 30 mins to crisp up from it former bitter and green state to the beautiful mouthwatering crunchy brown stage. You can stop the cooking process in between and be happy or sad (mostly sad actually ) as it will be bitter and don't blame me ;-)
Roses

I'm not in a great mood to talk (rather write) much today as I am kind of busy (in my head) planning all my chores for this week. We are having a party at home this weekend and I am so looking forward to all the cooking and entertaining that comes along with it. I really am. I know some of you must be thinking whether I am crazy, but what to do, I love to cook and entertain! I always wanted my home to be a home full of eatables, always! My home was like that. It was always stocked with food. The minute some one walks in , they will be fed with everything homemade. We hardly had any bakery snacks except for 'kadala muttai'/ Chikki, 'Paper-il pothinja cake/ Sponge cake in candy wrapper', 'Motta puffs/ Egg Puffs' etc.
Pavakka Mezhukkupuratti

So when I got married and moved to US, I used to plan of stocking my freezer with ready-to-fry 'cutlets', 'spring rolls', 'fish packets' 'chicken samosa' etc so that I just have to thaw and fry when guests come home. Sadly, it doesn't work like how it works in India. No, no, not that I am lazy to make them, but we don't have guests like how we have in India unless we call them for supper or a meal together. Yeah, life here is quite boring when you think that way. So whoever comes home, I make sure they are well fed...till their nose!

So now, how many of you want to come home?? :-)
PavakkaPAVAKKA MEZHUKKUPURATTI
My own recipe (Just love the way it sounds!)
Serves 2

Ingredients:
4 medium sized bittergourd,sliced fine
1 large red onion, sliced fine
1 1/2 tsp red chilli powder or to your spice level
Salt to taste
Oil as needed

Method:
As mentioned, slice the bittergourd as fine as you can. I used my mandoline to slice them both (the onions).
In a large pan, mix all of the ingredients together and cook on medium-high heat till you get them as crispy as you see in the picture. It will take about 30 mins maximum and some amount of oil which needs to be drizzled in as and when needed. You will know when to add the extra oil when you are cooking this.


Verdict: Trust me, it tastes really good! Especially with rice and yogurt.

I am sending this yummy side dish as an entry to The Kerala Kitchen hosted by yours truly!
Related Posts Plugin for WordPress, Blogger...