Ria's Collection: Tea time snack
Showing posts with label Tea time snack. Show all posts

Wednesday, March 8, 2017

OROTTI

Orotti
Iam having the time of my life here in Kannur. I don't even remember the last time I planned a menu. Amma does all the cooking and I get to eat all the deliciousness made with love! Ian on the other hand is enjoying a lot more than me. He has some kind of a fascination towards lighthouses and since we have one very very close to our home, Appa takes him there everyday. You should really see that glow on his face when he comes back home after that!
Orotti
Zara kutty is 5 months old now and she is growing up very fast! She can crawl all over the place,in a caterpillar like fashion and can sit up too! She has been introduced to her first solid food and totally loves it! She even cries when I take the bowl away. I hope she grows up to be a foodie like Ian,then things will be awesome in that department.
Orotti
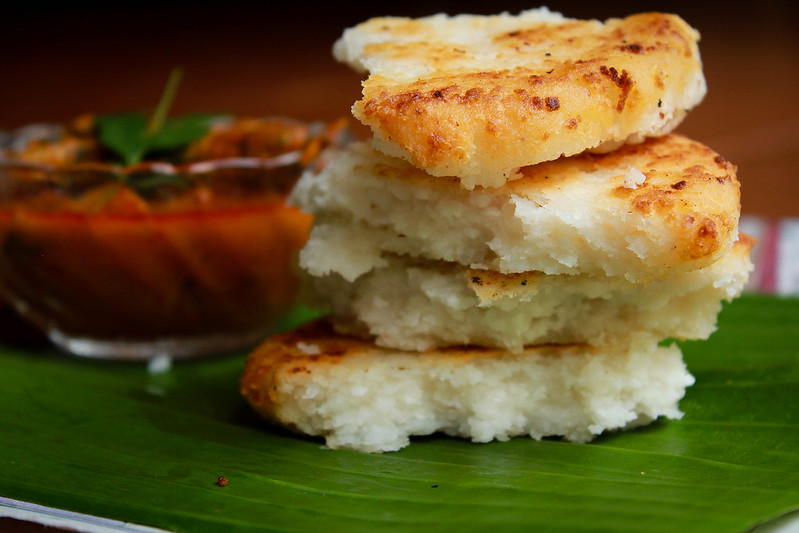
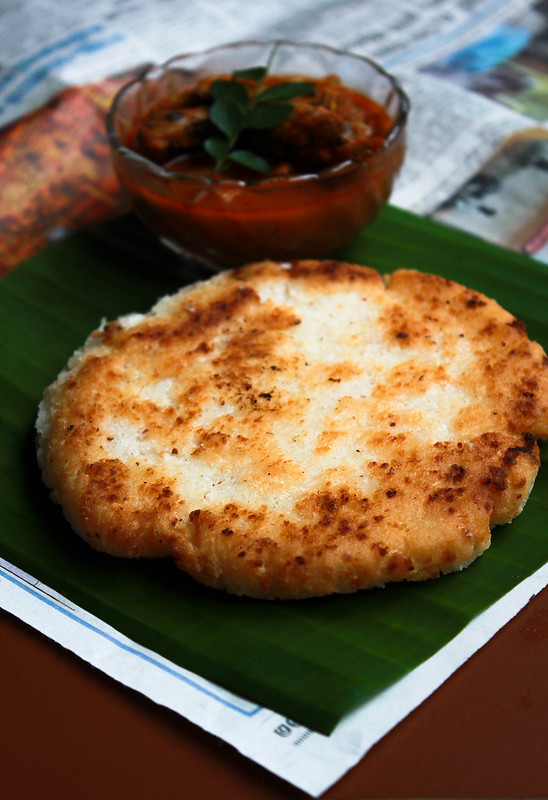
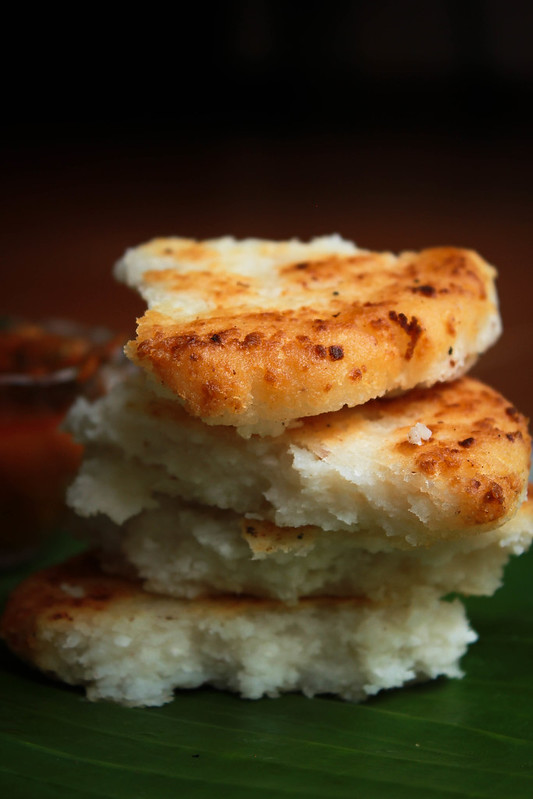
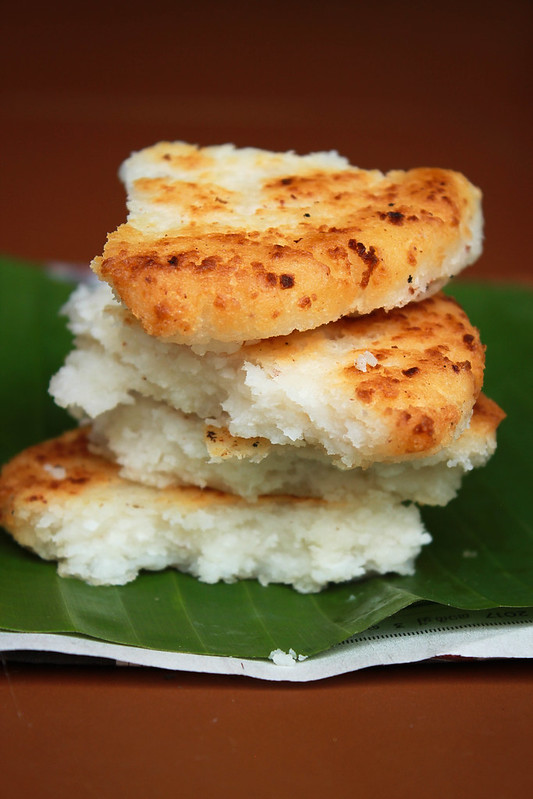
So yesterday when Amma made these totally scrumptious Orotti for breakfast, I immediately told her I need to tell you all about it. I am sure some of you must have eaten this at some point in your life. We make this 'palaharam' either for breakfast or for tea time and it's always cherished. The aroma while making Orotti's are simply awesome! So the Orotti's you've been seeing here were made by Amma. I just took some photographs of it. ;-)
OROTTI
Orotti Recipe source: Amma

Ingredients:
2 cups fine roasted rice flour (Appam/Idiyappam podi)
1 cup water
Salt to taste
1 cup grated coconut
Coconut oil

Method: In a heavy bottomed sauce pan, bring the water and salt to a boil. Reduce the heat to medium and add the roasted rice flour all at once and mix well.Take off the heat, add the coconut,cover the pan and let it sit till it's warm to the touch. Pinch off tennis ball sized dough balls and flatten it in your palms.
Heat some coconut oil in a flat bottomed pan, a tablespoon or two and put the flattened disc of dough over it. Pat it out a little bit more to make that dough disc to 1/4 to 1/2 inch thickness. Cook till the bottom side is golden. Before flipping it over, smear some coconut oil over the second side. Cook till the second side is golden. Take off the heat and transfer it to a hotbox till needed. Serve it with some honey/paani or some spicy curry.
All those who make it at home, do you call them the same? Do you make it the same way ? There are so many ways to make one dish, right? I am intrigued to know if it's the same with Orotti. Anyway, give this a try sometime and let me know what you think! I need to be honest, it feels good to come back here to share a recipe with you all! Thanks for sticking by! I haven't forgotten about sharing Zara's baptism photos, will do so very soon!

Wednesday, July 27, 2016

OLD FASHIONED KERALA DOUGHNUTS

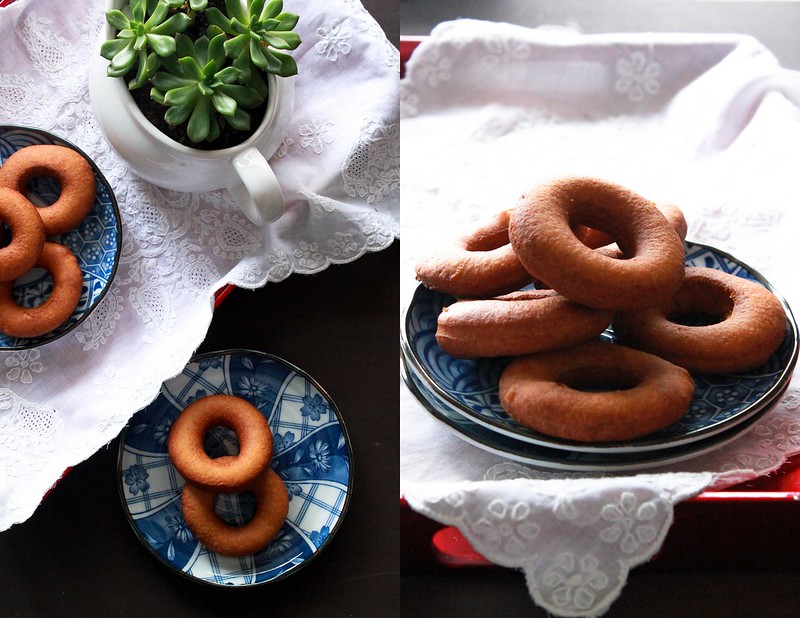
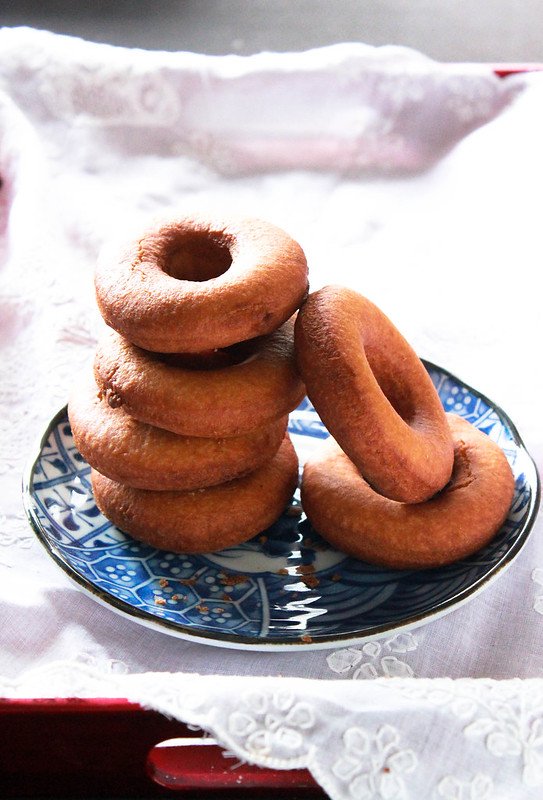
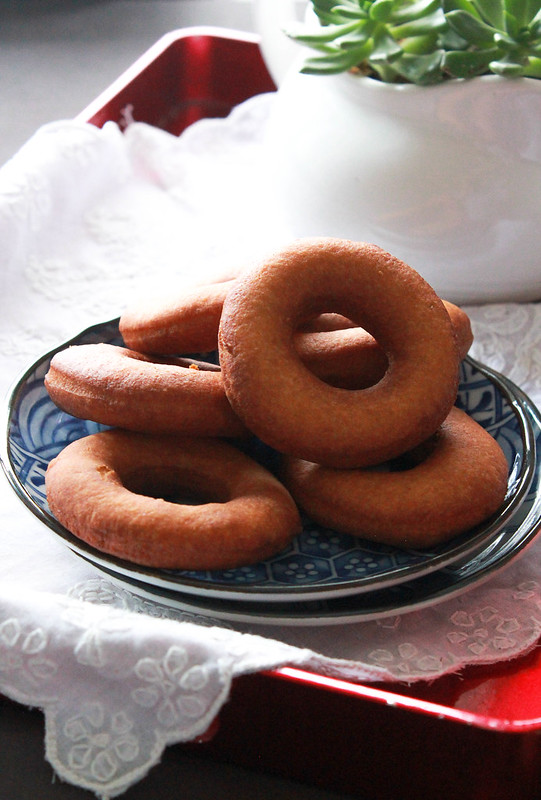
Old Fashioned Kerala Doughnuts
Honestly, I don't know how many of you can relate to these doughnuts.These doughnuts played a huge role in my childhood days. Thankachi aunty, my Mamma's sister-in law would make these and send it across to us whenever Mamma visited her. Later, Amma got the recipe from Thankachi aunty and would make it for me once in a while. I don't remember Amma making it much after Ritchie was born. I was 8 1/2 years old when my brother was born,so I pretty much remember everything that happened then. It was my first hands-on experience with babies. Gosh, I do have a lot to tell you all!
Old Fashioned Kerala Doughnuts
So, till Ritchie was born, Mamma's grandkids were all girls. Anju chechy, Tinu, Neethu and I. We would spend our vacations together in Mamma's terrace,grinding up her bougainvillea flowers and then diluting it with water,pretending it to be wine! Mamma was totally against anyone plucking flowers from her plants. That's because her Headmistress,a foreign lady, in her school Balikamadom (Tiruvalla) was very strict about it . She (The Headmistress) would pull out two strands of hair from the head of anyone who dared pluck the flowers from her garden. Then when her birthday came, she would let everyone pluck the flowers to their heart's content. That was the story Mamma would tell us,even though she never pulled out her granddaughter's hair. So finally,when Ritchie was born,she got her first Grandson!Anyway, that has nothing to do with these doughnuts, well almost.
Old Fashioned Kerala Doughnuts
So when Anju chechy got married and was living in Bangalore, we visited her once and Neethu made these and brought it for her sister. Everyone made fun of her saying it's the Home Science effect,because of the subject she took for her undergrad! I was so thrilled to see my favourite thing and still remember eating them early in the morning as soon as we got to Anju chechy's apartment. I don't know if Neethu remembers it but I do!
Old Fashioned Kerala Doughnuts
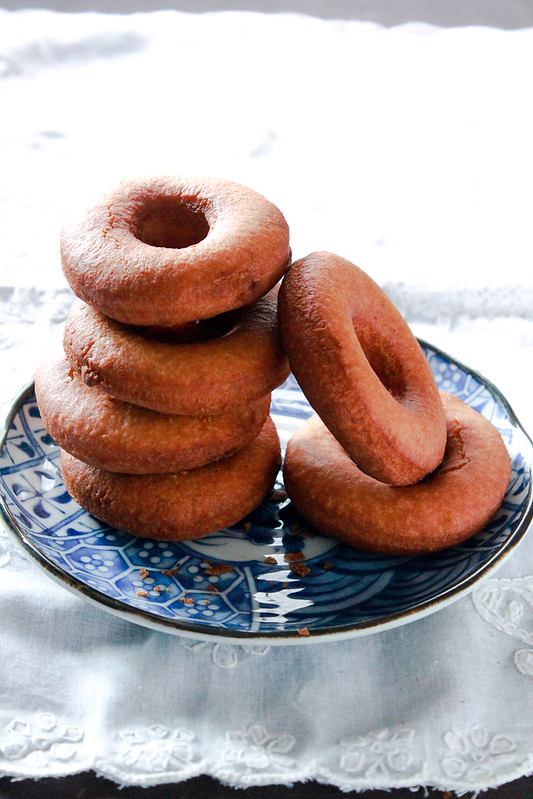
So, if you are thinking these are the typical melt-in your mouth doughnuts,you are wrong. These are more of the 'Vettu Cake' kind, soft yet a bit like a cookie. I must say that these are super addictive. I wanted to take the pictures of the doughnut holes but I popped them one by one into my mouth while frying the rest. And do you know why I made these today? It was raining here! It was so dark outside and it was thundering and raining at the same time. Even if there is no dinner at home, we always have some kind of a thing to snack on and usually,it is deep fried if it rained like how it did today!

OLD FASHIONED KERALA DOUGHNUTS
Old Fashioned Kerala Doughnuts Makes 26-28 pieces

Ingredients:
3 cups all purpose flour
1 teaspoon baking powder
1/4 teaspoon salt
1 cup powdered sugar
3 tablespoons ghee
3 eggs, separated
Oil for deep frying

Method:
In a bowl, mix together ghee and powdered sugar. Add the egg yolks and mix well. Add the flour,baking powder, salt,lightly beaten egg whites to it and mix to for a soft dough. Set it aside covered with a cloth for 10 mins.
Roll the dough out into 1/4 inch thickness on a floured surface and cut them out like doughnuts. Deep fry in hot oil over medium heat* until golden brown.Drain on paper towels and store in an airtight container. They have an amazing shelf life!

*Don't heat up the oil too much, the doughnuts will brown very fast since there's sugar in the dough.
Well, now this is not Thankachi aunty's recipe.I didn't want to wake Amma up in the middle of the night asking for the recipe. Instead, I checked my favourite source for recipes of these kind, Swapna chechy's blog because I was 100% sure she would have it and she did! Her recipes are foolproof and delicious!
 

Monday, August 18, 2014

GRILLED SPICY PANEER SANDWICH

SPICY GRILLED PANEER SANDWICH
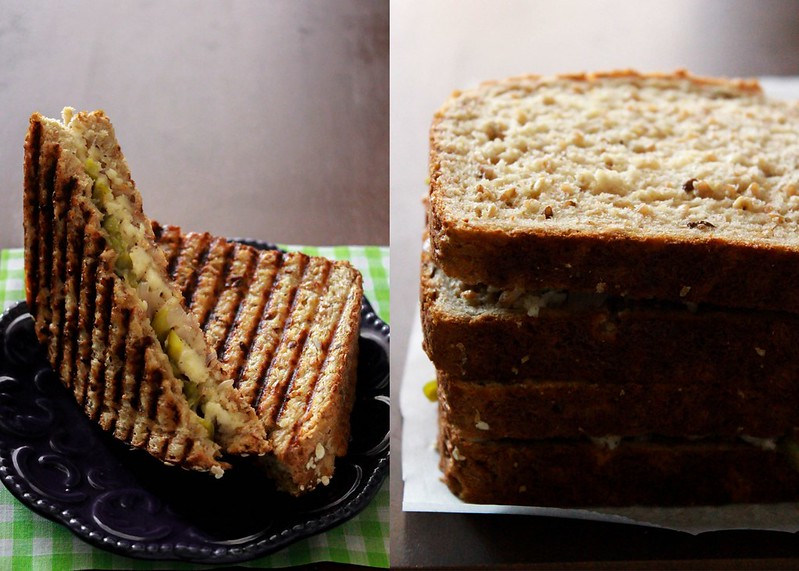
This sandwich is amazing! There, I said it. What's not to love about a grilled cheese sandwich? Comfort food at it's best,right? This recipe uses Paneer and that's another way I eat the mild Indian cheese.I have had this on my mind for so long because we used to eat a Paneer Cheese Sandwich from a joint opposite St. Joseph's College of Commerce, Bangalore.It was delicious. I used to pack that as my dinner for the overnight bus journey's to Kannur.
SPICY GRILLED PANEER SANDWICH

The crisp buttery bread which acts as the base for the sandwich filling plays a big role. So chose the bread you love the most. I used to be a white bread lover but now, I've developed a liking for multigrain breads and enjoy them as much I would enjoy a slice of white bread. Having said that, nothing beats the Kannur bakery breads! What are they made of? Clouds? It is super soft and  so yum!
SPICY GRILLED PANEER SANDWICH
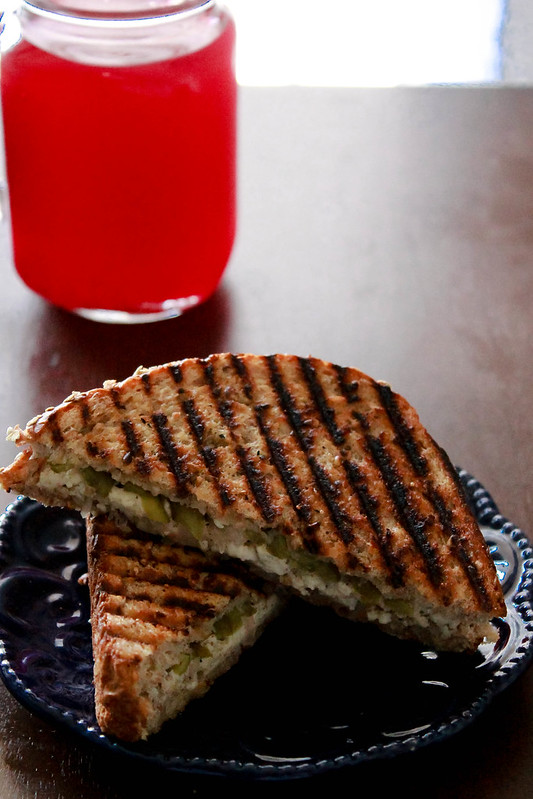
I've used an 8 grain bread here but you could use whatever kind you like. Just don't forget to forget the calories a few spoonfuls of butter can carry. You need some good buttered slices of bread to have them grilled to perfection.And then when you slice the sandwich into two triangles,it should make a crisp noise which eventually would make you drool! A big thanks to Monica for sharing this delicious recipe!
GRILLED SPICY PANEER SANDWICH
SPICY GRILLED PANEER SANDWICH Serves 4

Ingredients:
2 tablespoon oil
2 shallots, finely sliced
2 cloves of garlic, finely minced
1 serrano chili, sliced thin
1 1/2 cups grated paneer
Salt & pepper

8 slices of bread
1 medium sized green bell pepper,roasted and sliced thin
Plenty of butter

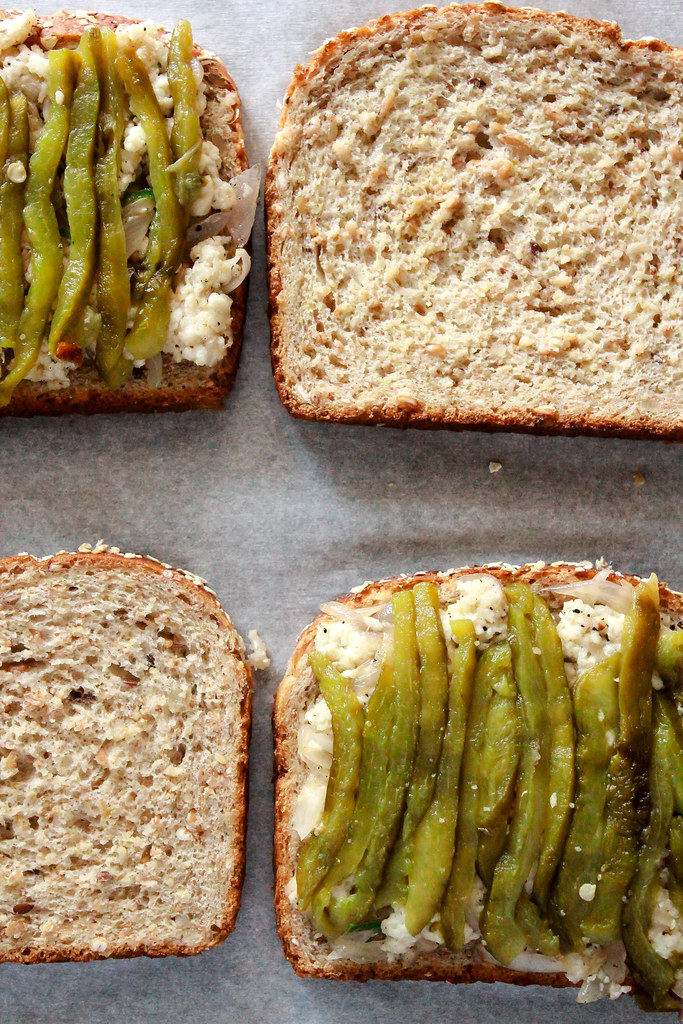
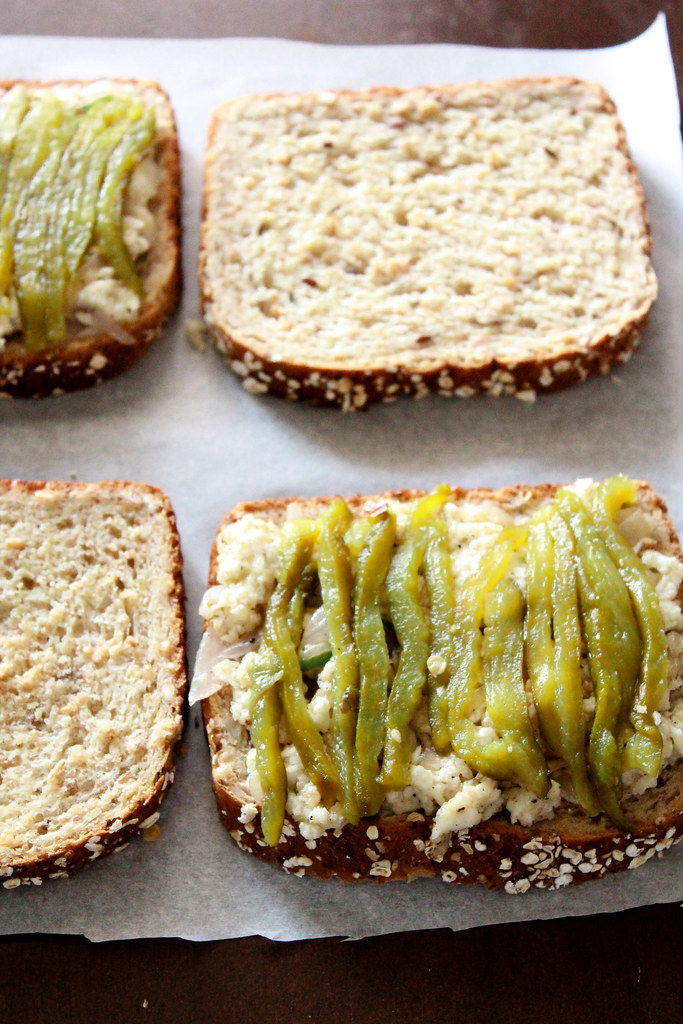
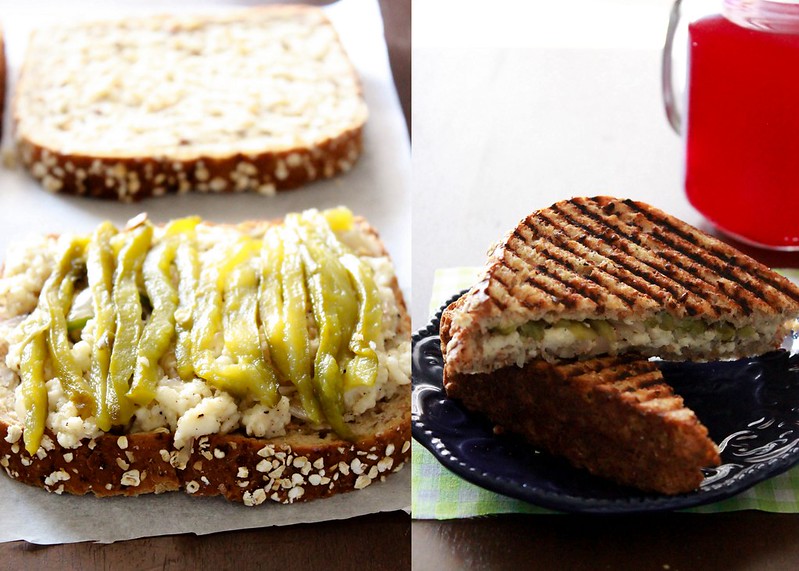
Method: Heat the oil in a medium sized saute pan on medium-high heat and once hot, add the sliced shallots,garlic and chili and saute for 2 minutes.Add this to the grated paneer and season with salt and pepper.  Take 4 slices of bread and divide the paneer mixture equally over it. Top each of them with strips of roasted bell pepper. Cover it with another slice of bread and apply some butter over it. Heat a grill pan on medium heat and place the sandwich buttered side down. Cook till they are golden nnd crisp with grill marks. Apply some butter on the slice of bread that's facing you and flip the sandwich over. Grill till golden on side two and repeat with the remaining sandwiches. Slice into two and enjoy it with some chilled Blueberry Lemonade.

I've lost the number of times I've this sandwich last week.The texture is so good that you wouldn't miss the meat !Since I am so choosy about Paneer dishes, I am so glad I went out of my comfort zone to taste it at that restaurant in Bangalore. This is an awesome sandwich! Like any grilled cheese sandwich,it tastes best straight off of the grill pan.
 

Monday, February 10, 2014

BAKERY STYLE CHICKEN ROLLS

Bakery Style Chicken Rolls
The earliest memories I have of these rolls are from Cochin Bakery, Kannur. It was many years ago when I was in school. That bakery was located in a corner on Fort Road and after a few years, they shut it down. By then, these rolls were everywhere. Somehow, I was never excited to try them after that. I think it was the size and colour that threw me off. They were huge and ugly brown. It was fried sometime early in the day and still lingered in those shelves till they were sold.

Bakery Style Chicken Rolls
I think Amma needs to be blamed for that! We were and still is spoilt with choices at home. Food is always served hot at home and there was a point when my brother wouldn't eat anything other than those right off of the stove! Imagine! He will not eat any snack that was stored in tins but only those which came out piping hot from the oil! He is so much better now, hostel life changes you in so many ways!
Bakery Style Chicken Rolls
I was scrolling through my cousin Priya Chechy's food photographs yesterday and saw these rolls .I don't know where I got the craving for them but it was very strong that I decided to take action right away. I always have poached chicken with me,either in the fridge or in the freezer. So making these were a breeze.Seriously,these are so much better when made at home.They taste so fresh and are unbelievably flavourful!

BAKERY STYLE CHICKEN ROLLS
Bakery Style Chicken Rolls
Ingredients:
Filling
3 cups of poached chicken, shredded
1 large shallot or 8 pearl onions, diced
3 green chilies,chopped
1 inch ginger, chopped
5 cloves garlic, chopped
1 teaspoon red chili powder
1 1/2 teaspoon coriander powder
1 teaspoon garam masala
5 curry leaves,chopped
1 teaspoon vinegar
Oil
Salt & pepper

Wrapper
2 cups all purpose flour
2 cups milk
1 egg
1 1/2 tablespoon sugar
Salt

Coating
3 egg whites,lightly beaten
Fresh breadcrumbs from 6 slices of bread

Method:
Filling: Heat oil and saute all the ingredients from shallots through curry leaves.Once the shallots have softened, add the chicken and mix well to coat. Add the vinegar and saute for 2-3 minutes. Turn off the heat and check for seasonings.Let it cool.
Wrapper: Mix all the ingredients together,reserve 1/4 cup of the batter and make sixteen 6 inch pancakes using the remaining batter.
Assembly: Divide the filling into 16 and place them over the 16 pancakes,a little lower than the centre of each pancake. Fold them like how you would with a spring roll and seal the edges with the reserved 1/4 cup batter.Dip each roll in egg white and roll them in breadcrumbs. Deep fry them in hot oil ,drain on paper towels and serve with ketchup!

I wasn't very sure if the filling would be Ian friendly but went ahead with it anyway. Ian was fast asleep when I made these rolls and by the time he woke up, I had fried a few for us to enjoy . He was overjoyed to see the deep fried goodies and happily munched on them!
 

Wednesday, January 16, 2013

UNNAKKAYI / PLANTAIN COTTON PODS

Unnakayi I am pretty sure most of you,Malayali's, would have seen this atleast once in their lifetime. Or am I wrong? If that's the case,you really have to try it. It really is delicious.Since I was brought up in the Malabar region of Kerala, this was a very common snack sent across by our Muslim friends and neigbours.It used to be the snack in my school friend's tiffin box.The later was slightly different from the ones I had tasted before,interms of the filling.

Unnakayi
'Unnakkayi ' literally means 'cotton pods'. Have you seen a cotton tree with cotton pods on it? Cotton is called as 'Unnam' therefore cotton pods gets translated into Unnathinte Kaaya / Unnakkayi.

Unnakayi This tea time snack (for us) is always filled with grated coconut,cashewnuts,raisins sauteed in pure ghee.Like how I've mentioned before,this snack has another filling which is made of scambled eggs. Oh! wait! Before you make that funny face,let me tell you ,it's really tasty. I have eaten it many times but we cannot think of making and stuffing that filling into our plantains,so we usually stick onto the coconut one.

Unnakayi When I say plantains here,I am talking about the 'Ethakka'/ 'Nenthrapazham' and not the Puttu-nte pazham. I used to call the 'Ethakka' as banana and the Puttu-nte pazham as plantains until we went to America. Then the light dawned upon me!

UNNAKKAYI /  PLANTAIN COTTON PODS
Unnakayi My own recipe

Ingredients:
2 half ripe plantains (Nentrapazham / Ethakka)
2 tablespoon granulated sugar or as needed
1/2 cup grated coconut
1 tablespoon cashew nuts,chopped
1 tablespoon golden raisins
2 teaspoon ghee
Coconut oil,for frying

Method: Cut the plantains into two,leaving the peel on and steam till cooked and fork tender.Grind them to a smooth paste without adding water.Keep it aside.
In a small pan, melt ghee and fry the nuts to golden.Add the raisins and wait till it has plumped up.Add the coconut and sugar and cook till the sugar melts.Keep aside.
Divide the plantain dough into golf ball sized balls. Smear some oil in your palms and take one such plantain ball. Fatten it and fill it with some coconut mixture.Carefully seal it by pressing the plantain mixture together.Shape them as you saw above.Repeat.
Deep fry in coconut oil. Drain excess oil and serve.


This is best served on a rainy day,like all deep fried goodies! :-)
FYI, I'm a lot more active on my Facebook page these days,where I update our day to day stuffs along with Vaava's photographs.It's much easier than blogging,no cooking involved! :-D So join the bandwagon,if you feel like it!
Happy New Year,everyone!

Friday, April 27, 2012

AMMACHI'S ACHAPPAM

Achappam

If only you could see me now! I cannot tell you how happy I am to have made this traditional snack at home. I am very excited because I've heard a lot of people saying that it's a palaharam/ traditional snack which is hard to find success in it's first attempt. I must say, I proved them all wrong. This was my very first attempt and I haven't stood next to anyone trying to learn it. All I had was my Grandmother's 'achu' / brass mould + self confidence + an age old recipe.

Achappam

I vaguely remember Mamma frying the Achappams in her big old kitchen but I very very clearly remember eating them.The clearest of them all was when Mamma bought a huge tin full of her special Achappams to our house. That evening Babitha, my childhood friend came over to play and Amma gave her some Achappam to eat. She always had a big appetite (I hope she doesn't have the time to read this !) and would eat them very soon. Then, she would ask for more! I was a single child for 8.5 years so I didn't like the idea of sharing , a lot. I did share a share of those Achappams but when she asked for more, I clearly remember being disturbed :-)Anyway, the Achappams are long gone now but we are still thick pals.

Achappam

Unfortunaltely none of us got hold of Mamma's recipe instead Amma has her twin sister, Daisy's mother-in-laws recipe.All of us fondly call her 'Ammachi'...to be specific...Kothamangalathile Ammachi. I remember eating Ammachi's achappams during our 1000 stop overs and sleep overs in Daisy Mummy's house. It used to be very thin, crisp, tender and yummy! I could easily eat a truck load of those because my stomach could never get filled with this light weight palaharam.

Achappam

One evening, without any specific reasons, I felt like eating Achappams. So I went ahead and soaked my Mamma's acchu in oil, overnight.The next morning, I dialed Amma and got hold of that precious family recipe for this awesome palaharam. I am so glad I tried these because I can now proudly say, I can make Ammachi's Achappams at home! :-)

AchappamAMMACHI'S ACHAPPAM
Recipe source: Kothamagalathile Ammachi
Makes 100 achappams

Ingredients
4 c fresh rice flour*
1 c maida/flour
2 c coconut milk, medium thick
6 eggs, beaten
2 tsp black sesame seeds/cumin seeds
Salt to taste
Powdered sugar for dusting
Oil for deep frying

Method: In a large bowl, mix rice flour, maida & coconut milk together. It will be quite thick like Idli batter. Leave it aside for 2 hours. After 2 hours, add beaten eggs , seeds & salt. Mix well.Keep aside.

Heat about 4-5 inches of oil in a sauce pan on medium-high and while doing so, immerse the mould into it. Let it heat up along with the oil. To check if the oil is heated enough, add a drop of the batter into it and if it sizzle up right away, it's ready. Take the mould out of the hot oil and dip just 3/4 th of it into the batter, lift it up and then dip it into the oil. Hold it for a count of 5 and the shake the mould gently to release the achappam. If you are finding it a little difficult, use a skewer/thin knife to help it release. It will go smooth from the second one onwards. Fry till golden. You may or maynot have to adjust the heat depending on the colour of your fried goodies.

Drain on paper towels and when cooled, dust with powdered sugar.Munch away!

* I used Sona Masoori rice. I soaked 3c of rice in tap water for 1 hour,rinsed, spread it over a paper towel and let it dry for 45 mins. Then I powdered it very very fine in my mixie and it was sieved once before using. DO NOT use store bought roasted rice flour.
* A lot of recipes use sugar in the batter but we don't since we don't like the Achappams to turn dark.

Achu

Believe in yourself, be it in the kicthen or anywhere and you are bound to find success. That's all I did when I tried this out. When I was measuring and getting the things ready for it, I felt there was someone looking over my shoulders to make sure I was doing it right. I bet it was Mamma, my paternal grandmother. She was an interesting character,who lived to eat and cooked the most amazing Chinese food! Appan still complaints that Amma's fried rice is no where close to Mamma's even though Amma learnt it from her :-)

So go ahead and oil your Achappam mould right away and make these for your family or for yourself and enjoy!

Wednesday, March 7, 2012

LONDON CAKE / PEANUT BRITTLE / CHIKKI / KADALA MUTTAI

Chikki/London Cake

Ihave a problem. A serious problem.If I see a photograph of something that I really like, I have to make it then and there...no matter what time it is :) What would happen otherwise? I would dream about it and wake up hungry, it's that simple :-) Have you all faced such stuff? I do, most of the time...therefore inorder to get a good night's sleep, I have to cook and eat it!

London Cake/ Chikki

This peanut chikki was one among them.This is such a favourite for all of us, in my family. Appan is super happy if he has a bar of it. I was,is and will always be happy if I have 2 bars of it. Ritchie is not as greedy as I am, so he is happy if he has a bar of it :-) Amma likes it too maybe not as crazy as we 3 are. Appan,his brother and my uncle Tom and my grandmother calls it a  London Cake ,don't ask me why? :-)

Peanut Candy/Chikki

This peanut chikki was one of the items we had to make in our college lab for the candy making class. In our labs, we are not allowed to use a candy thermometer so after many burnt fingers, we all got different stages of  melting the sugar right.Whenever I came home on weekends from the hostel, I used to take 'Manna'(my fave brand) slabs (read many) back with me. The last time when I went home and shopped at the supermarket, those Manna slabs were staring at me and I did pick up a few. How can I leave them behind when they were my everything during the hostel days??

Peanut ChikkiLONDON CAKE / PEANUT BRITTLE / CHIKKI / KADALA MUTTAI
Recipe source: Nithi & Sharmi

Ingredients:
1 c roasted skinless peanuts
3/4 c white sugar

Method: Crush the peanuts coarsely,using a mixie. Make a dry caramel (Melt sugar without water in a pan, till it dissolves completely. It will turn dark brown in colour).* Switch off the heat and add the crushed peanuts and mix well, quickly. Immediately,pour this over a greased plate/parchment paper,roll it into 1/4" thickness using a greased rolling pin and mark into desired shapes with a greased knife. Let it cool completely. Break into pieces.

* Timing is crucial in this recipe, so as soon as the last crystal/lump of sugar melts add the peanuts.Roll it out as soon as it is poured and mark into desired shapes.

After seeing a photograph of it on Facebook, I told Jobin that I wanted to eat Kadala Muttai. It was around 9 pm then and I was sure that I didn't want to ask him to take me to the store as the Indian stores would be closed by then :-) It's not just that, the peanut chikki, irrespective of the brand that I have tried here has always been soft,chewy and tasteless. I like them to be crisp, crunchy and brittle...they way they are meant to be.

Therefore without a second thought, I went straight into the kitchen and made it. It hardly took me 10 mins.The dinner was finished in seconds as I had my little quick dessert waiting for me :-)

Tuesday, January 10, 2012

PARIPPU VADA / SPLIT PIGEON PEA CROQUETTES...it's time to snack!

Parippu Vada

Back while I was working, every evening we would have some snack sponsored by someone in our office. I used to wait for that time of the day because it always used to be something hot like a Pazhampori/ Ethakkappam/Banana Fritters,Potato Bondas or Parippu Vadas. Babu Chetan was the one who brought us these snacks and Shyja Chechy would bring in the tea. Ah! Those were the days! :-)
Parippu Vada

A few days ago, I was thinking about those tiny parippu vadas I used to have at work. Babu Chetan bought it from a tea stall which is very popular for their parippu vadas. They were really small but very crisp and tasty. There's a widespread talk among people that parippu vada is shaped in armpits! I am sure people were kidding when they told me that but while I was shaping the vadas today, I was smiling over that. Whatever! I shaped them in my palm and made sure they don't look alike as I wanted them to look rustic !
Parippu VadaPARIPPU VADA
My own recipe

Ingredients:
2 c Toor dal, washed and soaked for 2 hours
4 green chilies, chopped fine
5-6 pearl onions/shallots, chopped fine
1 sprig of curry leaves, torn up
Salt to taste
Oil for deep frying

Method: Drain the dal completely.Keep aside 1/2 cup of the soaked dal and grind the remaining soaked dal to a coarse paste without adding any water.Add the remaining ingredients and form small patties. Deep fry in hot oil.


It was crisp on the outside and soft inside, a perfect accompaniment for your chai! If you'd like, have a baby banana too, along with these...that's the way a lot of people prefer to eat.

Sunday, October 9, 2011

MIXED FRUIT SWISS ROLL...for 3 years of Blogging!

Mixed Fruit Swiss Roll

Please don't go away reading the title,pretty please!I promise you ,there will not be any speeches given on this special day. Even then, I do have to say that I'm very happy about it and I owe a big thanks to you , dear readers! I haven't been participating in any group baking that I used to for the last 2 months,  I promise you, I shall return to it very soon! :-)
Mixed Fruit Swiss Roll

Jam rolls/ Swiss rolls has been something which my aunts used to bake. We never rolled anything  sweet at home except for these yummilicious Coffee Cream Wheel .This was the time when I never quite liked anything with jam in it, so I stayed away from any such rolls. Later, when my taste buds developed I had a liking towards all these jammy treats especially My Favourite Jam Tarts  , Jam Filled Cookies and also Bakewell Tart .
Mixed Fruit Jam Roll

When I think of it , all the veggies that I disliked when young is my favourite, now! Bittergourd was something I disliked terribly and I love it with all my heart,now! Have you observed such stuff about yourselves? I bet there are plenty for you to tell me! :-)

IMG_4610
MIXED FRUIT SWISS ROLL
Ingredients:
3 eggs
1/2 c sugar
1 tsp vanilla
1/2 c -1 tbsp flour
1 tbsp cornflour
5 tbsp mixed fruit jam, stirred well

Method:
Pre-heat the oven to 180C and line a 9x13 inch/ swiss roll tin.

In a large bowl, beat together the eggs & sugar for 12 mins, non stop.Add the vanilla and beat for another 1 minute.Add the dry ingredients and fold it in.Pour into a prepared tin and bake for 10-15 mins or until the top is golden and is springy to touch.Pull it out of the oven and unmould it onto a tea towel sprinkled with sugar.Roll it away from you, along with the towel. Hold it there for 10-15 second.Open the roll and let it cool completely.Spread the jam and roll once again.
Slice and serve!


Verdict: I have lost the number of times I have used this basic sponge recipe given to me by Amma. It's so versatile.You can roll it, layer it,mould it or better still, eat it plain! This roll was very very soft and we really liked it!

Wednesday, August 17, 2011

COFFEE CREAM WHEEL

Coffee Cream Wheel
We are on a roll these days.Rolling from one part of the country to another.It's just the beginning of our journey. When we booked the tickets, Amma & I insisted that we go in a train so that we get to rest atleast for that many hours!To be at home, is the best thing to ever happen to many of us and that's even more awesome if you can lose some weight, even though you are gorging on endless yummy Amma-made food!

IMG_3136
This recipe is sensational. It is such an easy one and something you just cannot go wrong with! Did it seem that easy to you? If you just look at it, you wouldn't think so but when you actually make it, you would wonder how something so simple to make can turn out to be so tasty! Amma got this recipe from Amma's twin sister, Daisy.
IMG_3140
Yes,my Amma,Susy, has a twin.They are identical twins, in almost everything.Sharing recipes is one of their favourite hobbies which is also passed down to me.I recently started writing another diary with just homemade recipes...mostly passed down from my aunt's and cousins. I hope to fill it by the time this vacation of mine, is over.
IMG_3146
I have been itching to put this recipe here for a long time while I was in Minneapolis but it never happened. Today, finally it is here for you all. This is an excellent make-ahead snack/dessert and it freezes very very well! The only thing that you need to remember here is that, you have to refrigerate it. Don't leave it outside for too long or else the filling will become soft yet the taste won't be compromised :-)
IMG_3130
You can make these really small, like a candy or big like a summer sausage. It's totally upto you as to how big or small you want these to be. Whatever size it maybe, make sure you wrap it well so that once you store it in the fridge, it doesn't get any 'fridge' taste. I always feel if desserts are not covered when left in the fridge,it get's a fridge taste and I don't like it. So whatever you keep in the fridge, cover it well. You don't want all the flavours to be mixed up or do you? ;-)
IMG_3137
So are you all ready to make this easy peasy snack/dessert with some biscuits, butter and sugar? Say YES! please! :-)

IMG_3126COFFEE CREAM WHEEL
Recipe source: Amma via Daisy Mummy

Ingredients:
250 g Marie biscuits/ Graham crackers, powdered superfine
150 Sugar, powdered fine
1/2 c Warm water plus 1 or 2 (if needed)
1 tbsp Instant coffee granules
100g Salted butter,softened
1/4 tsp Vanilla extract

Method:
In a large bowl, dump in the powdered biscuits.Dissolve the coffee powder in warm water and add it to the biscuits and knead to form a smooth dough. It should not be too dry nor too wet. You should be able to kind of knead it. It will be smooth and soft, almost like a Chapathi dough.Divide it into 4.
Cream the butter and sugar. Add vanilla and beat to mix. Reserve.
Take a rectangular sheet of foil and roll out one ball of dough. It should be about 1/4" thick,as seen in the photographs above.
Spread some buttercream over it making sure it's spread all over. It need not be very thick,just a good coating would do.
Now, start rolling from the shorter side. You should roll it away from you, with out the foil. Take the help of the foil to lift the dough and to aid in rolling.
The dough will crack at the first roll but it's OK, it won't be seen in the end. Keep rolling and  it will come off the foil easily.
With the seam side down, wrap the assembly in the same foil and secure the ends tight. Refrigerate till firm.
Cut into thin circles with a serrated knife, carefully with the seam side down.
Enjoy!!

Verdict: Dee-li-cious! If you like, you can serve it with an ice cream of your choice. This is something I've grown up eating and it's still one of my favourites!
Related Posts Plugin for WordPress, Blogger...